# Welcome
This page provides an overview of your system and how it can be used in your organisation.
This documentation specifically covers Version 5, released in 2025 (refer to [Releases](/security-and-support/releases) for a full version history). This version includes a number of key new security features including Multi-Factor Authentication and Single Sign On and performance improvements including a faster, more powerful user interface.
# Quick Start Guide
This page helps you jump in and get started by giving you a summary of the basic steps required before performing any action.
If you're in a hurry, have your access details ready and need to work with the system straight away, here are the basic steps:
1. Sign In:
1. [On a phone or tablet](/concepts-and-fundamentals/mobile-app)
2. [On a computer](/concepts-and-fundamentals/on-a-computer)
2. [Select your Site](/concepts-and-fundamentals/on-a-computer/navigation#welcome-screen) (skip this step if your organisation only has one site)
3. [Join an Event](/concepts-and-fundamentals/on-a-computer/working-with-events#joining-events) by updating your duties under Events or your User Profile
4. Open the [Register](/concepts-and-fundamentals/on-a-computer/using-the-datagrid) you need to work with
5. [View](/concepts-and-fundamentals/on-a-computer/using-the-datagrid/viewing-items), [Edit](/concepts-and-fundamentals/on-a-computer/using-the-datagrid/editing-items), [Add](/concepts-and-fundamentals/on-a-computer/using-the-datagrid/adding-items) or manage Items as needed (consult the [module/register](/modules/overview) guide for details including operation and settings)
If you need to work offline on the Mobile app refer to: [Working Offline](/concepts-and-fundamentals/mobile-app/working-offline).
# Terminology
This page describes some of the key terms and concepts you may come across.
The system supports a highly flexible and modular configuration while maintaining a consistent and user-friendly approach to data management.
It features a unified, end-to-end workflow that provides effective management of data throughout its entire lifecycle.
By learning some system basics, you will quickly gain the confidence to navigate and perform tasks in any module.
If you're familiar with some of these terms you can skip straight to a guide on using it on your preferred device.
## Events, Users, Positions and Duty
At the core of the system are **Events**. They provide a secure way to organise work around themes, topics and incidents. Create an event whenever a planned or unplanned activity needs the system. Events define required functions. They determine which positions and resources you use. They also control which **Users** can access the event through the user competency system.
**Users** are individuals who can log in to the system.
**Positions** define a user's permissions and determine what they can access.
To participate in an Event, a user must:
* Be assigned a **Position** within that event
* Go **On Duty** with that Position
The system allows users to be on or off-duty for multiple positions across multiple events simultaneously.
Being **On Duty** makes the user available to accept task assignments and receive notifications.
### Registers
Each event includes a set of **Registers**. Registers are structured databases that store specific information types. The system calls each record an **Item** and lists these on a **Datagrid**. Registers have defined structure and workflow rules and available **Positions**, **Assets** and **Resources**.
To manage register items, users must **go on duty** with a **Position** that has access to that register.
### Assets and Resources
**Assets** are typically locations or properties related to the Event. These can be homes, businesses, community facilities or even transport stops and services.
Assets refers to the built-in geospatial database (also known as cadastral data) used to search for things by name and location. The Assets system can even include things that are non in fixed positions and allows additional information to be added (such as owner information). This supports a diverse range of items from roads to private land parcels, bridges, parks, civic buildings to public transit stations and even individual vehicles.
As some Asset data is sensitive, management of it by users is limited and secured.
The Assets system is typically set up when your system is configured [along with mapping](/concepts-and-fundamentals/on-a-computer/mapping-and-assets) using available data for your local area. It may even be synchronised to your device for [access offline](/concepts-and-fundamentals/mobile-app/working-offline).
## Modules
**Modules** group registers, positions and resources. They appear in the main navigation menus.
Core modules include:
* **Dashboard**
* **Reports**
* **System Administration**
Other modules are configured for specific tasks.
The modules users have access to depends on the events they join, their positions and duties they sign in with.
While modules are typically configured when your system is set up, access to registers and functions within events is configured by your system administrator.
### Workflow and Communications
Depending on the configuration of each module, registers are used in combination to perform various actions. Items may be **assigned** to users and positions, and can utilise resources and relate to assets.
Additionally, registers implement **workflows** using combinations of **status**, **priority**, **assignment**, **counters**, **escalations**, **notifications** and **communications**, which help users and teams to effectively manage an event.
At every step of the way each change is audited, and data within each register item must conform to its workflow rules and schema constraints, meaning nothing is lost or forgotten.
Administrators can import data, including data from other systems for management in bulk. Data sharing is automated via the Application Programming Interface (API).
Built-in reports provide analysis, summarisation and data sharing with others.
### Sites and Regions
Your organisation may have multiple instances of the system called **Sites**. These Sites usually share the same modules, registers and functionality but with a separate sets of events.
{% hint style="info" %}
Sites are created set by Datalink, not your administrator. To add sites to your system, contact the [Service Desk](/security-and-support/maintenance-and-support/accessing-support).
{% endhint %}
There are a couple of advanced configurations where information is shared across a single Site or multiple sites:
* **Multi-Site** - a deployment which features multiple Sites used simultaneously that users with sufficient privileges can navigate between. This is sometimes set up before the launch of the main Site during testing and training. Rarely it is used in enterprise deployments where there are multiple separate departments or organisations using the same configuration but independently of each other.
# On a Phone or Tablet
The mobile app works with modern Apple iOS and Android devices, both phone and tablet, for use in the field.
## Overview
The mobile app has many features designed specifically for mobile to make it easier for users in the field.
### Benefits
The web app has many benefits including a mobile-first design which means that it works as well with screens of different sizes. Small screens feature a single column layout, larger screens show additional information as the app makes use of the increased space.
Much of the functionality is unified with the [web app](/concepts-and-fundamentals/on-a-computer) which means that you don't need to use the mobile app to access the majority of the system functionality. This also means that the mobile app is generally [released and versioned](/security-and-support/releases) similarly.
However for the following reasons it is highly recommended to use the app in the field:
1. familiar functionality to the web version, but optimised for ease of use
2. designed for devices of different sizes with support for multi-touch controls
3. some features optimised for mobile use such as offline functionality, multimedia an location tracking
4. platform version may support device native features
5. your organisation's configuration may include integrations with other apps or services
{% hint style="info" %}
For power use, such as coordination, administration and reporting it is recommended to use the web interface [on a computer](/concepts-and-fundamentals/on-a-computer) instead. The web app has more functionality in areas such as System Administration, filtering and querying that can be useful to administrators, coordinators and power users.
{% endhint %}
### Features
The app includes many features to make working in the field easier:
* Simplified interface for easy use
* Easy touch and multi-touch controls
* Use of the device's camera and gallery to capture video
* Access to the device's location for real-time tracking and routes
* Watermarking photos for evidence with date and location. To enable photo watermarks, your system must be configured for this a per register basis. [Contact the Service Desk](/security-and-support/maintenance-and-support/accessing-support) to enable this feature.
* [Offline](/concepts-and-fundamentals/mobile-app/working-offline) functionality, including downloading asset database, forcing offline mode and saving items for offline use. Offline functionality greatly assists inspections in areas with poor or no mobile data coverage.
{% hint style="info" %}
It is recommended that mobile users, particularly those that require System Administration access, are familiar with both the web app and mobile app as they share similar features and terminology.
{% endhint %}
### Setup and Configuration
No special positions are required for the mobile app, however custom functionality is based on the modules and registers enabled for your organisation.
Your organisation may also have a tailored version of the app supporting functions such as Mobile Device Management (MDM) and Single Sign On (SSO) - check with your System Administrator. In such cases, you device may be pre-installed with the app or it may need to be activated by an administrator.
# Getting Access
{% content-ref url="/pages/eizTeBBHmqu1nd6i0Cpl" %}
[Browser and device support](/security-and-support/maintenance-and-support/browser-and-device-support)
{% endcontent-ref %}
### App Permissions
Permissions are required including Location (this is also requested within the app), Personal information (for your login), Audio, Camera and Video.
These should be set on installation and a connect request will be made upon initiating the app.
However they may be changed at some stage so it is advisable to check them if you run into any issues later.
### Launching the App
To launch the app, simply locate the app on your device's operating system (an icon in the applications menu).
The background colour of the app indicates the type of Site. Your app background should be blue if it is the live (production) site. It may be another colour, for example if it is a training (green) or testing site (orange). Note that your sign in credentials may also differ based on the site you are using.
### Signing in
Signing in is the same as [on a computer](/concepts-and-fundamentals/on-a-computer/getting-access#signing-in) with a few exceptions. The process is generally simpler. For example no Site URL is required the app is pre-configured to connect to the server.
There are two main methods of signing in which will depend on how your site is configured:
1. [Email and Password (with Multi-Factor Authentication)](#signing-in-with-email-and-password)
2. [Single Sign-On (SSO)](#signing-in-using-single-sign-on-sso)
#### Signing in with Email and Password
To sign in using the mobile app (iOS or Android):
1. Launch the app on your device
2. On the opening page, tap the **Sign in** button
3. On the Sign In page, enter:
1. Email Address
2. Password
4. Tap the **Sign In** button
#### Recovering your password
If you are a new user or have lost or forgotten your password, follow these steps to reset:
1. Use the **Reset Password** link underneath the **Sign In** heading.\

2. Enter your **email address** and use the **Send Code** button.
3. Without closing your browser, check your email for a reset code.
4. Set a new password (you'll need to enter it again to confirm).
Passwords must include:
* At least 8 characters
* Upper and lower case letters
* At least one special character (@\*!\&#$%^<>.\_-\[]{}()=\~+?,;:"'/|)
* At least one number
5. Enter your **Reset Code** and use **Submit**
6. Once your password has been updated successfully you will see a confirmation message. Use the **Back to Sign In** link and login with your email and new password.
#### Important notes
* The email sent by the system contains a reset code, not a password.
* If you don't receive an email, you may not have an account on the system that uses that email address.
#### Signing In with Multi Factor Authentication
Multi-factor authentication (MFA) helps secure your account to prevent it being compromised or hacked. MFA adds an extra, highly secure, step to logging in addition to the username and password.
{% hint style="warning" %}
MFA is now mandatory for all those users not using SSO.
{% endhint %}
If you have enabled Multi Factor Authentication (MFA) (recommended) additional authentication steps are required before signing in.
There are currently two main options for MFA:
1. Authentication App that supports one-time password (OTP) codes (recommended), and;
2. SMS based authentication
#### Authentication Code (via Authenticator App)
If your MFA method is Authentication Code, you'll see a prompt to enter a one-time authentication code. This will depend on the Authentication method you're using, for example Google Authenticator.
1. Using your Authenticator app, find the code
2. Enter or paste the code into the field on screen
3. Use the **Confirm** button
#### SMS Authentication
If your MFA method is SMS you'll get a screen notifying you that a code has been sent to your phone and get a prompt to enter a one-time code.
1. Check your phone for an SMS
2. Enter or paste the code from the SMS into the field on this screen
3. Use the **Confirm** button
#### Signing In with Single sign-on (SSO)
If Single sign-on (SSO) is configured for your site, this will be the default login option (otherwise users will sign in using their email address and password).
After using the **Sign In** button, a second page will appear prompting you to sign in with your corporate ID.
Follow your organisations authentication process to complete the login.
{% hint style="info" %}
Please refer to the Single Sign On instructions from your organisation for account onboarding.
{% endhint %}
{% hint style="info" %}
If your organisation has implemented Single Sign-On (SSO) you will need to ask your System Administrator for access.
{% endhint %}
### Configuring your device on first use
The first time you sign in, you'll be required to:
1. Connect your device's location service
2. [Select an Event](/concepts-and-fundamentals/mobile-app/working-within-events#selecting-a-primary-event) to work with
3. Set up Multi-Factor Authentication
#### Connecting your device's location service
The first time you use the app you will be required to connect to your device's location service. This will initiate your settings for your device's native location service.
All you need to do to proceed is to use the Connect button.
#### Setting up Multi-Factor Authentication
Refer to Manage Your Account
# Navigation
This section outlines use of the mobile app.
## Overview
A key difference between the mobile app and on a computer is the user interface and navigation.
The mobile app is designed to be used on smaller screens.
On smartphones, there is a single column layout.
On tablets, there is a two column layout.
The system is also colour coded depending on which [Site](/concepts-and-fundamentals/concepts-and-fundamentals#sites-and-regions-1) you are using (Production, testing etc.).
To access the Main Menu, you must use the Hamburger menu  commonly used in apps. You can return to this menu at any time using this icon.
## Main Menu
Main Menu
### Current Event
To access Registers and [use the datagrid](/concepts-and-fundamentals/mobile-app/using-the-datagrid), you'll need to first visit the Dashboard under the Current Event.
### On Duty Events
This menu allows easy switching between Events by selecting the Event you want to use from the menu.
### Duty
Use Event and duty management to access the [Events Selection screen](/concepts-and-fundamentals/mobile-app/working-within-events#events-selection-screen).
### Settings
Use this menu to access User Preferences or Diagnostics.
### Account
Use this menu to [Manage Your Account](/concepts-and-fundamentals/mobile-app/manage-your-account) or [Sign Out](/concepts-and-fundamentals/mobile-app/signing-out).
# Working within Events
This page describes how to manage and use events.
## Overview
Events in the mobile app work similarly to [on a computer](/concepts-and-fundamentals/on-a-computer/working-with-events) with some exceptions.
Mobile users:
* are required to go on duty to at least one primary event before using it
* who wish to go on duty to multiple events must do so one event at a time
* who are System Administrators and manage events have limited tools for this in the mobile app.
{% hint style="info" %}
It is best practice in the mobile app to only go on duty to the Events with the Positions that you need. Having too many duties may cause confusion and have unintended effects.
{% endhint %}
{% hint style="info" %}
Some mobile app users can Create an Event, however may not be able to view or manage them like they could on a computer.
{% endhint %}
## Selecting an Event
In order to use the app, you'll need to select an event. To do this, use the Go to Event Selection button.
Go to Event Selection button
Each section section shows the total number of Events found and list duties in an expandable section. By default these are collapsed and will give you a total positions that you're on duty for or that are available.
A:
* green message means on duty, total positions you're on duty for are displayed
* red message means off duty, total positions that are available to you are displayed
Your current duties can be expanded using the right arrow
To expand the section and change these Position(s) use the right arrow .
To collapse them with the down arrow . Unticking them all individually or the All Positions box will put you off duty, which will change the message to red.
#### Joined Events
If you've already gone on duty to some events this section tells you exactly which and when along with any Position(s) that currently apply.
#### Active Events
The Active Events screen is whereevents that your account's Position has access can be found (this is controlled by your administrator refer to: [Managing Events](/system-administration/managing-events)).
To find an Event, start typing its name into the **Search events** box. If you don't know the Event's name, ask your System Administrator or Coordinator.
Event selection with primary event indicated next to the hamburger menu
If you're finding the Event you need to work with isn't there, try the Refresh Events button at the bottom of the screen or contact your administrator.
### Primary Event
The primary event is the one you have selected, determines where records will be added, is displayed at all times on the top left next to the hamburger menu.
### Selecting a new Primary Event (Switching between Events)
To select an Event as a Primary Event:
1. Go to the [Events Selection Screen](#events-menu)
2. Next to the Event you wish to make primary, use the Select button
## Joining Events
1. Navigate to the [Events Selection screen](#events-menu)
2. In Joined Events:
1. To select individual duties - Expand, tick the Position(s) that you want to go on duty with (tick 'All Positions' to tick all). Use the Update Duties button at the bottom of the screen OR
2. To select all duties use the Join button. There is no need to update duties when using the Join button as the system does this for you.
## Leaving Events
There are two main ways to leave an Event:
* Leaving Events Individually, and:
* Leaving All Events
#### Leaving Events Individually
1. Navigate to the [Events Selection screen](#events-menu)
2. In Joined Events, expand, untick the Position(s) you want to go off duty for
3. Use the Update Duties button at the bottom of the screen
#### Leaving All Events
To leave all Events:
1. Navigate to the [Events Selection screen](#events-menu)
1. Untick All Positions, use the Update Duties button at the bottom of the screen and repeat for all Events OR
2. Use the Leave All Events button at the bottom of the screen
## Creating an Event
Some Position(s) allow users to create an Event. Users with this permission will see a Create Event section at the bottom of the screen.
The process is the same as [on a computer](/system-administration/managing-events#creating-a-new-event) requiring an **Event Title**, **Event Description**, **Template and** as well as an optional **Event Description,** **Start Date** and **End Date**. Complete the process using the Create button.
Create an Event section
Create Event screen
# Using The Datagrid
This page explains how to use the datagrid on a mobile device.
Using the Datagrid on a mobile device is similar to but not the same as [on a computer](/concepts-and-fundamentals/on-a-computer/using-the-datagrid).
## Register Menu
Only modules and registers you have access to with your event and duty will appear in the menu.
Modules have a light blue background and Registers have a white background.
To access the records within a register, touch the respective menu item.
Registers appear within module sections of the main menu
In tablet mode the Activity Log (Recent Activity) will be listed in the middle of the screen and counters to the right grouped by category.
### Register Views
Registers work differently to on a computer. You must first choose a filter/counter to activate Register mode.
### Filter Screen
The Filter Screen is used to ensure that the register is opened with filtered data.
Each register has a selection of filter menus displayed in bold. These are typically collapsed and must be expanded to access a specific filter.
#### Expanding and Collapsing Filter Menus
To access them expand them using the right arrow icon. Expanded filter menus appear with a down arrow icon, to collapse them and allow more screen for other sections, tap the down icon.
Filter Menu
Some filters have counters to show you the total number of items.
#### Showing Hidden Filters
Others may be hidden. These will have an eye icon along with a total items.
To reveal all hidden filters, simply tap on this.
#### Activating Filters
To activate a filter and launch [Register Mode](#register-mode), tap the respective row on your device.
### Register Mode
Choosing a register from the main screen activates Register Mode. This is the default mode and you can switch back to it from other views (such as [Map Mode](#using-the-map-mode) using the Datagrid icon ).
This is different to working on a computer in that there is no grid view. Items are instead listed vertically based on the screen size.
Selecting items will activate the Bulk Actions menu in a bar at the top of the screen. This includes [Offline Store](/concepts-and-fundamentals/mobile-app/working-offline#access-1) options).
Datagrid with bulk actions menu for Information on an Android device
### Map Mode
Map Mode can be activated from registers that support it using the Map button which has a pin icon. The pin icon also contains a total number of records with locations in the current filter which can be viewed on the map.
Map mode fills the entire mobile screen and from this screen you can also:
* Zoom into your current location
* Show different layers and mapping views (from the bottom right corner)\

* Select records individually to view and edit
When zoomed out, multiple records are indicated in blue with a number indicating how many records are in that same area. You will see them as individual records as you zoom in closer to them.
# Viewing Items
This page explains how to view items in the mobile app.
To view a record, touch the row in the datagrid.
Alternatively you can select a record from the map.
To centre the map on your location, use the Compass icon . This will also zoom the map in and rotate the map in your facing direction.
To view on the map, Zoom in until the boundaries of are visible and use the View button.
Selecting an item from the map
# Adding Items
This page explains how to add items in the mobile app.
You can create a new record for any register you have access to using the down arrow at the top right of the screen.
# Editing Items
This page explains how to add items in the mobile app.
Editing is done similarly to the web, the Edit/Save button can be found at the top right when [viewing an item](/concepts-and-fundamentals/mobile-app/using-the-datagrid/viewing-items).
## Edit Mode
### Working with Drafts
Drafts appear in the Drafts counter in the On My Device section. Drafts appear with yellow icon in the datagrid. If a Draft is viewed, it will open automatically in Edit mode.
### Cancelling an Edit without Saving
To exit Edit mode without saving, use the back (arrow) button at the top left of the record. When prompted "Are you Sure?" use the OK button
### Saving
When in Edit mode, you have two options to Save:
1. Save - overwrites the current version. Saved items go into the On Device counter in the On My Device section and are synchronised when online.
2. Save as Draft - creates a temporary draft copy on the device. To select this option, use the pull down list next to Save.
## Item Settings
### Selecting Properties
When selecting properties you can use the ‘Near me’ to find properties in the vicinity (populates the search list with the nearest properties). This will work only if you have enabled location permission on your device.
Selecting properties using the Near Me function
Tap a spot on the map to find assets around you.
Note the top of the map shows when the map is current to. Records on the map do not update instantly including records you may have recently added. The total also reflects how many assets have been loaded based on your preferences in the settings.
Selecting ‘From Map’ shows nearby properties without items in green making it easier to organise inspections.
Nearby properties without items are shown in green
The default Asset type is Properties, you can change this using the pulldown list at the bottom of the map to other available types, for example if you want to select infrastructure such as a footpath, culvert, road or bridge.
To select a property, touch the parcel on the map and then the ‘Pick’ button in the info box.
Selecting a property using the Pick button
The Asset, along with its Asset Code will be selected and visible within the record, you can remove the asset by touching the red cross.
### Drawing on (annotating) the Map
The mobile app features the ability to draw on maps to indicate locations including a Route if you are currently moving.
This is accessed through the ‘Draw on Map’ button which appears in property and asset fields.
Draw on map button
Draw on Map opens the map with special functions for drawing, including a Location button and Point button (at the bottom left of the screen) and Drawing mode selection list at the bottom of the map.
The first time you load the Draw on Map function you’ll be given a guide on the different buttons.
Drawing instructions appear when activating Draw on Map mode.
Long pressing the Compass button will allow the map will auto-scroll as you move. This will be indicated by a solid blue button. You can turn this off again by holding it down.
Double tapping the Point button will automatically drop points as you move to create a multipoint line.
Manual drawing of lines and polygons is possible by accessing the Drawing sub-menu at the bottom of the map.
Drawing options at the bottom of the map
### Capturing multimedia - photos, videos and audio
The device’s camera is used to take photos and videos. These can be added/attached wherever you see the camera or video icons.
Camera and video icons indicate that the device’s camera can be used.
To add photos, activate the camera icon and select the source, to upload an existing photo from your gallery/library select ‘Photo Library’ or to use the camera to take a photo select the ‘Take Photo’ option.
Selecting a source for multimedia
The device’s camera will launch and you can select Use Photo to insert the photo into the form field. To replace or remove it use the red cross icon on the uploaded photo.
# Manage Account
This page describes how to manage your account from the mobile app.
To view your current setup:
1. Go to the main menu
2. In the Manage Account page use the 'Manage Account' link
## View Connected Sites
Your connected sites will be listed at the bottom of the screen under the 'Connected Sites' section.
## Open your Contact record
To open your contact records use ths 'Open Contact Record' button.
## Configure Multi-Factor Authentication (MFA)
To configure your MFA setup:
1. Use the 'Configure MFA' button
### Configuring SMS for MFA
To configure SMS for MFA
1. On the Multi-factor authentication Settings page, under the SMS section, use the 'Change' button
2. On the Enable SMS for MFA screen:
3. Enter your mobile number
4. Use the Send Code button to send a code to the mobile number provided
5. Find the text message containing the code in your phone and enter the code you received in the field below the Send Code button
6. Save
### Configuring a One-Time Password program
To enable an Authenticator App or password manager (such as Microsoft Authenticator, Authy or 1Password):
1. On the Multi-factor authentication Settings page, under the Authentication App section, click on Set up
2. On the Enable your authenticator app for MFA screen
3. Scan the QR code using your One-Time Password (TOTP) program or get a code to manually enter
4. Enter the code provided into the field below
5. Save
Once you have set up one or more MFA methods, you can choose your preferred method at any time.
# Signing Out
# On a Computer
# Getting Access
This page describes how to access the system via the web app.
## Supported Devices
Most Internet and web enabled devices are supported including:
* Desktop computers
* Laptops (notebooks) and netbooks
* Tablets
* Smartphones
{% hint style="info" %}
Note that for tablets and smartphones, [use of the Mobile app](/concepts-and-fundamentals/mobile-app) is preferred (with the exception of Windows devices) due mainly to integrated mobile functionality such as use of the device's improved support for GPS, multimedia, barcode/NFC scanning and touch screen control. However the web app has more power user and System Administration functionality including searching and querying.
Some applications, such as inspections, are designed primarily for use only with the app.
{% endhint %}
For more information, visit the following page:
{% content-ref url="/pages/eizTeBBHmqu1nd6i0Cpl" %}
[Browser and device support](/security-and-support/maintenance-and-support/browser-and-device-support)
{% endcontent-ref %}
## Signing In
The system supports both manual sign in (using username and password) and Single Sign-On via the web or mobile app.
### Site URL
Your Site URL enables you to access your organisation's system and all the Sites you are authorised to use.
{% hint style="warning" %}
Consult your system administrator for your access address. It may be other than standard method listed here. Your system may be configured for internal access only.
{% endhint %}
Typically you'll use the single URL below for access (note: this may differ for your organisation).
```
http://app.cw.crisisworks.com
```
1. Open the web browser and go to your Site URL
2. Use the **Sign In** button
1. If Single Sign-On (SSO) is enabled, you will be redirected to the SSO screen. Note that you can still sign in another way using the Other Sign In Options button.
2. Otherwise, enter the email address registered to your account.
To sign in use the Sign In button
#### Recovering your password
If you are a new user or have lost or forgotten your password, follow these steps to reset:
1. Use the **Reset Password** link underneath the **Sign In** heading.\

2. Enter your **email address** and use the **Send Code** button.
3. Without closing your browser, check your email for a reset code.
4. Set a new password (you'll need to enter it again to confirm).
Passwords must include:
* At least 8 characters
* Upper and lower case letters
* At least one special character (@\*!\&#$%^<>.\_-\[]{}()=\~+?,;:"'/|)
* At least one number
5. Enter your **Reset Code** and use **Submit**
6. Once your password has been updated successfully you will see a confirmation message. Use the **Back to Sign In** link and login with your email and new password.
#### Important notes
* The email sent by the system contains a reset code, not a password.
* If you don't receive an email, you may not have an account on the system that uses that email address.
#### Signing In with Multi Factor Authentication
Multi-factor authentication (MFA) helps secure your account to prevent it being compromised or hacked. MFA adds an extra, highly secure, step to logging in addition to the username and password.
{% hint style="warning" %}
MFA is now mandatory for all those users not using SSO.
{% endhint %}
If you have enabled Multi Factor Authentication (MFA) (recommended) additional authentication steps are required before signing in.
There are currently two main options for MFA:
1. Authentication App that supports one-time password (OTP) codes (recommended), and;
2. SMS based authentication
#### Authentication Code (via Authenticator App)
If your MFA method is Authentication Code, you'll see a prompt to enter a one-time authentication code. This will depend on the Authentication method you're using, for example Google Authenticator.
1. Using your Authenticator app, find the code
2. Enter or paste the code into the field on screen
3. Use the **Confirm** button
#### SMS Authentication
If your MFA method is SMS you'll get a screen notifying you that a code has been sent to your phone and get a prompt to enter a one-time code.
1. Check your phone for an SMS
2. Enter or paste the code from the SMS into the field on this screen
3. Use the **Confirm** button
#### Signing In with Single sign-on (SSO)
If Single sign-on (SSO) is configured for your site, this will be the default login option (otherwise users will sign in using their email address and password).
After using the **Sign In** button, a second page will appear prompting you to sign in with your corporate ID.
Follow your organisations authentication process to complete the login.
{% hint style="info" %}
Please refer to the Single Sign On instructions from your organisation for account onboarding.
{% endhint %}
Example of Single Sign On prompt
## Troubleshooting Access and Sign In issues
If you're experience troubles with signing in, refer to the [Troubleshooting Access and Sign In](/security-and-support/faqs/troubleshooting/signing-in) page.
# Navigation
An overview of the navigation including the Sites, Modules and Registers.
The system main navigation is organised around Sites, Modules, Registers and Events. Your login determines which of these you can access. Before you can begin to use these you will need to [join and go on duty to an Event](/concepts-and-fundamentals/on-a-computer/working-with-events#setting-your-duties-for-events).
The screen is divided into three sections to make navigation easier:
* **Menu** (black bar) which includes the main menus for Sites, Modules, Help, Events and Users
* **Navigation** (blue bar) assists you to navigate within a Register and includes a Search tool, View modes and New Item button
* **Registers menu** (grey on the left) which includes an accordion register menu
* **Content pane** (white on the right) where you'll find any information for the Register or module that you're working on
## Useful terms for navigation
* **Modules** - A group of registers and functions organised by theme, for example Operations or Recovery. Each contains a set of registers Contacts or Requests. Your role determines modules you can access and work with. Modules available to you appear in the [Modules Menu](#modules-menu) in the [Menu bar](#menu-bar).
* **Help** - Includes resources and links, including this user guide to assist you as a user. You can access help via the question mark icon in the [Menu bar](#menu-bar).
* **Sites** - A Site is an instance of the system, for example, each organisation might have its own site. You may be able to access more than one sites via [Site Selection](#site-selection) or the [Sites Menu](#sites-menu) based on your user privileges.
## Welcome Screen
The Welcome screen appears when you first log in. It shows all the Crisisworks sites you have access to.
### **Site Selection**
Users can be granted access to multiple sites, however you can only work in one Site at a time.
Sites are colour coded, green indicates your Primary site, other colours may indicate Sites used for testing or training. To choose a Site, refer to the description of the site and use the button with the site name to select it.
{% hint style="info" %}
Sites cannot be set up by administrators, and must be licensed. If you require Site setup [contact support](/security-and-support/maintenance-and-support/accessing-support).
{% endhint %}
Once in the system you can switch between Sites using the [Sites menu](#sites-menu).
Welcome screen with Site selection
## Main Navigation
Once in the system you'll find a number of menus that will help you navigate.
### Menu Bar
The menu bar has the following menus:
* **Sites** - allows you to switch between the sites you have access to.
* **Modules** - this is the main system navigation and contains areas for performing key tasks such as generating Reports or managing Operations. Modules also contain collections of registers for managing items, such as Contacts or Requests. Your role determines which modules you can access and work with.
* **Help** - accessed via the help icon , this takes you to useful help resources, including this user guide.
* **Events** - in the events menu join one or more events and select an event to work on. Users with system administration privileges can create new events and manage existing ones.
* **User** - your user account and personal preferences are managed here including access to System Administration functions if you have authorisation.
The main navigation menus
### **Sites Menu**
Use the menu in the top left corner to switch between sites you have access.
Switch between Sites at any time using the down arrow symbol to access the list and then use the links to go to the Site you want so use.
Sites menu
{% hint style="info" %}
Sites cannot be set up by administrators, and must be licensed. If you require Site setup [contact support](/security-and-support/maintenance-and-support/accessing-support).
{% endhint %}
### Modules Menu
Modules group related Registers together, for example those used to manage Recovery or Operations.
The Module menu (or Main menu) is used to navigate between modules.
Your Positions, Roles and Events determine which modules you have access to.
When working in a Module, it will be highlighted in blue and the location bar below lets you know which Module and Register you are currently working in.
Module menu with Recovery selected (in blue)
#### Small Screen menu
When using a smaller screen or window, the system's navigation will adapt. You will need to use the hamburger icon (three horizontal stripes) to open the modules menu instead.
Hamburger menu (left) on a smaller screen
Vertical modules menu on a smaller screen
#### Large Screen menu
On larger screens, the modules menu has a cascading (pull-down) menu is available if configured. Usually enabled by default, when users hover over a main menu item, a sub-menu will appear of the registers within the module, allowing users to navigate straight to that register.
Cascading menu activating when hovering over the Operations menu
{% hint style="info" %}
If you wish to disable (or enable) a cascading menu for your Site, [contact support](/security-and-support/maintenance-and-support/accessing-support).
{% endhint %}
### Built-in Modules
There are two standard modules that will appear in all event views, they are:
* **Dashboard** - provides an overview of the system
* **Reports** - allows you to run reports and extract data
### Purpose-built Modules
Refer to the [Modules section](/modules/overview) for more information and see your installation for modules in your organisation's system.
Some of the more commonly used modules include:
* **Operations** - Registers for emergency management, which include Requests, Information, Logs, Contacts, Resources, Request Tasks and Work Summaries
* **Recovery** - Registers for managing impacted people, property and infrastructure, which include Cases, Persons, Assessments, Relief Registration, Needs & Tasks, Private Assets, Infrastructure, Livestock, Environmental Health and Agriculture.
* **Communication** - Registers for managing emails and text messaging
* **Library** - Repository for documents and geospatial information restricted to certain groups, or Workspaces.
### Help
Accessed help links via the question mark icon , this takes you to useful help resources, including:
* **Online Documentation** - This user guide
* **Online Training Videos** - [How To Videos](broken://pages/vyiJKMyg1IMiZLLc3E3q) page in this guide
* **Register for Online Training**
* **Raise Support Ticket** - for accessing the online [Service Desk](/security-and-support/maintenance-and-support/accessing-support)
### Events Menu
The Events menu allows you to join and switch between events.
The Primary Event determines where new items will be added to.
You can find it second from the top right in the menu bar.
Location of the Events menu
Your current selected event will be displayed on the top main menu bar. If no event is selected, this display 'All Events'.
Events menu
Use the down arrow symbol to access the events menu and switch between events.
For more on this menu refer to [Working with Events](/concepts-and-fundamentals/on-a-computer/working-with-events).
### User Menu
The User menu is labelled with your name at the top right corner of the screen, and is used to:
* manage your User Account settings
* Go On and Off Duty and Sign Out
* access System Administration for authorised users
* set User Preferences
* view Background Processes and Diagnostics
User menu
To open the menu, use the down arrow symbol
For more on this menu refer to [Your User Account](/concepts-and-fundamentals/on-a-computer/your-user-profile-and-duties).
### Registers Menu
For more on this menu refer to [Datagrid: Basic Use](/concepts-and-fundamentals/on-a-computer/using-the-datagrid).
Registers are organised into modules, such as Operations, Recovery, Inspections, Communications and Library. Use the module menu to view and select Registers within them. Registers are also listed on the left side of the navigation and feature an expandable accordion menu. Use the accordion menu to expand and collapse the register and to access the Search, Filter Groups and Filter submenus.
The Register menu can be found on the left of the screen. When using a smaller screen or window, the registers menu is hidden. You will need to use the Filters menu at the top of the screen to open it.
To expand a register menu, use the down right arrow symbol
To collapse a register menu, use the down arrow symbol
Example of a register menu in the Operations module
# Working Offline
Working Offline allows you to capture data quickly and to work in areas with limited or no data connectivity.
Working offline is supported in **offline mode** allowing you to work in areas with limited or no data connectivity.
Offline Support enables you to force your device offline and synchronise any changes to your data when you return to the office.
Working offline is supported by both web and mobile app versions of Crisisworks, however the mobile app has additional functionality.
### **Preparing to work offline**
Records, such as inspections, relief registrations and cases can can be saved to your mobile device for offline use. This way if the property you are visiting is in an area with poor reception or your relief centre has no connectivity, you can still record information into Crisisworks and synchronise them back to the server when you are back online.
Follow these steps to ensure you have access to the data and records you will need when working offline:
{% tabs %}
{% tab title="Mobile" %}
Asset data will automatically download to your device ready for offline operation.
Navigate to the register and select the records you wish to access offline by ticking them, or tap **Select all**.
Scroll back up to the top of the screen and tap **Add to offline store**, review the summary list then select **Next** and finally **Proceed**.
Repeat these steps to add to your offline store from other registers.
{% endtab %}
{% tab title="Web" %}
Unlike the mobile app, individual records cannot be made available for offline access. However asset data is available allowing you to create new records.
{% endtab %}
{% endtabs %}
### Enable Offline support
You can force your device **offline** in situations where the data connectivity is significantly reduced.
{% tabs %}
{% tab title="Mobile" %}
Navigate to the Dashboard of the event you are working in.
The **offline** options show at the top of the screen. Check that you have your asset data downloaded, and simply select **Go offline**.
To go back online, select **Go online**. Your offline items will automatically sync when data connectivity is restored.
Select **View items** for a list of items in your offline store.
{% endtab %}
{% tab title="Web" %}
On the web app, select **User Preferences** from the User Menu.
Scroll down to **Enable offline support**, and select 'Yes'.
Unlike the mobile app, individual records cannot be made available for offline access. However asset data is available allowing you to create new records.
To go back online, navigate back to User Preferences, and select 'Default' under Enable offline support. Your offline items will automatically sync when data connectivity is restored.
{% endtab %}
{% endtabs %}
## Synchronising items added offline
When the device returns online, any items created offline will automatically synchrnoise.
These items are indicated on the datagrid with an upload icon .
# Using The Datagrid
All the data in the system is managed using the Datagrid, which is a central way to search, filter, and access your information.
## Overview
Registers store and manage data in the system and have a built in audit log to ensure that each and every action that changes the data is recorded.
A register's configuration defines the shape of its data, the forms used to collect its data, the relationships between data, plus the overall functionality and capabilities of the records such as whether they have maps, can relate to assets, support status transitions, have priority, support assignment, can be tagged, have escalation rules, as well as other behaviours or workflows.
General features of Registers include:
* **View modes**
* **Datagrid** – a list of items organised into columns to provide information on items specific to that register. The Datagrid includes access to the:
* **Actions menu** - additional functions available in the register for bulk management of records (such as exporting, bulk editing or generating mail merge)
* **Columns menu -** options for customising the datagrid columns and groupings
* **Map** - a geo-spatial view of the items list including a visual map, markers, polygons and overlays (layers)
* **Search -** for refining the list by query or key words
* **Filters** - refine the list by status or preset query
* **Status** – indicates the current workflow progress of each item colour coded Status column
* **Links to Items** - usually blue coloured hyperlinks (such as the ID or Summary)
Columns functions are available to further sort and group items to organise large amounts of information.
# Basic use
This page explains the basics of navigating the datagrid including the register menus, filter menus and search.
Registers feature consistent navigation.
This includes:
* Left panel [Register menu](/concepts-and-fundamentals/on-a-computer/navigation#registers-menu) and [Filter menus, filters and counters](#filter-menus-and-filters)
* Right panel View panel
Once you've [navigated to a module and register](/concepts-and-fundamentals/on-a-computer/navigation), you'll reach a datagrid.
There are multiple ways to navigate here including different [views](#views), [menus, filters and counters](#filter-menus-and-filters), [search](#using-the-search). These are summarised below:
Register navigation
Once you've decided on what data you want to see, you can use [select a view](#views) to control how the results are presented in the view panel. For the datagrid this will include a [grid presentation of items](#viewing-the-datagrid-and-items-list) and for the [map view](#map-view) this will be a [geospatial presentation of items](#viewing-items-from-the-map).
## Views
Datagrid is the default view mode, however Map mode is also available.
To toggle between these modes use the corresponding grid icon.
The two main view modes are:
* Datagrid
* Map
These icons can be found at the top right of the Register navigation bar.
***
## Datagrid View
The Datagrid by default shows all items listed over a number of pages.
The following filters are available to refine the list.
### **Filter Menus and Filters**
The easiest way to filter and view a list of items is to use a Filter menu.
Filter menus are grouped by categories. You can expand a category using the arrow symbol on the left of the category name.
Some filters are initially hidden. These are usually ones that will most likely return no result, for example those without [counters](#counters). To unhide a hidden filter, activate the eyeicon.
hidden filter
#### Counters
Filters are sometimes accompanied by counters.
These tell you how many items should be in the results.
Counters in red (such as Overdue, Assigned etc) usually require actioning.
Filters in the main category with counters in red and blue
#### Activating a Filter
To activate a Filter, use the relevant blue link.
The MAIN filters include frequently used presets.
These vary from register to register but include:
* **Active** - any items that are in progress and not closed
* **Recently Updated** - items updated recently (i.e. in the last week)
* **Assigned to Me** - items either assigned to a position that is in your user profile, or to your user individually
* **Overdue** - items that have a due date set that have passed that date
* **All** - includes everything including items that have an active or inactive/closed status
#### Refreshing the Filters and Counters
Sometimes the filters and counters can get out of date and need to be refreshed. This should result in more accurate counters and unhiding of active filters.
To refresh, use the Refresh button.
{% hint style="info" %}
Sometimes other factors can cause filters and counters to be out of date. In this case the system may more help to refresh. If you're consistently finding inconsistencies, you can use the [Reload App Data](/concepts-and-fundamentals/on-a-computer/your-user-profile-and-duties#app-data) under Diagnostics in the User menu or try refreshing the page.
{% endhint %}
### **Searching**
To filter the datagrid use the Search icon in the Navigation Bar to open the Search Bar or activate the Register filters using the Filter icon .
More information on the search parameters can be found in the [Searching and Querying](/concepts-and-fundamentals/on-a-computer/searching-filtering-and-querying-registers) section.
### Datagrid controls
Items presented are determined by the currently activated filter and any datagrid controls enabled.
Datagrid controls are found at the top and bottom of the [items list](#conceptualoverview-status-priority-and-progress). These determine both how the data will be presented and what actions can be performed on it.
By default, it presents 25 items per page sorted with the most recently updated at the top. It is not necessary to change these controls to use the datagrid.
Datagrid controls and columns
Controls include (clockwise):
* [Refresh](#refreshing-the-datagrid)
* [Actions menu](#actions-menu)
* [Options menu](#options-menu)
* Datagrid columns, the first of which is the selection column which includes a tickbox
* Select All column
* Pagination, at the bottom of the grid
#### Refresh
Sometimes the datagrid can get out of sync with the filters, such as if new data gets added or if you're moving from module to module or register to register. If you're finding the active filter isn't displaying what you're expecting the datagrid may also need a refresh. This is similar to [refreshing filters and counters](#refreshing-the-filters-and-counters). Use the Refresh button at the top left to update the datagrid to the latest data.
{% hint style="info" %}
The [Options menu](#options-menu) has an option to Auto Refresh, however this is turned off by default for performance reasons.
{% endhint %}
#### Actions Menu
The Actions menu provides access to additional functions for bulk management of records within a register. It is located in the Datagrid menu bar to the top right of the datagrid.
The available options will depend on the functions available for the register you are using, your duty and permissions and whether or not you have selected records.
{% hint style="info" %}
Most actions will only work if you have an Event selected
{% endhint %}
This can include:
* **Bulk edit** (requires selecting of one or more records - see Working with Register Items)
* **Export to Report** (exports all records, or only selected ones if any are selected)
* **Create a Copy** (duplicate an item)
* **Copy IDs** (to clipboard)
* **Generate file** (such as a Mail Merge) (requires selecting of one or more records)
You can select items to perform actions with either:
1. Collectively using the [Select All](#select-all) box
2. Individually by ticking the select box in their row
#### **Options menu**
The options menu determines how items are presented in the datagrid and includes the following:
* Choose Columns
* Group by Column
* Restore to initial state
* Enable Auto Refresh
Options menu
**Choose Columns**
This option allows you to customise which columns are available on the datagrid.
Not all available columns may be displayed. To add or remove columns to the datagrid display:
1. Click the Columns menu at the top right corner of the datagrid and select *Choose Columns*.
2. Tick the checkboxes next to the columns you want to display. To show all columns, click *Select All*.
3. Select OK to save and refresh the column list
Searching and selecting available columns using tick boxes
**Group by column**
This option enables grouping which is disabled by default.
**Restore to initial state**
This option returns the datagrid view back to the default. For example, if you've modified any [columns](#datagrid-columns) or enabled grouping.
**Enable Auto Refresh**
The datagrid is set to refresh each time you activate a filter or when you [manually refresh it](#refresh).
Use this option to turn on Auto Refresh which will continually check for updates.
{% hint style="info" %}
Enabling Auto Refresh may impact performance. If you are experience datagrid performance issues, please disable this option.
{% endhint %}
#### Datagrid columns
The Datagrid columns also control the data presented.
**Ordering**
To change the order of the columns in view, drag and drop the column you want to move left or right in the datagrid.
**Resizing**
To change the width of a column, drag and drop the bar separating the column headers left or right.
**Sorting**
To sort the datagrid by a column, click the columns header to sort by that field (ascending or descending). The up arrow indicates ascending order and the down arrow indicates descending order.
Sorting by a column by toggling the up and down arrow
You can sort by as many columns as necessary.
{% hint style="info" %}
Sorting is only available on select columns such as ID, Name and Date.
{% endhint %}
**Grouping**
Grouping is enabled from the [Options menu](#options-menu) by enabling *Group by column*.
You can add up to 3 groupings to the datagrid.
To group items with Group by column enabled:
1. Drag the column header into the space directly above the column headers. Groupings will be created in real time as column headers are added, showing the number of items in each group.
2. Add more column headers as needed.
Dragging items into the column header to group
To sort within a group, click the column header. An up or down arrow will indicate the current sort direction, just like in the main datagrid view.
To remove a column header from the grouping, click the cross on its right.
#### Select All
The Select All column will select all items in the current filter. This is mainly used in combination with the [Actions menu](#actions-menu).
To select all items in the current filter, tick this box.
Ticks will appear all items in the current view (note that some items selected may not be visible).
Select All box ticked
When the Select all box is ticked, it indicates that all items are selected. If you have one or more items selected or unselect one or more items, the Select box will instead show a minus symbol.
A minus symbol indicates not all items are selected
#### Pagination
Pagination controls determine how many items are presented at a time and which sub-set of items are presented.
Datagrid pagination
To show more items, use the pagination controls at the bottom of the item list.
Select number of the page, or move between sets of items using the controls.
To view less or more items per page, select the number option to set the ‘Items per page’. The view will update automatically.
### Items list
Items are presented as rows, similarly to a spreadsheet. This section explains some common items and how to use them.
You can use the [Datagrid controls](#datagrid-controls) to configure the columns and enable additional options.
#### Selection Box
The selection box is used to select an item to perform actions on using the [Actions menu](#actions-menu).
Place a tick in the selection box to select it. Likewise, to unselect an item, untick the box.
Selecting an item
Item selection works like a shopping basket. The items will remain selected until you change a filter or [Restore the datagrid to its initial state](#options-menu).
#### ID
Every register item has a unique ID. You can use this to [open an item for viewing](/concepts-and-fundamentals/on-a-computer/using-the-datagrid/viewing-items) or editing.
This column is always enabled by default.
#### Status, Priority & Progress
Most registers use a **status** system controlled by strict rules known as a **state machine**. This ensures that only authorised users can set specific statuses, and that items proceed through the status workflow in a defined logical order. A core feature of Crisisworks is that each register has its own state machine, allowing workflow to be tuned to the needs of each register. To fully understand how a register operates, it's important to understand the status progression within its workflow.
While each register has its own workflow process, they generally follow a common colour-coded convention:
* **Red**  is unhandled and needs to be assessed and assigned
* **Yellow** is assigned but not underway
* **Blue** is in progress
* **Green** is safe or completed
* **Grey** is inactive or completed
***
## Map View
The Map View displays register items from the current filter in a geo-spatial format, using markers, polygons and overlays (layers).
* To activate Map View select the pin icon from the top right of the Register navigation bar.
* Zoom in and out using the  and  controls at the top left, or use the pinch/spread gestures if using a touch screen or mobile device.
* To move the map around, select and drag the map area.
* Click the **full screen icon**(bottom left) to expand the map.
* You can filter by asset class using the drop down list at the bottom of the screen.
* Click the **Layers icon** (bottom right) to toggle available map overlays.
* To **exit Map view**, click the datagrid view button (top right).
### Viewing Items from the Map
* Items on the map are indicated by **Points**, **LineStrings** and **Polygons**, typically colour coded according to their workflow state.
* Pins can have icons depending on their register. For example, on the map a [Request that is 'Requested](broken://pages/6qkLMNrCU6gx9Gj5hsi7#request-workflow)' has an icon that looks like an blue in-tray .
* To **view a summary** of an item, tap the icon on the map.
* Selecting **View** in the summary links you directly to the full item details.
Tapping an icon on the map reveals a summary of the icon.
# Adding Items
This section covers adding new items to a register
If you have sufficient permissions, you may add new items to a register.
The steps are similar to editing a register in that you must successfully complete and form, however the item form will be almost entirely blank, so it is imoportant to observe all the data entry rules and complete all required fields of the register.
{% hint style="info" %}
Some registers may also require sub-items from other registers to be added. In some cases this is done for you automatically when saving.
{% endhint %}
## Adding New Items within a Register
When you can add a new item from the Register the name of the register item will appear in the blue button.
Example of a New Item button from a register that supports it (Information register)
{% hint style="info" %}
Make sure you're in the right Event before adding (or set this under Classification). It is possible to change an item's Event later, but not recommended. So always take care to check the Event menu before adding.
{% endhint %}
The general process for adding a new item this way is:
1. Activate the New Item button for the register
2. The new item form will open, initially empty, enabling you to enter the basic information in for the new record.
3. Complete all required field (indicated by a red asterisk)
4. Save using the 'Save' button
A new item will appear in the register with a new ID and default workflow status.
If you do not wish to proceed with the new Item, you can use the 'Cancel' button to return to the register Datagrid. The system will check with you to see that you are sure you wish to cancel as selecting this option means your work will not be saved.
## Adding New Items to another Register
To add a new Item to any register, use the blue button with the plus symbol (or down chevron) at the top right.
The plus symbol will only appear for registers you can directly add an item to.
You don't need to be in the register to add an Item to it.
Only Items you have permission to add can be added this way.
You can select the item from the drop down list.
# Viewing Items
This section covers opening and viewing of register items.
## Overview
You'll find links to items in various places, however the main areas are:
* Datagrids
* Maps
* Dashboard and Recent Activity logs
* Related items
In most of these places, the item will be displayed with its ID and name to help identify it. If you're viewing the item from outside its register, following the link will redirect you to item in the relevant module and register.
Each item will have different sections, fields and settings depending on the register and permissions from your current duties.
## From a Datagrid
When working in [datagrid view](/concepts-and-fundamentals/on-a-computer/using-the-datagrid#data-grid-view) to view or open an item, click on the ID or any other field in the datagrid row that is linked (usually coloured blue).
Viewing or editing a Datagrid item
Items open in the same window. To return to the datagrid, use the Back button at the top right of the item window.
{% hint style="info" %}
Do not use the browser back button to return to the datagrid from an Item. Doing so may lose the screen you are working on.
{% endhint %}
If you have permission to, more options including Edit mode may be available to you.
## From a Map
When working in [map view](/concepts-and-fundamentals/on-a-computer/using-the-datagrid#map-view), to view a summary of an item (including the name, type, Event, workflow, currency info and other relevant information) simply tap on an icon on the map.
Tapping an icon on the map reveals a summary of the icon.
The 'View' link links in the summary window links directly to the full item details.
## Viewing Item Details
Items details are divided into two columns, the left column and right column with multiple expandable sections in each. Each item contains unique information, however generally consists of the following common sections.
| Left column | Right Column |
| ------------------------------------------------------------------------------------------------------ | --------------------------------------------------------------------------------------------- |
| Includes the sections and fields that describe the item and are available to your role to view or edit | Includes the metadata about the item, any related items and system settings |
| | **Workflow** - includes information used to manage the item’s workflow, status and delegation |
| | **Related Items** - items from other registers linked to this item |
| | **Activity** - a running audit log of all changes made to the item |
Depending on the type of item, additional sections may be present in the left and right columns.
#### Sections
Items are divided into sections which are expandable and collapsable. This help you focus on the sections which are relevant to the current process/step/workflow stage.
Controls for expanding and collapsing sections appear at the top of the section to the right of the section title.
To expand a section use the down chevron symbol.
To collapse a section use the up chevron symbol.
### Embedded and Related Items
In some registers, Embedded items and Sub-items from related registers or sub-registers may be found in sections of an item. The key fields required to be managed are often editable from the main register. However more information can sometimes found in the record.
The View Record button acts as a link to a sub-register to access the full record if necessary. These typically have a link back in the Related Items section.
Embedded items with a View Record link to their home register. This type of record can only be added from the home register.
#### Assets and Properties
Embedded assets show details of the address including asset and property ID information.
You can check if there are contact details for any owners using the Fetch Contacts button. This will only work if your administrator has performed an [Asset Contacts import](/system-administration/configuring-the-system/imports#assets). Contact information for the owners will be displayed if there are contacts. If there are no contacts the button will dissapear.
#### Locations
Embedded locations are sometimes used to illustrate precise geographical information which can be viewed on the map using the View Map button.
### Workflow
The Workflow section holds essential information used to manage the item’s workflow, status and delegation.
Key information common to most items includes:
* IDs - unique identifiers for the item
* Status - the current workflow state
* Last updated
### Classification
The Classification section is used to classify items. This can be a useful way to retrieve or report on all items that have a similar theme.\
There main ways items are classified include:
* Event - The event that the Item belongs to
* Tags - A list of keyword descriptors used to categorise the Item.
* Classifications - Special system defined terms used to classify items. (Only available in registers where this feature is enabled)
Classification section
### Activity
The Activity section contains running audit log of all changes made to the item including notes recorded by users.\
This cannot be edited.
Each change has its own entry including the user who made the change.
Status changes are indicated with the colour coding.
Sample Activity Log with newest updates listed
To view or hide all details of each change including who made the change, when and which fields were changed, toggle the ‘Show Details’ / 'Hide Details' link at the bottom right of each entry.
Show Details activated highlighting changes to each field made between updates
### Linked Items
Linked items are items from other registers which are created automatically by the system. The Linked Items section allows for easy navigation to the related records.
This section includes a summary of the related item with the ID and other key details.
It is important when following related records to do it only when necessary and remember where you are in the system. This is because you may be taken to a completely different module or register than the one you were working on.
Example of a linked Contact
#### Advanced
The Advanced section includes information about the Item that is relevant to administrators and power users.
Information that may appear in Advanced includes:
* Save this item as a Template - this item is available to use as a Template. Templates can be used by administrators to create other similar items pre-populated with information.
# Editing Items
This section covers some of the basics of editing register items.
## Overview
If you have permission to do so, you will be able to make changes to register items.
The fields available for editing are based on the permissions of your currently on duty position.
## Editing an Item
You can edit items individually or [in bulk via the actions menu](/concepts-and-fundamentals/on-a-computer/using-the-datagrid/bulk-actions).
To edit an individual item (if you have access to):
1. [Open the item](/concepts-and-fundamentals/on-a-computer/using-the-datagrid/viewing-items)
2. At the top right of the item form, press the 'Edit' button to enter Edit mode
3. Make the required changes (required fields indicated with a red asterisk must be completed in order to save)
4. Save using the 'Save' button at the top right of the item form to return to View mode
{% hint style="info" %}
It is important to save the record, if not your work will be lost. Check to ensure that all required fields are completed.
{% endhint %}
Register item forms can be designed to guide interactions. This means that some sections and fields only appear when certain pre-requisites and rules are met. This helps reduce the amount of information required of you at each stage and prevents you from completing information before it is required.
{% hint style="info" %}
You may be required to change a field or update a workflow in order to access or complete a section or hand the work over to another role.
When unsure about the steps involved in a process, please consult the user documentation, process guide or trainer.
{% endhint %}
## Common Field Concepts
The following elements are common to editing items.
### Required Fields
All required fields (those marked by a red asterisk) must be completed before an item will be saved.
If you miss a field, you'll see a red error directly below the save button and the field required to be completed will also be highlighted in red. Note that on large forms you may need to scroll down to find the highlighted required field.
Red error message and highlighted required field
You will most likely need to re-save using the Save button again if you receive an error message upon saving.
{% hint style="info" %}
You will need to re-save using the Save button again if you receive an error message upon saving. If you still can't save, consult troubleshooting guides or contact support.
{% endhint %}
### Recording Notes
Almost every type of register item has a yellow **Record Notes** field at the very top of the form when editing.
This field is essential for audit purposes.
Notes added will appear in the Activity History along with other log items.
To record notes:
1. Edit the item
2. In the yellow 'Record Notes' section, record any notes including of any important changes made
3. Save
Record Notes field
{% hint style="info" %}
Notes cannot be edited or deleted. However new notes can be created which can contain explanations or corrections to previously recorded notes.
{% endhint %}
### Rich Text Fields
Rich Text fields support more advanced formatting options via a toolbar with word-processing style options.
A Rich Text field
Rich Text fields typically support the following formatting options:
* **Styles selection** - a limited set of pre-set styles selectable via a drop-down list typically with Paragraph and 3 levels of Headings for breaking text into sections
* **Emphasis formatting** - Bold and Italic buttons to activate and deactivate styles for emphasising
* **Lists** - unordered (bullet) and ordered list (numbered) buttons toggle them to create a list
* **Indent/Outdent** - indent (left arrow) and outdent (right arrow) buttons toggle them to indent text
* **Blockquote** - the blockquote button enables an indented quote style
* **Tables** - the tables button enables a table to be inserted by activating the down chevron you can select the number of columns and rows using the grid selector below. Once added, rows can be added by tabbing within the table.
Selection of rows and columns
* **Undo/Redo** - the Undo (left arrow) and redo (right arrow) buttons will undo or redo the last action in the field. These will be greyed out if there were no further actions.
### Files
Some sections may allow you to attach files, for example, to record evidence such as documents or images.
#### Adding Files
Where a file can be added you will see an 'Add File' button .
The interface supports two methods of file attachment:
1. Drag and drop one or more files from the desktop into the attach file window, or;
2. Browsing from the file menu
Using the 'Browse files' link will launch a desktop file window to select the file. Select one or more files and then use the Open command on your computer to attach the files.
Drag and drop file browser
Attached files will show in the window below including a thumbnail, metadata including the upload date and file size along with a download link.
To add more files, repeat the process.
To close the File attachment window use the cross icon.
#### Removing Files
To remove any attached files use the red cross icon .
#### Downloading Files
Use the file download icon  to download and preview an uploaded file. Check your local file system to view and open the file.
### Photos and Images
As photos and images are also files they are handled similarly. A key difference is that the photos can also be added from the device's camera or media gallery. This requires the relevant media permissions on the device.
#### Metadata watermark
When configured, metadata can be automatically watermarked onto photos. This includes key identifying information on when the photo was taken (timestamp), who took it and where it was taken (geostamp) who took the photo.
This feature is useful when presenting photos as legal evidence (such an in a notice).
This information can include:
* Item type
* ID
* Officer
* Location
* File number
* Date/time
These are post-processed (added after the initial upload) and the item must have an Active status.
This function must be configured for each register you want to use it with and it is a global setting - that is - it will appear on all photos for that register. To enable this function for the register you're working with [contact Help Desk](https://docs.cw.crisisworks.com/security-and-support/maintenance-and-support/accessing-support).
### Selecting Dates
Some fields require entry of a date or date and time.
This contains a blank value by default and appears in the format dd/mm/yyyy representing two digits for day i.e (22 for the 22nd), two for the month (i.e. 02 for Feburary) and four for year (i.e. 2024).
Pickers that require a time will also have a blank format **--:-- --** representing a 12 hour clock time with two digits for the hour, minutes and two for the am or pm.
You can enter a date by activating the field and either typing over the default value or entering it via the visual picker popup which appears.
Date and time field with visual picker popup open
To enter the current date, use the blue Today link at the bottom of the date time picker.
To enter a date, you can click on the calendar icon or type over the 'dd' part of the date.
To navigate between or select months, type over the 'mm' part of the date or select the up and down arrows on the date time picker.
To navigate between or select years, select the 'yyyy' part of the date and edit or activate the chevron next to the displayed month and year.
If the time is also included you will need to select a time. You can do this by typing over the dashes '--/--' or selecting a value from the hours and minutes column. AM or PM is also required which can be entered by typing over the remaining dashes or the 'am' or 'pm'.
### Location
The system supports multiple methods of location selection from the [Asset database](/concepts-and-fundamentals/on-a-computer/mapping-and-assets#property-and-assets-database).
An example of location selection
Select a location to deliver or perform the request.
Depending on the form there are several ways to do this:
1. Text search - by Property address, Library Item or Point Of Interest
2. Map based search
3. Marking the Current Location using the Mark Current Location button (this is particularly useful in the mobile app)
4. Manually marking Locations using the Edit the Map button
See the sections below for more information on each of these options.
#### Fetching Contacts
For Assets that have available Asset Contacts (such as owners of a property) you can use the Fetch Contacts button to preview contact details.
This function is available only on registers that support it (such as Permits and Inspections) and required special [security policies](/system-administration/configuring-the-system/positions#security-policies). Asset Contacts must also be [imported](/system-administration/configuring-the-system/imports/assets/asset-contacts) in order for this feature to return results for a given property.
#### Removing Locations
Once you have selected a location, it will appear as the currently selected location. You can remove an individually selected location by using the red cross icon
Example of a selected location
Additionally, where present you can also clear locations using the 'Clear' button .
#### Text Search
You can perform a text based search by **Property** address, **Library Item** or **Point Of Interest**, or by any other configured asset class. When a property is selected, it will appear on the map.
To search, begin typing in the text field. As you do, a list of corresponding items from the assets database will present itself from which you can choose.
Text address search
Optionally you can filter by asset class or register items, for example by **Property** addresses, **Library Items** or **Points Of Interest.**
To view or annotate this location, you'll need to Edit the Map.
#### Map Based Search
Refer to: [Map View](/concepts-and-fundamentals/on-a-computer/using-the-datagrid#map-view)
You can search manually from a map using the From Map button which opens a map window from which you can select a location.
{% hint style="info" %}
The map itself, default centre point and layers will depend on the configuration of your system.
{% endhint %}
Map search interface using Open Street Map layer
To find nearby assets:
1. Choose the Asset type from the list (default is All)
2. Click the map to place the crosshair and find nearby assets (Assets will be highlighted in blue, with the total displayed at the top of the map)
3. Select the asset or segment to view the summary
4. Use the Pick button to pick the asset
Asset selection
Assets are highlighted in blue
Asset summary for selection
To exit Map based search use the Cancel link at the top left.
#### Marking the Current Location
You can use your current location to mark the location if your device is location aware (such as a mobile device or laptop).
To mark the current location, use the Mark Current Location button.
{% hint style="info" %}
Your device will need to have Location enabled in the settings. Consult your device's manual if you do not know how to enable location. If your device does not have Location enabled you will receive an error message.
{% endhint %}
#### Editing the Map
You can create a custom location from a selected location or from scratch or modify an existing one using the Edit the Map button.
The map editor has all of the standard map options, plus additional options for drawing.
There are three types of drawing that can be used in combination:
* **Point** - individual markers on the map
* **Polygon** - a closed shape made up of multiple lines used to define an area
* **Line string** - a line made up of multiple points
To toggle between drawing modes use the Drawing selector at the bottom of the map to select your chosen option and then use the Done link to return to the map.
Drawing selector
Once your drawing is completed, use the 'Finish' option from the bottom right of the map to save.
#### **Mobile Commands**
Additional map controls for *mobile users* are available while in edit mode (these require Location to be enabled on your device). These can help you to plot your path in real-time if you are moving and show your orientation in relation to other map objects.
To activate the Help menu use the Question mark icon .
Zoom to current location
Show compass bearing (requires a double tap to activate)
Drop point at current location
Drop points as you move
**Drawing Points**
To draw a point:
1. Select 'Point' from the Drawing selector
2. Navigate the map (zoom, pan etc) and tap to drop the point. A single point appears as a callout icon .(If you have enabled drop points as you move, points will be dropped automatically.)
3. Repeat until finished. When finished select 'Finish'.
**Drawing LineStrings**
To draw a LineString:
1. Select 'LineString' from the Drawing selector
2. Navigate the map (zoom, pan etc) and tap to drop a point to begin. The yellow point indicates a line which will be connected to the next point that you drop.
3. Repeat until finished. When finished, double tap to complete the line or select 'Finish'.
Example of a LineString used to define a Front
**Drawing Polygons**
To draw a Polygon:
1. Select 'Polygon' from the Drawing selector
2. Navigate the map (zoom, pan etc) and tap to drop a point to begin. The yellow point indicates a line which will be connected to the next point that you drop.
3. Repeat until finished. When finished, double tap to complete the line or select 'Finish'.
Example of a Polygon used to define an area
{% hint style="info" %}
Because they define areas, polygons are extremely useful as they can be used to define an area to search within or filter items by
{% endhint %}
## Sub-Items
In some registers, you may be able to edit or add sub-items which have corresponding records in other registers.
{% hint style="info" %}
You will not be able to save a Register Item unless all Sub-items are completed or saved.
{% endhint %}
### Editing Sub-Items
To edit Sub-Items, use the Edit button to enter Edit mode. If the item is read only (does not have an Edit mode), you may be able to edit it via the main register.
The View Record button acts as a link to a sub-register to access the full record if necessary. These typically have a link back in the Related Items section.
Embedded items with a View Record link to their home register. This type of record can only be added from the home register.
To edit the sub-item, as in any register item, complete the form that appears (including all required fields).
To cancel or remove a sub-item, use the red cross icon found at the top right of the form.
Sub-Items are saved when the Register Item is saved.
### Adding Sub-Items
Where you can create a Sub-Item, you'll typically find an 'Add' button . This will typically also add a new Item into to the Sub-Item's home register.
To add a sub-item, as in any register item, complete the form that appears (including all required fields). To cancel or remove a sub-item, use the red cross icon found at the top right of the form.
When attaching more than one record, use the 'Add Another' button . To the right of this button, the system has a section to let you know how many records are attached.
New Sub-Items will only save when the Register Item is saved. If you forget to save the Register, you will lose any Sub-Items you have created. Don't forget to use the 'Save' button to save the Register Item along with any added Sub-Items.
### Adding Contact Sub-Items
Some sub-items that are Contacts feature a search interface. This enables you to find existing (known) contacts in the system through a search with a combination of:
* First Name
* Last Name
* Organisation
* Primary Email
To find variations in spelling you can use the checkbox to include similar sounding names.
Contact Sub-Item search
To search for an existing Contacts:
1. Enter one or more search fields
2. Use the Search button
3. The results list for Contacts is typically limited to 10 results. If you don't see your contact there, then use the Search Again button or use the Reset button to clear the form to change the search parameters.
4. If a close match is listed in the results, use the View button to open the contact record to view the details. If the contact looks correct from this screen use the Select button.\

5. If you selected the View contact and it looks correct use the Select Contact button . If not, use the Back button to return and repeat steps 4 or 3 find a better match.
6. The selected contact will appear as a Sub-item.
To add a new contact to the system:
1. Enter the contacts details into the search form
2. Use the Search button to check if a contact already exists
3. Use the Enter New Contact button found at the bottom of the results. This will attach a contact with the details provided.
{% hint style="info" %}
When entering new contacts enter as much information into the search form, or the contact record will appear with minimal information. It is also important to avoid duplicating contact records.
{% endhint %}
## Right Hand Side Settings (metadata)
### Workflow
#### Status
The Status field is used to manage item workflow. Almost all register items have a Status field.
Workflows are configured individually by register, so the options will differ depending on the process involved.
The simplest of Status is used to control whether an item appears on the lists or not, that is whether the item is Active or Inactive. As items are generally not deleted due for audit purposes you can sometimes use the Status to toggle between these two states.
Generally speaking only the next available steps can be chosen from the Status pulldown list.
#### Assignment
Assignment fields allow an item to be assigned to a single user or position.
Assignment fields are most often but not always found in the Workflow section and can have different names, for example Task assigned to, Field Officer, Case Officer etc. Where an item can be assigned to multiple different people or positions, there will be multiple of these fields. In some situations an assignment field may also enable assignment to external organisations such as contractors with restricted permissions.
This field type enables selection of a user from a pulldown list of those in the system of specific position(s). In order to appear in the list and be assigned an item, an administrator must first [give a user the matching position](/system-administration/user-and-contact-administration#positions) and they must be an active user.
Assignment field
### **Classification**
The Classification section contains settings that help classify an item.
#### Event
This setting determines which Event the item belongs to. It is set by default to the Event that the item was created in.
This also enables an item to be moved to another event.
You must have an event selected in order to be able to move an item to another event, otherwise the option will be greyed out.
The Event Classification
#### Region
This setting determines which Region that the item is associated with which is useful where the system covers multiple areas or Sites.
#### Tags
This setting enables [tagging](/concepts-and-fundamentals/on-a-computer/using-the-datagrid/tagging-items) for additional categorisation of records beyond the built-in workflows to help manage large volumes of items.
{% content-ref url="/pages/J6cZK66XTxb7ryZpMy92" %}
[Tagging Items](/concepts-and-fundamentals/on-a-computer/using-the-datagrid/tagging-items)
{% endcontent-ref %}
### **Administrative**
The Administrative section contains functions for power users and administrators.
#### Save this item as a template
This setting saves the item with the settings when the it was saved with the option ticked. It enables the content to be reused in new items that are created. This option can save time for data entry and can be used to generate sample records for testing and training.
Not all register items support this function.
Save this item as a template option in Advanced
### **Correspondence**
Depending on the item, there may be a Correspondence which you can use the generate correspondence using Mail Merge templates.
{% hint style="info" %}
Note that Correspondence may work differently in your system depending on how it is configured and may support additional functionality. Consult your system specific guide.
{% endhint %}
To do this you must use a [pre-configured template created by your administrator](/system-administration/configuring-the-system/mail-merge-templates).
Correspondence section for generating a Mail Merge
To generate correspondence:
1. Drop down the **Select a Template** list and select the template you wish to use
2. Use the **Generate** button
3. The file will download onto your device
Note that if you wish to record this correspondence you may want to add a note or upload the generated file back into the record.
## Simultaneous Edits
When two or more users edit the same record at the same time, the edits are written in chronological order based on the time that each user saved.
In the unlikely event that multiple users save the same item at exactly at the same time, the sytem implements a back off algorithm to convert simultaneous writes into a sequential queue using a randomised retry approach.
The result of a simultaneous edit is that all changes by all users are recorded into the audit history, and the most recent save becomes the current values of the record.
### Scenario one: multiple users editing different parts of the record
The system intelligently compares the proposed data against the existing record in the database and only processes the changes, which means that multiple users working on the same record at the same time will not conflict with each other if editing different fields.
### Scenario two: multiple users adding sub-records to the same record
When adding sub-records (such as adding new affected people into an existing recovery case record), both saves will successfully create new records, and this will result in a duplication of records if the new records independently contained the same data. The system has a [merge](/concepts-and-fundamentals/on-a-computer/using-the-datagrid/bulk-actions#merge) feature to clean up data duplication.
### Scenario three: users editing the same fields of the record
When editing the same fields, the system records the changes sequentially, so the edit processed last will be the final value on the record, and all values will appear in the audit log as prior versions.
Although uncommon, it is possible that the server may block processing a user's save if this results in an inconsistency — for example, if two users change the status field, and the second user's status value results in an incompatible change following the first user's save, then the server will return an error message to the second user and ask them to select a different status.
### Scenario four: Offline edits via the mobile app
When editing records offline via the mobile app, the saves are processed in the order they are received at the server (i.e. when the device reconnects), even though the edit itself will be back-dated to the time the user originally pressed Save in the field.
### Example
To illustrate, let's assume two users are editing the same case at the same time.
{% hint style="info" %}
If they both work together as a team and are working on different parts of the case and change different things then there will be no overwriting of data the data will be nicely “merged” together.
* at 12:01 Fred set YYY to Severity
* at 12:02 Mary set ZZZ to Priority
If they both edit the same field like '[Damage Summary](broken://pages/Sfj9Pht3MY5OyzcTaJAs#property-damage)', both transactions will succeed but the 2nd save will update the value of the first save.
* at 12:01 Fred added YYY to Damage Summary
* at 12:02 Mary changed Damage Summary from YYY to ZZZ
If they both add one “related data item” e.g. a Recovery [Need & Task](broken://pages/cbvxkWADYBnySUMuIgVf), then there will be 2 Needs & Tasks added to the [Case](broken://pages/Sfj9Pht3MY5OyzcTaJAs).
* at 12:01 Fred added Fred Smith to Affected Persons of Case 123
* at 12:02 Mary added John Smith to Affected Persons of Case 123
{% endhint %}
# Tagging Items
Tags are used to group related items together to make them easier to find.
## Overview
*Tags* are used to group related items together to make them easier to find.
Users can navigate *Tags* using the using Tags also appear under 'Active Tags'.
The tags menu is useful for identifying related records
{% hint style="info" %}
Avoid overusing tags. Tags are a form of unstructured data. Always use the structured data provided in fields where available.\
Overused tagging can generate long lists and make your system confusing for first time users. Additionally, make sure that tags are not duplicated with slightly different names. Always look at the suggestions when creating a new tag to avoid duplicating records. As a best practice it is a good idea to have a list of pre-approved tags.\
An alternative is to use [Classifications](/concepts-and-fundamentals/on-a-computer/using-the-datagrid/editing-items#classification) which can be pre-approved for use by a Coordinator or Administrator.
{% endhint %}
## Adding Tags to an Item
To add a tag you must first [edit the item](/concepts-and-fundamentals/on-a-computer/using-the-datagrid/editing-items).
The *Tags* field is usually, but not always, found and set in the Classification section in the right column.
There are two ways to add tags:
* Selecting an existing tag
* Creating a new tag
Tags are separated by commas.
### Selecting Existing Tags
Tags are specific to each register.
There may also be pre-installed with useful tags to select from, this will vary depending on your system's configuration.
As you type into the Tags field, suggestions will appear below. Select it from the list.
Adding existing tags by looking them up in the list
### Creating new tags
{% hint style="info" %}
Avoid creating duplicates of tags with similar spelling (for example Fire and Fires). Always check for existing tags before creating new ones. Duplicate or similar tags can make navigation and reporting difficult.
{% endhint %}
To create a tag:
1. In the Tag field, type the new tag. You can include spaces in your tags. All other Illegal characters will be removed.
2. When you've written it, use the comma key to add it. If the tag already exists, the system will match it with the existing tag to avoid duplication.
3. Save the item as the change will not take effect until you've done this.
### Removing tags
If you need to remove a tag from your item, click on the cross to the left of the tag.
Note that the change will not take effect until you've saved the record.
# Bulk Actions
The Actions menu enables you to access additional functions available in the register to perform bulk actions on items.
## Overview
The Actions menu enables you to access additional functions available in the register for bulk management of items.
It is located at the top right of the datagrid.
{% hint style="warning" %}
The available options will depend on the functions available for the event and register you are using, your duty and permissions and whether or not you have selected records. Some options are only available when you have selected more than one record.
{% endhint %}
{% hint style="info" %}
Most actions will only work if you have an Event selected
{% endhint %}
Example Actions Menu in Cases register
## Performing Bulk Actions
To perform a bulk action:
1. (Optionally) tick one (or all) items you want to perform a bulk action on
2. In the confirmation screen, review and check that you have selected the records you want and press the Next button or Proceed button \

3. If there are additional steps or options, such as confirming fields or filters, complete these and press the Proceed button Proceed button
4. Some bulk actions use a lot of system resources and may be queued (particularly [Export to Report](#export-to-report) and [Generate Merge](#generate-merge)) . You'll see a queued message when this happens. If you want to check the status while it is being queued you can optionally use the Monitor Progress button.\

5. The bulk action will be performed and you'll be able to access the output
{% hint style="info" %}
Available bulk actions will depend on your user permissions, the register you're using and whether you have selected any items.
{% endhint %}
The following sections outline some of the more common bulk actions available in registers:
### Copy IDs
Copy IDs can be useful in many places where multiple IDs are accepted, such as reports or to [perform a search/filter](/concepts-and-fundamentals/on-a-computer/searching-filtering-and-querying-registers) for specific items.
To Copy IDs, simply select the items and run this command to get a list of IDs. This will copy the IDs to your device's clipboard.
The output is in CQL (listing the IDs in square brackets) which you can then paste from your clipboard.
For example the output from the command run on the 3 selected items below would be:
```
id:[38,789,799]
```
Running the Copy IDs function.
### Bulk Edit
{% content-ref url="/pages/a2eWhKOkTwpBhWsPFV1g" %}
[Editing Items](/concepts-and-fundamentals/on-a-computer/using-the-datagrid/editing-items)
{% endcontent-ref %}
The Bulk Edit command allows you to edit select fields in the items in registers that support it.
Using the Bulk Edit Action to edit multiple items at once
{% hint style="info" %}
Workflow rules must be observed when doing this or the system will reject the changes.
{% endhint %}
Fields that you can change are listed.
There are typically three options. The Default option is *Don't Change* in which case the field will be ignored and its current value kept.
#### Setting Values
Selecting 'Set' will allow you to change the field's value.
Checkbox fields, have the option to 'Set On' or 'Set Off'.
For fields with lookup lists, 'Set' will bring up a Value field to the right which will set it to whatever you select.
Set command and Value options for Status field
#### Adding or Removing Values
Selecting 'Add' or 'Remove' will allow you to add or remove one or more new values respectively. This can be done by typing it in and adding a comma after each value or by selecting any suggestions from existing options as you type from the lookup list. Any tags you select will be added or removed when you proceed with the Bulk Edit.
Adding new tags using Bulk Edit
#### Clearing Values
Selecting 'Clear' will allow you to set the value back to its default before any user changes.
### Bulk Edit All Filtered Records
This option works the same way as [Bulk Edit](#bulk-edit) but using items selected through a [Filter or Query](/concepts-and-fundamentals/on-a-computer/searching-filtering-and-querying-registers).
To use this option, first create a Filter or query and then use this option to Bulk Edit all items selected.
As with the Bulk Edit, fields available to be changed depend on the register you're working with. Check the register for details.
### Create a Copy
Create a Copy duplicates each of the selected items in registers that support it.
The new items will have a separate ID but contain all the same details.
### Merge
The Merge command merges multiple register items into a new one in registers that support it.
The end result is a new item with the field data as if they were added in sequence and relinked to all external media, data, assignments, etc. The original items are archived and a single audit comment that describes the merge process with links between the objects.
### Send Communication
{% content-ref url="/pages/96Wl4ZyuvvALoh43jcys" %}
[Broken mention](broken://pages/96Wl4ZyuvvALoh43jcys)
{% endcontent-ref %}
Send Communication is enabled for some registers that contain contact records. This will pick up the email and mobile details and observe any settings for individual privacy and consent.
Sending a Communication to contacts in selected items
### Export to Report
{% content-ref url="/pages/IwhECOjXodLQkcojUf7P" %}
[Running Reports](/system-administration/reporting/running-reports)
{% endcontent-ref %}
The Export to Report command sends sends either All or Selected items to a specific report.
This typically generates a CSV file.
When you select All, it will copy the is:Active CQL query into the Report Search Query to find all records in the register.
When you choose Selected items, it will [copy the IDs in CQL format](#copy-ids) into the Report Search Query.
### Generate Merge
{% content-ref url="/pages/Z6JVwtr2rm2GS5otnYQ5" %}
[Mail Merge Templates](/system-administration/configuring-the-system/mail-merge-templates)
{% endcontent-ref %}
This command is used to create a mail merge using the Mail Merge Templates facility in registers that support it.
Generate Merge has the option to preview a merged item.
Generate Merge with template selection and Preview Merge option
To generate a merge, select the template using the **Select Template** field then Proceed. These are configured by your System Administrator in the [Mail Merge Templates](/system-administration/configuring-the-system/mail-merge-templates) in the [Admin module](/system-administration/configuring-the-system).
To generate a preview, change the **Merge Action** to *Preview Merge*.
Use the Download File button to download a file to your device.
Merge output with download button
# Searching and Filtering
This page outlines the tools for searching and retrieving records efficiently within each register. This overview provides a concise summary of the key search techniques.
You can use the search and CQL (Crisisworks Query Language) to perform anything from basic text based searches to advanced multi-field and multi-register queries. For detailed syntax and examples refer to the [CQL Reference](/security-and-support/technical-reference/cql-reference).
## Filter/Counter Menu
The Filter/Counter menu contains some handy preconfigured queries which you can use to generate lists of items.
Filter/Counter menu
Main and Assignments are shown at all times and indicates the number of items retrieved by the filter on the right. Urgent or overdue counters are indicated in red, all others are in blue. Open any filter/counter to view the list of matching items. The current query is displayed in the blue [search bar](#search-bar) which you can use to manually refine the set of items.
To view more filters, use the three dots icon . This will open the full set of available filters/counters menus which you can expand to show the full set of filters/counters.
The counter totals stay be up to date, however if you know items have very recently been added or changed and you suspect that the numbers are not up-to-date you can update them using the Refresh icon .
{% hint style="info" %}
Filter/Counters are configured when your site is setup but may be modified by the support team. If you need additional filters or options [contact support](/security-and-support/maintenance-and-support/accessing-support).
{% endhint %}
## Register Filters
To query an individual register:
1. Open/expand the register to access the search box for that register.
2. Use the Filter icon to open the search
The Register search is activated using the filter icon
Register Search enables you to filter the lists with a combination of filters including text searching using the **Contains** field or by data field, for example Date, Name or ID.
Contains works best for specific content such as reference numbers and names.
Filters menu for a register
{% hint style="info" %}
Register filters are configured when your site is setup but may be modified by the support team. If you need additional filters or options [contact support](/security-and-support/maintenance-and-support/accessing-support).
{% endhint %}
### Search bar
An alternative way to search is th Search bar is located in the Navigation bar. It also displays any currently applied filters.
You can run a custom query using the magnifying class icon
{% hint style="info" %}
The Search bar will only search within the currently active Register.
{% endhint %}
To search, enter a CQL query into the white box that opens. The search field supports advanced querying (including wildcards and other search operators) across almost any field in the Register.
Search activated in the Navigation bar
#### Help Reference
A help reference can be found in the search bar using the Help icon  next to the magnifying glass icon.
Once activated you can use the scroll bar to browse CQL query examples or use the link provided to return to this user guide. For advanced queries, please use the [CQL Reference](/security-and-support/technical-reference/cql-reference).
Help reference for search bar
### Sharing Search Results
Collaboration is made easy with the ability to share search results:
1. After conducting a search, copy the URL from the browser's address bar.
2. Share the URL via emails, documents, or bookmark it for future use.
3. Colleagues can click the shared link to access and resurrect the same search results.
By following these steps, users can efficiently navigate the system and retrieve the information they need.
## Clearing the search
Clearing the search is important so that your datagrid does not display unexpected results.
To clear a search, use the Clear button. This will return you to the filter/counter menu.
## Search syntax and concepts
This section contains some of the types of searches you can perform on standard fields.
### Keyword and phrase matching
You can perform keyword queries on any field by entering the field as a prefix with a colon. The Contains field provides a simple way of performing searches across all fields.
Search for the word "clean" in all text fields:
`clean`
Use double quotes to search for records that contain phrases with spaces. For example, to search for the phrase "clean up" in all text fields:
`"clean up"`
### Searching within specific fields
You can reference specific fields by prefixing them with a colon. Consult the technical specification for a full list of field names.
Search for records where the title must equal the word clean
`title:clean`
Wildcard searches are available using the \* symbol. This will search the title field where the first word is “water”. This would return results such as “water”, “waterfall”, “water-pump” or phrases such as “water is needed”.
`title:water*`
Search for records where the word water is anywhere within the title. This would return results with titles such as “I need water”, “Water is required”, “Property water is needed”
`title:*water*`
Search for an empty title field:
`title:none`
Search for whether the title field has a value
`title:any`
The \~ symbol performs SOUNDS LIKE searches. For example, in the contacts register a search such as the one below would return records that sound like “Smith” such as Smyth, Smith, Smath.
`lastName:~Smith`
### AND, OR and NOT searches
By default, when can combine multiple search terms they are combined with an “AND” logic — that is, the results will only contain records that match all search terms.
If you want to change this behaviour, you can explicitly specify the way the search should logical combine the terms by using the words AND, OR and NOT.
This will return records that have both the words water and clean in the title field:
`title:*water* AND title:*clean*`
This will return records that have either the word water or clean in the title field:
`title:*water* OR title:*clean*`
Return items that have the word water in the title but not the word clean in the title:
`title:*water* NOT title:*clean*`
### “is” Searches
Shorthand search syntax has been developed to help simplify some common search queries.
Returns all active items:
`is:active`
Returns active and non-active items:
`is:any`
You can also use the NOT syntax to find all inactive items:
`NOT is:active`
### Using parentheses
Parentheses can be used to group together search terms in a logical way.
For contacts this search below will find records with the first name of Rick and last name of O’Shea OR any user:
`(firstName:Rick AND lastName:O'Shea) OR (isUser:true)`
### Testing if a field contains a value
You can test whether a field is set or unset using the following syntax.
To search for a field containing a value:
`fieldname:any`
to search for a field NOT containing a value
`fieldname:none`
You can also test whether a sub-record has been added for a register. For example in Recovery Case you can return items with no Private Assets:
`privateAssets:none`
You can also search for cases that have one or more private assets added.
`privateAssets:any`
### Operators and Wildcards
The search also supports operators and wildcards.
Some useful examples for beginners are:
| Operator | Usage | Examples |
| -------- | -------------------------------- | -------------------------------------------------------------------------- |
| ? | Substitutes a single character |
|
| none | finds fields without data | title:none |
| any | finds fields with any data | title:any |
### Textual Data and Complex Searches
For searches involving names or textual data, consider the following:
1. Use quotes for multi-word values.
2. Use "Sounds Like" searches by placing the tilde (`~`) character before the search term
3. Use asterisks (`*`) for wildcard searches (e.g., searching for names starting with a specific letter).
4. Implement boolean logic for complex searches using brackets `(` and `)`, as well as `AND`, `OR` and `NOT` keywords.
Examples using fields:
* `firstName:"Cameron Smith"` — will find a field containing a phrase
* `firstName:~April` — will find April and Apryl using a sounds-like search
* `firstName:Sc*` — finds all records beginning with `Sc`, such as Scott, Scot, Scod
* `firstName:Scott or firstName:April` — finds records with a first name of either Scott or April
* `(firstName:Ashley lastName:G*) OR (firstName:Apryl lastName:D*)` — looks for records Ashley G\* and Apryl D\*.
Soundex, phrase and boolean searches can also be performed on full text searches.
### Multi-register queries
You can perform a multi-register query on [registers with sub-items or related items](/concepts-and-fundamentals/on-a-computer/using-the-datagrid/viewing-items#embedded-and-related-items), however to do so you must do so via a field that contains a key for the other register. Consult the CQL technical documentation for further information on which registers and fields are available.
The query a different register, nest the query in brackets following the colon prefix of the key field.
Examples using multi-register queries:
* `relatedcase:(status:resolved)` — will only find related cases with a status of resolved
* `relatedcontacts:(id:123 status:inactive)` — will find related contacts with an ID of 123 and a status of Inactive
# CQL examples
This page contains a series of useful CQL (Crisisworks Query Language) searches for use across all registers.
## Overview
{% content-ref url="/pages/Hqx2rS3kEW8IpmSxPLI7" %}
[Searching and Filtering](/concepts-and-fundamentals/on-a-computer/searching-filtering-and-querying-registers)
{% endcontent-ref %}
CQL (Crisisworks Query Language) can be used to perform advanced searches. They allow you to use structured queries to search for content.
The following search queries can be pasted into the Contains box on the relevant datagrid after you select the filter icon.
Example of CQL search to find all the 'Ricks' and all the 'O'Sheas'
{% hint style="warning" %}
You MUST be in the correct register for these searches to work
{% endhint %}
**Refer to the** [**Reference Lookup Values**](#reference-lookup-values) **table below.**
## Contacts
{% content-ref url="/pages/LA4Q1JYzBEpq4X9RdhIY" %}
[Broken mention](broken://pages/LA4Q1JYzBEpq4X9RdhIY)
{% endcontent-ref %}
The following common CQL searches can be performed in **Operations > Contacts:**
Name searches
Find contacts with the first name of rick or Rick ✔
```sparql
firstName:rick
```
Find contacts with last name matching O’Shea or o’shea ✔
```sparql
lastname:O'Shea
```
Find contacts with first name Rick **and** last name O’Shea (as well as lowercase versions) ✔
```sparql
firstName:Rick lastName:O'Shea
```
Find contacts with first name of Rick and last name of O’Shea or any Crisisworks user. ✔
```sparql
(firstName:Rick lastName:O'Shea) OR (isUser:true)
```
Find contacts that have a first name starting with Ric and contacts with last that sounds like Smith. For example this could return a contact called Rick Smith or Ricky Smyth ✘
```sparql
firstName:Ric* lastName:~Smith
```
Perform a full-text search on all fields with the term Rick ✔
```sparql
"Rick"
```
Media Searches ✔
Find contacts where an avatar file has been uploaded
```sparql
avatar:any
```
Find contacts where the avatar file field is empty
```sparql
avatar:none
```
Find contacts where a signature file has been uploaded
```sparql
signature:any
```
Find contacts where the signature file field is empty
```sparql
signature:none
```
## Requests
{% content-ref url="/pages/6qkLMNrCU6gx9Gj5hsi7" %}
[Broken mention](broken://pages/6qkLMNrCU6gx9Gj5hsi7)
{% endcontent-ref %}
The following common CQL searches can be performed in **Operations > Requests**:
Due date searches ✔
Find items with due date of 25 March 2026
```sparql
due:2026-03-25
```
Find items with an exact due date and time
```sparql
due:"2026-04-01 10:15:00"
```
Find items that were due yesterday
```sparql
due:-1ddue
```
Find items due between the date range provided. For this example it will find all items due between 1st and 20th March 2026
```sparql
due:>2026-03-01 due:<2026-03-20
```
Find items due between between date range and time provided. For this example it will find all items due on 1st April 2026 between 10am and 11am
```sparql
due:>"2026-04-01 10:00:00" due:<"2026-04-01 11:00:00"
```
Find items greater than 7 days ago and less than 6 days ago
```sparql
due:>-7d due:<-6d
```
Find items where no due date is set
```sparql
due:none
```
Find items where the due date is set
```sparql
due:any
```
Requestor searches ✔
Find items where the requestor has a firstName of Rick
```sparql
requestor:(firstName:Rick)
```
Find items where requestor has the firstName of Rick and the lastName of Jones (items must have both of these values set to return a match)
```sparql
requestor:(firstName:Rick lastName:Jones)
```
Find items where the requestor has either the firstName of Rick or the lastName of Jones. For example Rick Smith will be a match and Bob Jones will also be a match.
```sparql
requestor:(firstName:Rick OR lastName:Jones)
```
Find items where no requestor has been set
```sparql
requestor:none
```
Find items that have a requestor set
```sparql
requestor:any
```
Status searches ✔
Find all items in the status of Requested.
```sparql
status:requested
```
Find items in both the Assigned and In Progress statuses. You can use either of these, status key or label.
```sparql
status:[requested,in_progress]
```
```sparql
status:["Requested","In Progress"]
```
Region searches ✘
Find items where the region is not set (ie empty)
```sparql
regionId:none
```
Find items where the region is either not set or set to the region “default”.
```sparql
regionId:[none,default]
```
Assignment searches ✔
Find all items assigned to the MEMO Deputy position.
```sparql
assigned:"MEMO Deputy"
```
Cost Recovery Method searches ✔
Find items where “Cost Recovery Method” is set to None
```sparql
payer:noauth
```
Find items where “Cost Recovery Method” is set to “MEMO - authorised council to pay”
```sparql
payer:council
```
Find items where “Cost Recovery Method” is set to “MERC - authorised as an incident cost”
```sparql
payer:incident
```
Find items where “Cost Recovery Method” is set to “Requestor - authorised and has agreed to pay”
```sparql
payer:requestor
```
Find items where “Cost Recovery Method” is set to “Other”
```sparql
payer:other
```
Media Searches ✔
Find items that have no Attachments uploaded
```sparql
media:none
```
Find items that have Attachments uploaded to the item
```sparql
media:any
```
## Information
{% content-ref url="/pages/nQaLaful7q945ISCYKvS" %}
[Broken mention](broken://pages/nQaLaful7q945ISCYKvS)
{% endcontent-ref %}
The following common CQL searches can be performed in **Operations > Information:**
Promote on Dashboard searches ✔
Find all items that have the “Promote on dashboard” checkbox ticked. Any of these options will work.
```sparql
promoteOnDashboard:true
```
```sparql
promoteOnDashboard:yes
```
```sparql
promoteOnDashboard:1
```
Find all items where the “Promote on dashboard” checkbox is unticked.
```sparql
promoteOnDashboard:0
```
```sparql
promoteOnDashboard:false
```
```sparql
promoteOnDashboard:no
```
Date searches ✔
Find items where the “Expires at” date is before the current date ie Overdue
```sparql
validUntil:2025-01-01
```
Find items where the Schedule A Review checkbox is ticked
```sparql
remind:Yes
```
Find items where Schedule A Review checkbox is ticked, and where Valid from date is after 1st Jan 2026
```sparql
remind:Yes validFrom:>2026-01-01
```
Find items where the Next Review date is after 1st Jan 2025
```sparql
remindAt:>2025-01-01
```
Find items where the Next Review date is after 1st Jan 2025
```sparql
remindAt:none
```
Find items where the Next Review date is set
```sparql
remindAt:any
```
Media Searches ✔
Find items that have no Attachments uploaded
```sparql
media:none
```
Find items that have Attachments uploaded to the item
```sparql
media:any
```
## **Recovery Cases**
{% content-ref url="/pages/Sfj9Pht3MY5OyzcTaJAs" %}
[Broken mention](broken://pages/Sfj9Pht3MY5OyzcTaJAs)
{% endcontent-ref %}
### **Affected Person(s) Searches**
The following common CQL searches can be performed in **Recovery > Cases:**
Affected Person(s) searches
Find cases where the Affected Person is unknown
```sparql
isApplicantKnown:unknown
```
Find cases where the Affected Person is known
```sparql
isApplicantKnown:known
```
Find cases where the Primary Contact has consented to share full details
```sparql
sharingLevel:full
```
Find cases where the Primary Contact have not consented to share their details
```sparql
sharingLevel:none
```
Find cases where the Primary Contact has not been asked about consent to share their details
```sparql
sharingLevel:notYetAsked
```
Find cases where the Primary Contact or group are of Aboriginal or Torres Strait Islander origin
```sparql
ATSIOrigin:yes
```
Below are other ATSI Origin searches where the values are No, Prefer Not to Say or Not Yet Asked
```sparql
ATSIOrigin:noATSIOrigin:preferNotToSaypreferNotToSay:notYetAsked
```
Find cases where the Primary Contact’s Contact Type is set to Individual
```sparql
applicant:(contactType:individual)
```
Find cases where the Primary Contact’s Contact Type is set to Organisation
```sparql
applicant:(contactType:organisation)
```
Find cases where applicants have the First Name set to Kelly. This will be an exact search for the word “Kelly”. If a middle name is set in this field it will not return a result.
```sparql
applicant:(givenNames:Kelly)
```
Alternatively you can use a wildcard search as per the example below which will find results such as Kelly, Kelly-Anne or Kelly Rose.
```sparql
applicant:(givenNames:Kelly*)
```
Find cases where applicants have the Family Name set to Smith
```sparql
applicant:(familyName:Smith)
```
Find cases where the applicant has the Family Name set to Smith and the Given Names that start with the word Kelly
```sparql
applicant:(givenNames:Kelly* AND familyName:Smith)
```
Find cases where the applicant has the Family Name set to either Smith or Brown
```sparql
applicant:(familyName:Smith OR familyName:Brown)
```
Find cases where the applicant has the email address “"
```sparql
applicant:(email:matt.brown@gmail.com)
```
If the entire email address is not known, a wildcard search can be useful. This will find cases where the applicant’s email address has the word brown anywhere in the email address.
```sparql
applicant:(email:*brown*)
```
Property Use searches
Find cases where the Property Use has the Residential checkbox ticked
```sparql
propertyUseResidential:true
```
Find cases that have either the Residential - Primary or the Residential - Secondary checkboxes
```sparql
propertyUseResidentialPrimary:true OR propertyUseResidentialSecondary:true
```
Find cases that do not have the Residential - Primary checkbox ticked.
```sparql
propertyUseResidentialPrimary:false
```
Below is a list of all Property Use search terms that can be used to find one of more property uses:
```sparql
propertyUseResidential:
propertyUseResidentialPrimary:
propertyUseResidentialSecondary:
propertyUseResidentialUnclassified:
propertyUseCommercial:
propertyUseAccommodation:
propertyUseFarm:
propertyUseCommunity:
propertyUseGovernment:
propertyUseVacant:
propertyUseInfrastructure:
propertyUseOther:
```
Private Asset searches
Find cases that have one or more Private Assets added
```sparql
privateAssets:any
```
Find cases that have no Private Assets added
```sparql
privateAssets:none
```
Find cases that have a Private Asset added with the category set to Dwelling
```sparql
privateAssets:(buildingCategory:dwelling)
```
Find cases that have a Private Asset added with the category set to either Dwelling or Equipment
```sparql
privateAssets:(buildingCategory:dwelling OR buildingCategory:equipment)
```
Find cases that have a Private Asset added with the Asset Type set to Dairy
```sparql
privateAssets:(buildingType:dairy)
```
Find cases that have a Private Asset added with the Damage Level set to Totally Destroyed
```sparql
privateAssets:(buildingDamageLabel:Totally Destroyed)
```
Find cases that have a Private Asset with the Category of Dwelling and has the Damage Level set to either “Totally Destroyed” or “Damaged- Habitable / Functioning”.
Note - this query is using the label of the Damage Level field so the label must be entered exactly as it is displayed.
```sparql
privateAssets:(buildingCategory:dwelling AND
buildingDamageLabel:Damaged - Habitable / Functioning OR
buildingDamageLabel:Totally Destroyed)
```
Alternatively you can use a wildcard to search for the word Damaged within the Damage Level label:
```sparql
privateAssets:(buildingCategory:dwelling AND
buildingDamageLabel:Damaged* OR
buildingDamageLabel:Totally*)
```
This will return the same result as the previous search without the need for entering the entire label. This will return all cases that have Private Assets with the Category of Dwelling and has the Damage Level starting with the either the words “Damaged” or “Totally”
Alternatively, you can use the numerical keys of the Damage Level field (which is called buildingDamage in the back end).
```sparql
privateAssets:(buildingCategory:dwelling) AND
privateAssets:(buildingType:dwelling/caravan)
```
This will allow you to perform the following search using these numerical keys
This will return the same result as the previous search where the Private Asset Category is set to Dwelling and has the Damage Level set to either “Damaged- Habitable / Functioning” or “Totally Destroyed”.
```sparql
privateAssets:(buildingCategory:dwelling AND buildingDamage:1 OR buildingDamage:4)
```
Will find private assets with the category of Dwelling where the Is this a Primary Place of Residence checkbox is ticked
```sparql
privateAssets:(buildingCategory:dwelling AND primaryPlaceOfResidence:true)
```
### **Needs & Tasks**
{% content-ref url="/pages/cbvxkWADYBnySUMuIgVf" %}
[Broken mention](broken://pages/cbvxkWADYBnySUMuIgVf)
{% endcontent-ref %}
The following common CQL searches can be performed in **Recovery > Needs & Tasks:**
Need & Task searches
Find cases that have a Needs & Task record with the category set to Accommodation
```sparql
tasks:(category:accommodation)
```
Find cases that have a Needs & Task record with the category set to either Accommodation or Counselling
```sparql
tasks:(category:accommodation OR category:counselling)
```
You can also use the label of the category when searching
```sparql
tasks:(categoryLabel:Accommodation Temporary)
```
You can use wildcard searches when using the label if you’re unsure of the entire label
```sparql
tasks:(categoryLabel:Livestock*)
```
This will return cases that have a Needs & Task record with the category that starts with Livestock. This will return results where the category is set to Livestock Burial, Livestock Feed and Livestock Transport.
### General Case Queries Active cases with no damaged assets and no active tasks searches
Active cases with no damaged assets and no active tasks searches
```sparql
is:active privateAssets:none tasks:none
```
Active cases with active recovery tasks
```sparql
is:active tasks:any
```
Date searches
Find cases where the Referral Date is after 1st Jan 2025
```sparql
referralDate:>2025-01-01
```
Find cases where the Referral Date is not set
```sparql
referralDate:none
```
Find cases where the Referral Date is set
```sparql
referralDate:any
```
Media Searches
Find cases where the field “General Photo(s) of property” is empty
```sparql
photos:none
```
“General Photo(s) of property” field
```sparql
photos:any
```
Find cases where the media field “Case Documents” is empty
```sparql
caseDocuments:none
```
Find cases that have photos uploaded into the “Case Documents” field
```sparql
caseDocuments:any
```
Cases without Secondary Impact Assessments (SIA) inspections
The objective is to find cases that came from the FRV import process that have been incorrectly closed without having an SIA follow-up. It assumes the council is using one or more tags containing `sia` to track cases having SIA data or requirements to collect data.
```sparql
NOT is:active tags:iia-frv NOT tags:*sia*
```
Cases with tasks assigned
The objective is to find active cases where a Needs & Tasks record was created and assigned the MRM Deputy position
```sparql
is:active tasks:(assigned:"MRM Deputy")
```
Reconciling cases with windemere tag against assignments to Windemere
Some councils use tags at the case level to identify records they *want* to assign before assignment actually occurs. They then assign the contractor via Needs & Tasks.
To extend the above recipe, this reconciles cases against the `windemere` tag as follows: the objective is to find records tagged with `windemere` that have NOT been formally referred to Windemere using a Needs & Tasks record.
```sparql
is:active tags:windermere NOT tasks:(assigned:"Windemere")
```
Records Tagged with arborist that don't have a recovery task for “arborist”
We want to find all active records that have a tag starting with "arborist" that don't have a task with a label starting with "arborist" so we can bulk create a new task, note once done remove these tags so you are only working with the needs/tasks for the recovery cases
```sparql
is:active tags:arborist* NOT tasks:(categoryLabel:Arborist*)
```
Find the use of the words tree that doesn’t have a recovery task for “arborist”
Look for words in the case anywhere where "tree" or "arborist" appear where there is no task created yet, so you can bulk add a task, you may want to review each record to be sure
```sparql
tree is:active not tasks:(categoryLabel:Arborist*)
```
Find tagged cases starting with "Fence" that don’t have an affected private asset of "Fence"
We want to find all active records that have a tag starting with "arborist" that don't have a task with a label starting with "arborist" so we can bulk create a new task, note once done remove these tags so you are only working with the needs/tasks for the recovery cases
```sparql
tags:fence* NOT privateAssets:(buildingTypeLabel:Fencing)
```
Find tagged cases starting with "Fence" that don’t have an affected private asset of "Fence"
We want to find all active records that have a tag starting with "arborist" that don't have a task with a label starting with "arborist" so we can bulk create a new task, note once done remove these tags so you are only working with the needs/tasks for the recovery cases
```sparql
tags:fence* NOT privateAssets:(buildingTypeLabel:Fencing)
```
### Private Assets
{% content-ref url="/pages/eIC3EKq3W5hWtAu59Baw" %}
[Broken mention](broken://pages/eIC3EKq3W5hWtAu59Baw)
{% endcontent-ref %}
The following common CQL searches can be performed in **Recovery > Private Assets:**
Private assets without a building type ✔
This CQL finds open records without a buildingType attribute, which is typically a mistake.
```sparql
is:active buildingType:none
```
Private assets with no related Case ✔
This CQL finds any private assets with an 'active' status that have been removed from a Case.
```sparql
is:active not relatedcase:(status:any)
```
Private asset dwellings as primary residence, destroyed or uninhabitable, with a related Case ✔
This CQL finds any private assets with an 'active' status, has buildingCategory of 'dwelling' that is a primaryPlaceofResidence, is linked to an active Case and is either destroyed or uninhabitable.
```sparql
is:active
buildingCategory:dwelling buildingdamage:[4,2]
primaryplaceofresidence:Yes
relatedcase:(status:any)
```
Private assets caravans linked to an active Case ✔
Private assets with category of dwelling and building Type of Caravan
```sparql
buildingCategory:dwelling AND
buildingType:dwelling/caravan
relatedcase:(status:any)
```
Private assets with an attachment uploaded without the tag import ✔
This CQL finds open records with a PDF uploaded that do not have the tag `import`
```sparql
is:active photos:any NOT tags:import
```
### Environmental Health Assessments
{% content-ref url="/pages/3f5gt65zzLPgcI3VkrJq" %}
[Broken mention](broken://pages/3f5gt65zzLPgcI3VkrJq)
{% endcontent-ref %}
The following common CQL searches can be performed in **Recovery > Environmental Health:**
EHAs in ‘inspection required’ even though the inspection was conducted
Some inspections were conducted but the status incorrectly set to ‘inspection required’. We can achieve this by checking if one of the inspection fields has been set.
```sparql
electricityOnsite:any status:inspection-required
```
EHAs in ‘inspection required’ and no inspection was conducted
```sparql
electricityOnsite:none status:inspection-required
```
EHAs with no related Case ✔
This CQL finds any environmental health assessments with an 'active' status that have been removed from a Case.
```sparql
is:active not relatedcase:(status:any)
```
### Infrastructure Assessments
{% content-ref url="/pages/S4Vi1g255T0pGZOB48B9" %}
[Broken mention](broken://pages/S4Vi1g255T0pGZOB48B9)
{% endcontent-ref %}
The following common CQL searches can be performed in **Recovery > Infrastructure:**
Infrastructure searches
Find Infrastructure Assessments with the type of either Council Facility or Council Property with the Damage Level of either “Damaged- Habitable / Functioning” or “Unknown - Requires Assessment”
```sparql
is:active AND (infrastructureType:property OR infrastructureType:facility)
AND (damageLevel:1 OR damageLevel:5)
```
## Reference Lookup Values
| Category | Label | Value |
| ------------------------------ | ------------------------------------ | ------------------------------ |
| Building Category | Dwelling | dwelling |
| Building Category | Facility | facility |
| Building Category | Structure | structure |
| Building Category | Equipment | equipment |
| Building Category | Vehicle | vehicle |
| Building Category | Other | other |
| Building Type | Bikes | vehicle/bike |
| Building Type | Boats | vehicle/boat |
| Building Type | Business Economic Impact | other/business-economic-impact |
| Building Type | Cars | vehicle/car |
| Building Type | Caravans | dwellling/caravan |
| Building Type | Community Centre(s) | facility/community |
| Building Type | Dairy | equipment/dairy |
| Building Type | Other Dwelling | dwelling/other |
| Building Type | Other Equipment | equipment/other |
| Building Type | Other Facility | facility/other |
| Building Type | Fencing | structure/fencing |
| Building Type | Flats/Units | dwelling/flat |
| Building Type | Government | facility/gov |
| Building Type | Holiday House | dwelling/holiday-house |
| Building Type | Holiday Rental | dwelling/holiday-rental |
| Building Type | A Primary Place of Residence | dwelling/house |
| Building Type | Irrigation Pumps | equipment/irrigation |
| Building Type | Machinery | equipment/machinery |
| Building Type | Other | other/other |
| Building Type | Shed/s | structure/shed |
| Building Type | Shops/Factories | facility/shop |
| Building Type | Other Structure | structure/other |
| Building Type | Tank | structure/tank |
| Building Type | Trailers | vehicle/trailers |
| Building Type | Other Vehicle | vehicle/other |
| Building Damage (Damage Level) | Habitable / Functioning | 1 |
| Building Damage (Damage Level) | Uninhabitable / Non-Functioning | 2 |
| Building Damage (Damage Level) | Partially Destroyed (no longer used) | 3 |
| Building Damage (Damage Level) | Destroyed | 4 |
| Building Damage (Damage Level) | Unknown - Requires Assessment | 5 |
| Building Damage (Damage Level) | Not Damaged | 6 |
# Copy of CQL examples
This page contains a series of useful CQL (Crisisworks Query Language) searches for use across all registers.
## Overview
{% content-ref url="/pages/Hqx2rS3kEW8IpmSxPLI7" %}
[Searching and Filtering](/concepts-and-fundamentals/on-a-computer/searching-filtering-and-querying-registers)
{% endcontent-ref %}
CQL (Crisisworks Query Language) can be used to perform advanced searches. They allow you to use structured queries to search for content.
The following search queries can be pasted into the Contains box on the relevant datagrid after you select the filter icon.
Example of CQL search to find all the 'Ricks' and all the 'O'Sheas'
{% hint style="warning" %}
You MUST be in the correct register for these searches to work
{% endhint %}
## Registers
### Contacts
{% content-ref url="/pages/LA4Q1JYzBEpq4X9RdhIY" %}
[Broken mention](broken://pages/LA4Q1JYzBEpq4X9RdhIY)
{% endcontent-ref %}
The following common CQL searches can be performed on the Contacts Register
#### **First and Last Name searches**
Find contacts with the first name of rick or Rick
`firstName:rick`
Find contacts with last name matching O’Shea or o’shea
`lastname:O'Shea`
Find contacts with first name Rick **and** last name O’Shea (as well as lowercase versions)
`firstName:Rick lastName:O'Shea`
Find contacts with first name of Rick and last name of O’Shea or any Crisisworks user.
`(firstName:Rick lastName:O'Shea) OR (isUser:true)`
Find contacts that have a first name starting with Ric and contacts with last that sounds like Smith. For example this could return a contact called Rick Smith or Ricky Smyth
`firstName:Ric* lastName:~Smith`
Perform a full-text search on all fields with the term Rick
`"Rick"`
#### **Media searches**
Find contacts where an avatar file has been uploaded
`avatar:any`
Find contacts where the avatar file field is empty
`avatar:none`
Find contacts where a signature file has been uploaded
`signature:any`
Find contacts where the signature file field is empty
`signature:none`
### Requests
{% content-ref url="/pages/6qkLMNrCU6gx9Gj5hsi7" %}
[Broken mention](broken://pages/6qkLMNrCU6gx9Gj5hsi7)
{% endcontent-ref %}
The following common CQL searches can be performed on the Request register.
#### **Due Date searches**
Find items with due date of 1st March 2023
`due:2023-05-01`
Find items with an exact due date and time
`due: 2023-05-01 01:01:01`
Find items that were due yesterday.
`due:-1ddue:now-1d`
Find items due between the date range provided. For this example it will find all items due between 1st May and 3rd May 2024
`due:>2024-05-01 due:<2024-05-03`
Find items due between between date range and time provided. For this example it will find all items due on 1st May 2024 between 10am and 11am.
`due:>"2024-05-01 10:00:00" due:<"2024-05-01 11:00:00`
Find items greater than 7 days ago and less than 6 days ago.
`due:>-7d due:<-6d`
Find items where no due date is set
`due:none`
Find items where the due date is set
`due:any`
#### **Requestor searches**
Find items where the requestor has a firstName of Rick
`requestor:(firstName:Rick)`
Find items where requestor has the firstName of Rick and the lastName of Jones (items must have both of these values set to return a match)
`requestor:(firstName:Rick lastName Jones)`
Find items where the requestor has either the firstName of Rick or the lastName of Jones. For example Rick Smith will be a match and Bob Jones will also be a match.
`requestor:(firstName:Rick OR lastName:Jones)`
Find items where no requestor has been set
`requestor:none`
Find items that have a requestor set
`requestor:any`
#### **Status searches**
Find all items in the status of Requested.
`status:requested`
Find items in both the Assigned and In Progress statuses. You can use either the status key or label.
`status:[requested,in_progress]status:["Requested","In Progress"]`
#### **Region searches**
Find items where the region is not set (ie empty)
`regionId:none`
Find items where the region is either not set or set to the region “default”.
`regionId:[none,default`
#### **Assignment searches**
Find all items assigned to the MEMO Deputy position.
`assigned:"MEMO Deputy"`
#### **Cost Recovery Method searches**
Find items where “Cost Recovery Method” is set to None
`payer:noauth`
Find items where “Cost Recovery Method” is set to “MEMO - authorised council to pay”
`payer:council`
Find items where “Cost Recovery Method” is set to “MERC - authorised as an incident cost”
`payer:incident`
Find items where “Cost Recovery Method” is set to “Requestor - authorised and has agreed to pay”
`payer:requestor`
Find items where “Cost Recovery Method” is set to “Other”
`payer:other`
#### **Media searches**
Find items that have no Attachments uploaded
`media:none`
Find items that have Attachments uploaded to the item
`media:any`
### Information
{% content-ref url="/pages/nQaLaful7q945ISCYKvS" %}
[Broken mention](broken://pages/nQaLaful7q945ISCYKvS)
{% endcontent-ref %}
#### **Promote on Dashboard Searches**
Find all items that have the “Promote on dashboard” checkbox ticked.
`promoteOnDashboard:truepromoteOnDashboard:1promoteOnDashboard:yes`
Find all items where the “Promote on dashboard” checkbox is unticked.
`promoteOnDashboard:0promoteOnDashboard:falsepromoteOnDashboard:no`
#### **Date searches**
Find items where the “Expires at” date is before the current date ie Overdue
`validUntil:2025-01-01`
Find items where the Schedule A Review checkbox is ticked
`remind:Yes`
Find items where the Next Review date is after 1st Jan 2025
`remindAt:>2025-01-01`
Find items where the Next Review date is after 1st Jan 2025
`remindAt:none`
Find items where the Next Review date is set
`remindAt:any`
#### **Media searches**
Find items that have no Attachments uploaded
`media:none`
Find items that have Attachments uploaded to the item
`media:any`
### **Recovery Cases**
{% content-ref url="/pages/Sfj9Pht3MY5OyzcTaJAs" %}
[Broken mention](broken://pages/Sfj9Pht3MY5OyzcTaJAs)
{% endcontent-ref %}
#### **Affected Person(s) Searches**
Find cases where the Affected Person is unknown
`isApplicantKnown:unknown`
Find cases where the Affected Person is known
`isApplicantKnown:known`
Find cases where the Primary Contact has consented to share full details
`sharingLevel:full`
Find cases where the Primary Contact have not consented to share their details
`sharingLevel:none`
Find cases where the Primary Contact has not been asked about consent to share their details.
`sharingLevel:notYetAsked`
Find cases where the Primary Contact or group are of Aboriginal or Torres Strait Islander origin.
`ATSIOrigin:yes`
Below are other ATSI Origin searches where the values are No, Prefer Not to Say or Not Yet Asked.
`ATSIOrigin:noATSIOrigin:preferNotToSaypreferNotToSay:notYetAsked`
Find cases where the Primary Contact’s Contact Type is set to Individual.
`applicant:(contactType:individual)`
Find cases where the Primary Contact’s Contact Type is set to Organisation.
`applicant:(contactType:organisation)`
Find cases where applicants have the First Name set to Kelly.
Note this will be an exact search for the word “Kelly”. If a middle name is set in this field it will not return a result.
`applicant:(givenNames:Kelly)`
Alternatively you can use a wildcard search as per the example below which will find results such as Kelly, Kelly-Anne or Kelly Rose.
`applicant:(givenNames:Kelly*)`
Find cases where applicants have the Family Name set to Smith
`applicant:(familyName:Smith)`
Find cases where the applicant has the Family Name set to Smith and the Given Names that start with the word Kelly
`applicant:(givenNames:Kelly* AND familyName:Smith)`
Find cases where the applicant has the Family Name set to either Smith or Brown
`applicant:(familyName:Smith OR familyName:Brown)`
Find cases where the applicant has the email address “`matt.brown@gmail.com`"
`applicant:(email:matt.brown@gmail.com)`
If the entire email address is not known, a wildcard search can be useful.
This will find cases where the applicant’s email address has the word brown anywhere in the email address.
`applicant:(email:*brown*)`
**Property Use Searches**
Find cases where the Property Use has the Residential checkbox ticked
`propertyUseResidential:true`
Find cases that have either the Residential - Primary or the Residential - Secondary checkboxes
`propertyUseResidentialPrimary:true OR propertyUseResidentialSecondary:true`
Find cases that do not have the Residential - Primary checkbox ticked.
`propertyUseResidentialPrimary:false`
Below is a list of all Property Use search terms that can be used to find one of more property uses:
`propertyUseResidential propertyUseResidentialPrimary propertyUseResidentialSecondary propertyUseResidentialUnclassified propertyUseCommercial propertyUseAccommodation propertyUseFarm propertyUseCommunity propertyUseGovernment propertyUseVacant propertyUseInfrastructure propertyUseOther`
**Private Asset searches**
Find cases that have one or more Private Assets added
`privateAssets:any`
Find cases that have no Private Assets added
`privateAssets:none`
Find cases that have a Private Asset added with the category set to Dwelling
`privateAssets:(buildingCategory:dwelling)`
Find cases that have a Private Asset added with the category set to either Dwelling or Equipment
`privateAssets:(buildingCategory:dwelling OR buildingCategory:equipment)`
Find cases that have a Private Asset added with the Asset Type set to Dairy
`privateAssets:(buildingType:dairy)`
Find cases that have a Private Asset added with the Damage Level set to Totally Destroyed
`privateAssets:(buildingDamageLabel:Totally Destroyed)`
Find cases that have a Private Asset with the Category of Dwelling and has the Damage Level set to either “Totally Destroyed” or “Damaged- Habitable / Functioning”.
Note - this query is using the label of the Damage Level field so the label must be entered exactly as it is displayed.
`privateAssets:(buildingCategory:dwelling AND buildingDamageLabel:Damaged - Habitable / Functioning OR buildingDamageLabel:Totally Destroyed)`
Alternatively you can use a wildcard to search for the word Damaged within the Damage Level label:
`privateAssets:(buildingCategory:dwelling AND buildingDamageLabel:Damaged* OR buildingDamageLabel:Totally*)`
This will return the same result as the previous search without the need for entering the entire label. This will return all cases that have Private Assets with the Category of Dwelling and has the Damage Level starting with the either the words “Damaged” or “Totally”
Alternatively, you can use the numerical keys of the Damage Level field (which is called buildingDamage in the back end).
`privateAssets:(buildingCategory:dwelling) AND privateAssets:(buildingType:dwelling/caravan)`
#### Reference Lookup Values
| Category | Label | Value |
| ------------------------------ | --------------------------------- | ------------------------------ |
| Building Category | Dwelling | dwelling |
| Building Category | Facility | facility |
| Building Category | Structure | structure |
| Building Category | Equipment | equipment |
| Building Category | Vehicle | vehicle |
| Building Category | Other | other |
| Building Type | Bikes | vehicle/bike |
| Building Type | Boats | vehicle/boat |
| Building Type | Business Economic Impact | other/business-economic-impact |
| Building Type | Cars | vehicle/car |
| Building Type | Caravans | dwellling/caravan |
| Building Type | Community Centre(s) | facility/community |
| Building Type | Dairy | equipment/dairy |
| Building Type | Other Dwelling | dwelling/other |
| Building Type | Other Equipment | equipment/other |
| Building Type | Other Facility | facility/other |
| Building Type | Fencing | structure/fencing |
| Building Type | Flats/Units | dwelling/flat |
| Building Type | Government | facility/gov |
| Building Type | Holiday House | dwelling/holiday-house |
| Building Type | Holiday Rental | dwelling/holiday-rental |
| Building Type | A Primary Place of Residence | dwelling/house |
| Building Type | Irrigation Pumps | equipment/irrigation |
| Building Type | Machinery | equipment/machinery |
| Building Type | Other | other/other |
| Building Type | Shed/s | structure/shed |
| Building Type | Shops/Factories | facility/shop |
| Building Type | Other Structure | structure/other |
| Building Type | Tank | structure/tank |
| Building Type | Trailers | vehicle/trailers |
| Building Type | Other Vehicle | vehicle/other |
| Building Damage (Damage Level) | Damaged - Habitable / Functioning | 1 |
| Building Damage (Damage Level) | Inaccessible / Non-Functioning | 2 |
| Building Damage (Damage Level) | Partially Destroyed | 3 |
| Building Damage (Damage Level) | Totally Destroyed | 4 |
| Building Damage (Damage Level) | Unknown - Requires Assessment | 5 |
| Building Damage (Damage Level) | Not Damaged | 6 |
This will allow you to perform the following search using these numerical keys
This will return the same result as the previous search where the Private Asset Category is set to Dwelling and has the Damage Level set to either “Damaged- Habitable / Functioning” or “Totally Destroyed”.\
\
`privateAssets:(buildingCategory:dwelling AND buildingDamage:1 OR buildingDamage:4)`
Will find private assets with the category of Dwelling where the Is this a Primary Place of Residence checkbox is ticked
`privateAssets:(buildingCategory:dwelling AND primaryPlaceOfResidence:true)`
### **Needs and Tasks**
{% content-ref url="/pages/cbvxkWADYBnySUMuIgVf" %}
[Broken mention](broken://pages/cbvxkWADYBnySUMuIgVf)
{% endcontent-ref %}
Find cases that have a Needs & Task record with the category set to Accommodation.
`tasks:(category:accommodation)`
Find cases that have a Needs & Task record with the category set to either Accommodation or Counselling
`tasks:(category:accommodation OR category:counselling)`
You can also use the label of the category when searching.
`tasks:(categoryLabel:Accommodation Temporary)`
You can use wildcard searches when using the label if you’re unsure of the entire label
`tasks:(categoryLabel:Livestock*)`
This will return cases that have a Needs & Task record with the category that starts with Livestock. This will return results where the category is set to Livestock Burial, Livestock Feed and Livestock Transport.
### General Case Queries
#### Active cases with no damaged assets and no active tasks
`is:active privateAssets:none tasks:none`
Active cases with active recovery tasks
`is:active tasks:any`
Date searches
Find cases where the Referral Date is after 1st Jan 2025
`referralDate:>2025-01-01`
Find cases where the Referral Date is not set
`referralDate:none`
Find cases where the Referral Date is set
`referralDate:any`
**Media searches**
Find cases where the field “General Photo(s) of property” is empty
`photos:none`
“General Photo(s) of property” field
`photos:any`
Find cases where the media field “Case Documents” is empty
`caseDocuments:none`
Find cases that have photos uploaded into the “Case Documents” field
`caseDocuments:any`
#### IIA cases without SIA inspections
The objective is to find cases that came from the FRV import process that have been incorrectly closed without having an SIA follow-up. It assumes the council is using one or more tags containing `sia` to track cases having SIA data or requirements to collect data.
Case CQL:
`NOT is:active tags:iia-frv NOT tags:*sia*`
#### Cases with tasks assigned
The objective is to find active cases where a Needs & Tasks record was created and assigned the MRM Deputy position
`is:active tasks:(assigned:"MRM Deputy")`
#### Reconciling cases with `windemere` tag against assignments to Windemere.
Some councils use tags at the case level to identify records they *want* to assign before assignment actually occurs. They then assign the contractor via Needs & Tasks.
To extend the above recipe, this reconciles cases against the `windemere` tag as follows: the objective is to find records tagged with `windemere` that have NOT been formally referred to Windemere using a Needs & Tasks record.
Case CQL:
`is:active tags:windermere NOT tasks:(assigned:"Windemere")`
#### Records Tagged with arborist that don't have a recovery task for “arborist”
We want to find all active records that have a tag starting with "arborist" that don't have a task with a label starting with "arborist" so we can bulk create a new task, note once done remove these tags so you are only working with the needs/tasks for the recovery cases
`is:active tags:arborist* NOT tasks:(categoryLabel:Arborist*)`
#### Find the use of the words `tree` that doesn’t have a recovery task for “arborist”
look for words in the case anywhere where "tree" or "arborist" appear where there is no task created yet, so you can bulk add a task, you may want to review each record to be sure
`tree is:active not tasks:(categoryLabel:Arborist*)`
#### Find tagged cases starting with "Fence" that don’t have an affected private asset of "Fence"
`tags:fence* NOT privateAssets:(buildingTypeLabel:Fencing)`
### Private Assets
{% content-ref url="/pages/eIC3EKq3W5hWtAu59Baw" %}
[Broken mention](broken://pages/eIC3EKq3W5hWtAu59Baw)
{% endcontent-ref %}
#### Private assets without a building type
This CQL finds open records without a buildingType attribute, which is typically a mistake.
Private Asset CQL:
`is:active buildingType:none`
#### Private assets with no related Case
This CQL finds any private assets with an 'active' status that have been removed from a Case.
`is:active not relatedcase:(status:any)`
#### Private assets with an attachment uploaded without the tag `import`
This CQL finds open records with a PDF uploaded that do not have the tag `import`
`is:active photos:any NOT tags:import`
Private assets with category of dwelling and building Type of Caravan
`buildingCategory:dwelling AND buildingType:dwelling/caravan`
### Environmental Health Assessments
{% content-ref url="/pages/3f5gt65zzLPgcI3VkrJq" %}
[Broken mention](broken://pages/3f5gt65zzLPgcI3VkrJq)
{% endcontent-ref %}
#### EHAs in ‘inspection required’ even though the inspection was conducted
Some inspections were conducted but the status incorrectly set to ‘inspection required’. We can achieve this by checking if one of the inspection fields has been set.
EHA CQL:
`electricityOnsite:any status:inspection-required`
#### EHAs in ‘inspection required’ and no inspection was conducted
`electricityOnsite:none status:inspection-required`
### Infrastructure Assessments
{% content-ref url="/pages/S4Vi1g255T0pGZOB48B9" %}
[Broken mention](broken://pages/S4Vi1g255T0pGZOB48B9)
{% endcontent-ref %}
Find Infrastructure Assessments with the type of either Council Facility or Council Property with the Damage Level of either “Damaged- Habitable / Functioning” or “Unknown - Requires Assessment”
`is:active AND (infrastructureType:property OR infrastructureType:facility) AND (damageLevel:1 OR damageLevel:5)`
Below are the Damage Level numerical keys:
`Damaged - Habitable / Functioning = 1 Inaccessible / Non-Functioning = 2 Partially Destroyed = 3 Totally Destroyed = 4 Unknown - Requires Assessment = 5 Not Damaged = 6`
This will allow you to perform searches on the damageLevel field using these numerical keys
# Working within Events
This page describes how to manage and use events.
## Overview
Events are flexible, secure groupings of related records, people, positions and audit history.
The [Positions you are on duty](#joining-events) with in an event will determine the functions available to you, including the menus, registers and workspaces.
Events can be used for:
* an incident (disaster, emergency)
* project, or block of work (such as permits, patrols, journals etc)
* testing or training, ‘Test’ events can be used for practice, all email and text notifications will be marked as \*\*TEST\*\*
When an event is completed, all related information and records are retained.
Only administrators can [create Events](/system-administration/managing-events).
You can participate in multiple Events simultaneously if your position is added to them by [going on duty to multiple events](#joining-events).
{% hint style="info" %}
The system tries to intelligently determine which event you wish to work in.
* If you are going on duty only to positions within one event, Crisisworks will switch you automatically to that event.
* If you select multiple positions across multiple events, the system assumes you will be working across multiple events and places you into All Participating Events mode. You can then select an individual event by selecting one from the event menu
If you sign in but don't modifying your duty status, then the system will stay in your last selected event.
{% endhint %}
## Events Menu
The Events menu (or Events selector) allows you to join and switch between Events. You can find it second from the top right in the menu bar.
Location of the Events menu
### Primary Event
The primary event is the one you have selected, and determines where records will be added.
This event is displayed at all times along the main menu above the events menu and is highlighted in green on the events menu.
Primary Event indicated in the menu bar, and in green under 'Select an Event'
### Accessing the Events list
The currently selected event is indicated in green. To open the Events menu use the down arrow
The opened Events menu
### Working in 'All Events'
It is possible to not have an event selected (such as if your system has no active events or if you have not gone on duty). In this case 'All Events' may be selected or highlighted.
When working with all events, the dashboards and recent activity will aggregate information across all events in the system. Registers will also show items across all events.
When working with all events, you will need to manually select the event you wish to add items to.
Some actions require you to have an event selected.
{% hint style="info" %}
Unless you're an experienced user, it may be confusing working in All Events mode so it is recommended, instead, to select an event.
{% endhint %}
### Selecting a Primary Event
To select a primary event:
1. Open the Events menu
2. Select the Event from the list
3. The Primary Event in the main menu bar will update to show the selected Event.
If there are no events in the system, it will default to 'All Events'.
### Working in a Single event
The Event Menu displays the name of the currently selected event. Clicking the event's name will take you to the **Events and Duties** page where you can view the events you have joined; change the positions you are on duty for; and join or leave events.
To view all current events, select **View All Events.** This will take you to the Event datagrid showing all your Active events.
Use the down arrow  to open the Event menu. This shows a list of all participating events and a selection of items under Manage Events, including:
* **Join Another Event** — to join an event not listed
* **View Event** — to view, and if permitted, edit details of the current selected event
* **View Currently On Duty** — for a list of users on duty list by their Position
* **View all Events** — (if available) to view all Events and edit settings
* **Create Event** - (if available) to create a new event
Administrators and coordinators will get additional options (shown below) to manage the current event, manage all events, and even create a new event.
{% hint style="info" %}
**All Events** mode is useful for viewing records across multiple events at once, but it is not possible to add records, nor assign records to users or positions, when in this mode. Users are recommended to select a specific event and work within it as much as possible.
{% endhint %}
### Switching between Events
To switch events, you can select it from the events menu and it will change to a green tick.
## Setting your Duties for Events
Your duties determine what you can see and do in the system. When you first sign in your duty status will be set to 'Not on duty'. To begin working, you will need to go on duty by joining an event.
Additionally, your duty status lets other know if you are available to perform your tasks.
{% hint style="info" %}
To add positions to your account, you must have System Administration Access. If your access level updated, please contact your system administrator.
{% endhint %}
There are two ways to set your duties for events or go on duty:
1. via **Join an Event** under the Events menu, OR
2. via **Go on or Off Duty** under the User Profile menu (refer to the section on [Your User Account](/concepts-and-fundamentals/on-a-computer/your-user-profile-and-duties) for details on this method)
### Changing Duties via the Events menu
To change your duties via the Events menu:
1. Select **Not on Duty** or **Join an Event** from the events menu to access the **Events and Duties** screen\

2. To quickly go on duty for all available positions, click **Join** next to the event
3. To choose specific positions:
* Expand 'You're off duty' (in red) under the event
* Use the search bar to filter for a specific event, if needed
* Tick the checkbox next to the positions(s) that match your role
4. To go on duty for multiple events at once:
* Select your desired positions under each event
* Click **Update Duties**
This will put you on duty to the event with your position(s).
## Viewing Event Details
You may need to view an event's details, such as what type of event it is (eg. the severity or, whether it is a test event) when it started and which Registers and Positions are involved.
{% hint style="info" %}
Access to the Event screens may be restricted to administrators. You will only see the Events that are available to your position.
{% endhint %}
To view an event's details:
1. Open the Events menu
2. Under 'Manage Events', select 'View Event'
3. Open the event from the Events register datagrid to view the details
View Event under Manage Events in the Events menu
### General Information
The General Information section includes the main details for an Event.
Example event general details page showing the type of Event, when it started and other relevant information
### Currently On Duty
Currently on Duty provides a useful report of all the Positions active for an Event and the individual team member's duty, on call status, contact phone, email and a link to their Contact profile. This helps coordinate team activities during an Event.
Sample Currently on Duty list
## Viewing a List of Events
Administrators can view and manage the Events list.
Refer to: [View All Events](/system-administration/managing-events#view-all-events)
## Joining Events
To join another event:
1. Access the Events menu
2. In the menu select 'Join Another Event'
3. [Update your duties for that event](#setting-your-duties-for-events)
When joined to more than one event, registers will show a mix of events simultaneously in the Event column.
## Leaving Events
To leave Events you can [Go On or Off Duty](/concepts-and-fundamentals/on-a-computer/your-user-profile-and-duties#go-on-or-off-duty) or in the Events menu:
* Select 'Join Another Event'
* [Remove your duties for that event](/concepts-and-fundamentals/on-a-computer/your-user-profile-and-duties#setting-your-duties-for-events)
To leave all events you are currently joined:
1. Access the Events menu
2. In the menu select ‘Join Another Event'
3. At the bottom of the join Events screen use the red 'Leave Event' button
# Mapping and Assets
This page explains some of the ways maps and assets can be used and configured.
Maps form a key part of the common operating picture during an event.
Users interact with the maps without the need to learn to use complex Geographical Information Systems (GIS) software.
The system has an extremely robust base for mapping that supports various mapping standards and interoperability with GIS software.
A GIS can still be used in conjunction with the system for more detailed information if such technical resources are available.
There are two components of mapping:
* Maps - used to navigate, view and filter geospatial data
* Assets - used for storing, maintaining and resolving addresses and locality information
Maps provide key information relevant to the event. Maps are also used to capture optional geographical information when register items are added or edited.
The mapping system supports overlays with:
* Markers (points)
* Lines (linetrings)
* Areas and regions (polygon and radius)
## Mapping Functions for Users
There are several ways for users to navigate and interact using maps to access items and assets:
* [Map View](/concepts-and-fundamentals/on-a-computer/using-the-datagrid#map-view) - for Registers, includes navigating the map on the web or [mobile app](/concepts-and-fundamentals/mobile-app), filtering items and opening them from the map, and selecting overlays and base layers
Viewing items in map view
Map Layer selection including Overlays and Base Layers
* [Location selection](/concepts-and-fundamentals/on-a-computer/using-the-datagrid/editing-items#location) - for Register items, when users edit items they can use the map to retrieve nearby assets and record geographical information including:
* Text based searching
* Map based searching (including near me searches using device GPS and the mobile app)
* Marking the current location (using device GPS and the mobile app)
* Annotating the map (and drawing)
### Library Geospatial Feature
{% content-ref url="/pages/d776FxR0tnyTxbLSJAIw" %}
[Broken mention](broken://pages/d776FxR0tnyTxbLSJAIw)
{% endcontent-ref %}
Users can create geospatial features for one or more events using the Library module [Geospatial Feature](broken://pages/d776FxR0tnyTxbLSJAIw) items.
With this feature it is also possible to configure areas to search within.
### Administration
#### Managing Map Layers
{% content-ref url="/pages/V4jLM1IssxsTb9Io5xm1" %}
[Map Layers](/system-administration/configuring-the-system/map-layers)
{% endcontent-ref %}
Administrators can manage map layers using the [Map Layers](/system-administration/configuring-the-system/map-layers) register including:
* Base Layers — provide the base tile data such as roads, topographical data and satellite imagery from a wide range of sources
* Feature Layer — provides data based on other data within the system or data from external systems
Real-time feeds are also supported (for example, a fire front updated as it moves).
Depending on your region and configuration, your system may have some default layers set up for you. It also supports a wide range of formats and options for importing base layers and register layers including Geospatial features through the Library module.
Example of a feature layer to define a zone (area filled in green)
#### Property and Assets Database
Refer to: [Assets](/concepts-and-fundamentals/concepts-and-fundamentals#sites-and-regions)
{% hint style="info" %}
To supply your own asset data for asset lookups please lodge a support request and speak with our service desk. The system can support a flexible range of geospatial asset types including Shapefile, TAB file and open formats, and the system can transform between projections. The process involves an initial assessment of the data along with the creation of an import parser rule, and following that, the data can be automatically imported at regular intervals.
{% endhint %}
# Notifications and Alerts
This section explains the notification and alert system which automatically updates users by SMS and email based on their communication preferences.
The system uses email and SMS to help keep users up to date with workflows while they aren't signed in based on [communication preferences and email subscriptions](/concepts-and-fundamentals/on-a-computer/your-user-profile-and-duties).
## Overview
There are three types of notification:
* **Workflow notifications** inform users when items have an important change in their workflow — for example, when an item is assigned or becomes due.
* **Item Updates** inform users when changes are made to content in their assigned items
* **System messages** are sent occasionally when users ask the system to perform a long running action, or resulting from a user action such as resetting a password.
### Assignment notifications
When an item is first assigned to a user (or one of the user's on-duty positions), then an assignment email will be sent to that user.
The assignment email contains a high-level summary of the assignment and its key fields, and is intended to introduce the item to that user.
### Update notifications
Whenever an item is updated, the system will schedule a notification for the assigned users. The speed in which the update is sent is largely determined by the item's priority — high priority items are sent as soon as possible, whereas lower priority items are grouped together to prevent email overload and sent once per hour (see Notification Schedule below).
Unassigned items do not generate notifications because no user is responsible for the item.
### Due date notifications
Some registers support a "Due" or "Next Action Date" field (e.g. [Requests](broken://pages/6qkLMNrCU6gx9Gj5hsi7)). For these items, the system sends a notification to the assigned user(s) at the time the item becomes due.
Depending on the register, sometimes these fields support both a date and time to be specified, while others only support a date.
* If the due date supports a time component, it will check if the time has been set to midnight (which is the default). If the time has been set to midnight then the notification is sent at 9am on that date. If the time is set to something other than midnight, the due notification will be sent at that time. If the due date field only allows the entry of a date, then the notification is sent at 9 a.m. on that date.
* If the record is resolved before the due date, the scheduled notification will be cancelled.
* Only one notification will go out to the assignee when the due date occurs, it will not constantly send out notifications after the due date.
* If a new due date is entered for the record before the due date is reached, the previously scheduled notification is cancelled and a new notification is scheduled for the new due date.
* If an item has an existing due date and the item is saved without changing the due date, no overdue notification will be received.
## Notification Schedule
In order to help users keep on top of important notices and reduce the overall volume of email, the system has logic to batch lower-priority updates to send less frequently, and to send higher importance updates more frequently. Also, the system has intelligence to not send notifications where you made the change yourself.
Emails will be generated only if content has changed, and they are
| Priority | Send schedule |
| ------------------- | --------------------------------------------------------- |
| High or Urgent | As soon as possible, often as a single targeted email |
| Normal, Low or None | Approximately hourly, often containing a batch of updates |
Notifications for bulk actions are sent according to the priority of the highest-priority item in the batch.
{% hint style="info" %}
Email notifications for register items are generally sent hourly. Where urgent notifications are required for register item assignments and overdue notifications, make sure users have opted in to SMS notifications instead.
{% endhint %}
## User Profile Settings
The following user profile settings control how email and SMS are sent to users.
* Received communications by Email
* Receive communications by SMS
An administrator can also set these on behalf of a user.
Refer to: [Setting a user's communication preferences and Email subscriptions](/system-administration/user-and-contact-administration#managingusers-positions-and-organisations-settinguserscommunicationpreferences).
## Troubleshooting
If a recipient is not receiving notifications, then check the following:
* The recipient is on duty for the relevant position(s)
* The user's profile has email and/or SMS enabled
* The user's profile has the correct email address and/or mobile number specified
* Ensure that the changes made were from a different user than themselves.
If the timing of the notifications is too slow, then check the following
* For due date notifications, that the due date field supports a time component — if not, it will be sent at 9 a.m.
* For updates, the lower the priority, the slower the update may be.
# Your User Account
This page describes how to view and edit your user profile and manage your duties.
{% hint style="info" %}
You must be **on duty** for an event to start working in the system. Your administrator will typically set up and advise you of your position/s.
{% endhint %}
## Overview
Your user profile contains your:
* Essential contact information
* Assigned Positions
* Connected sites
* Alert and communication preferences
Your email address and mobile numbers are used for email and SMS notifications.
User accounts are created by System Administrators. New users will receive an automated welcome email inviting them to sign in and set their password.
You may have read only or edit permissions for your user account.
## User Menu
Access the **User Menu** by clicking on the down arrow next to your name.
An expanded user menu
The User Menu is grouped into the following sections:
* **PROFILE** - relates to your user account
* **My User Account** **-** for viewing and editing your account details
* **SYSTEM** - relates to the running of the system
* **System Administration** - site management (only visible to administrators Refer to: [System Administration](/system-administration/configuring-the-system))
* **User Preferences** - configure personal preferences such as layout options
* **Background Processes** - a list of resource intensive processes you've scheduled to run in the background, such as reports, merges etc
* **Diagnostics** - used to check your system is up to date and functioning optimally (Refer to: [Diagnostics](/concepts-and-fundamentals/on-a-computer/your-user-profile-and-duties/diagnostics))
* **SESSION** - relates to your current login session
* **Go On or Off Duty** - change your duty status
* **Sign Out** - log out of the system (will not change your current duties)
## Viewing Your User Account
Your User Account page includes your:
* **Crisisworks ID** - your name, email and phone number
* **Multi-Factor Authentication** (MFA) set up status. MFA helps secure your account to prevent it being compromised or hacked. It is recommended that you configure this as part of your organisation's information security policy.
* **Email verification** status - the system needs to confirm that the email address being used is actually yours. This is done automatically when your user profile is created by your administrator.
* **Phone number verification** status - the system needs to confirm that the phone number being used is actually yours. This is set automatically when [SMS for MFA](#enabling-sms-for-mfa) is enabled.
* **Connected Sites** - you may be set up to access additional sites, including production and training instances.
To view your account use the down arrow to the right of your name and select 'My User Account'.
'My User Account' link in the User Menu
User Account screen
## Updating your User Profile
You may need to view your profile to check the details registered with the system.
Others with permission may view your profile to access your key contact information.
To edit your profile:
1. Use the down arrow next to your name in the menu and select *My User Account*.\

2. Use the *Open Contact Record* button to open your contact record.
3. Use the Edit button to [**Edit**](/concepts-and-fundamentals/on-a-computer/using-the-datagrid/editing-items) your contact record
4. Update as needed (first name, last name and email are required). Some fields, like Positions, are only editable by system administrators. (For more information on editing a contact item refer to [Editing Contacts](broken://pages/LA4Q1JYzBEpq4X9RdhIY#editing-contacts))
5. Save with the Save button
The following sections include specific settings you can change.
### Communication Preferences
Your contact account can have both *Primary* and *Secondary* phone numbers and email addresses. Communications include or automated notifications for key events, such as item assignment or overdue alerts, or messages from administrators.
Communications Preferences section
#### SMS Communications
This setting specifies which phone number (*Primary Phone* or *Secondary Phone*) numbers you wish to receive SMS Communications. It accepts only mobile numbers. You can only select a Secondary if there is an mobile number in your Secondary field.
To receive SMS Communications you must also tick the box for the *Receive communications by SMS* setting.
#### Email Communications
This setting specifies which email (*Primary Email* or *Secondary Email*) address you wish to receive email Communications.
To receive SMS Communications you must also tick the box for the *Receive communications by email* setting.
### Email Subscriptions
Use the Email Subscriptions section to opt in or out of communications from Datalink. We send communications on software updates and news, maintenance updates and system outages. Check any boxes that match the communications you wish to receive from us.
Email subscriptions can be opted in or out using the checkboxes
### Avatar
The Avatar field is used to upload a user's photo or other image in jpeg format that represents them visually. For more information about uploading files refer to the [File Upload](/concepts-and-fundamentals/on-a-computer/using-the-datagrid/editing-items#editing-an-item).
### Signature
Signatures are used with document templates, such as those used for compliance. It is not necessary to upload your signature unless you use these templates.
You can upload your signature as a JPEG or PNG file using the **Signature** field using the [File upload](/concepts-and-fundamentals/on-a-computer/using-the-datagrid/editing-items#files). JPEG is strongly recommended if you're using a transparent background.
A sample signature uploaded into the Signature field
### Signature Text
This can be set to your official title/role. It often accompanies your signature in letters and [mail merge templates](/system-administration/configuring-the-system/mail-merge-templates). Do not include your name if the template already does.
## Changing Your Password
To change your password:
1. Go to **My User Account** page from the down arrow next to your name
2. Click on the **Change your Password** button
3. Set a new password, the password must fulfil the following conditions:
1. Must have at least 8 characters
2. Upper and lower case letters
3. A special character (@\*!\&#$%^<>.\_-\[]{}()=\~+?,;:"'/|)
4. A number
4. Re-enter the password to protect against mistyping
5. Click **Send Code** to receive a verification code by SMS or email
6. Copy the code from your phone or email into the field below
7. Use the 'Change Password' button to effect the change
## Configuring Multi-factor authentication (MFA)
Multi-factor authentication (MFA) helps protect your account from unauthorised access. It adds an extra verification step alongside your username and password.
MFA is mandatory for all Crisisworks users. If your site uses Single Sign-On (SSO), you may not be prompted for MFA during everyday sign-in. System Administrators should still configure MFA. High-level activities, such as creating high-level access users, may require it.
The system supports two types of MFA:
* **Authentication App** that supports one-time password (OTP) codes (recommended), and;
* **SMS** based authentication
{% hint style="warning" %}
Please note that it is your responsibility to:
* update MFA before changing phones
* back up your authenticator/OTP
* advise your administrator if you no longer have access to the device you configured for MFA
Failing to do so may prevent you from signing in.
{% endhint %}
To view your current set up, click on **Configure MFA** on the My User Account page.
The status of your MFA setup for the two modes are shown to the right of the screen.
MFA settings screen before setup
### Enabling Authenticator App for MFA
To enable an Authenticator App or password manager (such as Microsoft Authenticator, Authy or 1Password):
1. On the Multi-factor authentication Settings page, under the Authentication App section, click on **Set up**
2. On the **Enable your authenticator app for MFA screen**
1. Scan the QR code using your One-Time Password (TOTP) program or get a code to manually enter
2. Enter the code provided into the field below\

3. Save
{% hint style="info" %}
Never share your MFA codes with anybody over phone or email
{% endhint %}
### Enabling SMS for MFA
To enable SMS as a Multi-factor authentication method:
1. On the Multi-factor authentication Settings page, under the SMS section, click on **Change**
2. On the **Enable SMS for MFA** screen
1. Enter your mobile number (this can be different to the number in your contact record)
2. Use the **Send Code** button to send a code to the mobile number provided
3. Find the text message containing the code in your phone and enter the code you received in the field below the Send Code button
3. Save
🎬 [How to Video - Multi-Factor Authentication](https://docs.cw.crisisworks.com/how-to-videos#system-administration-2-videos)
### Can't access your MFA method?
If you no longer have access to your selected MFA method, the System Administrators of your primary site will need to reset your MFA. If you're unsure who your system admins are, check with the emergency management team at your council.
## Go On or Off Duty
You can manage your duties for Events via the Go On or Off Duty option under Session.
This can also be done via the Event menu. For more information on your duties, see [Working with Events](/concepts-and-fundamentals/on-a-computer/working-with-events).
Go On or Off Duty option in the User Menu
# User Preferences
This page explains how to set User Preferences on your device.
## Overview
User Preferences is where you can configure settings based on your own personal preferences.
This helps enables accessibility features.
With this you can:
* change the layout of the app to suit the device you're using
* switch to adaptive dark mode - this option can reduce eye strain, blue light emissions, make text more comfortable to read, increase battery life and improve accessibility for certain users
### Access
Diagnostics is accessed from the [User Menu](/concepts-and-fundamentals/on-a-computer/your-user-profile-and-duties#user-menu) via the User Preferences link under SYSTEM.
User Preferences in User Menu
## Layout
You can switch between 4 main layout modes using the radio buttons provided.
This also lets you simulate the presentation on another device type.
The modes available are:
Layout mode
Description
Web
Best for use on computers and larger screens.
This is the default on the web.
App
A smaller screen layout for mobiles and larger screen layout for tablets. This is the default in the mobile app.
Single View App
Best for mobile phones and small-screen devices
Split View App
Best for tablets and large-screen devices
## Dark Mode
This setting switches between normal and adaptive dark mode based on your operating system preference.
{% hint style="info" %}
This feature is currently web-only
{% endhint %}
To enable Dark Mode, set **Dark Mode** to *Enabled* using the radio button provided.
To disable Dark Mode, set **Dark Mode** to *Disabled* using the radio button provided.
## Saving Preferences
To save your preferences, you must use the Save button, following which any setting changes you've made will be applied.
# Background Processes
This page explains how to use the Background Processes screen.
## Overview
The system is comprised of a number of queues that run continuously and provide parallelised task processing.
The system has a powerful command runner to allow administrators to track and manage all background tasks
The Background Processes console shows the status of each of the configured queues, along with the status of each Scheduled Jobs.
### Access
Diagnostics is accessed from the [User Menu](/concepts-and-fundamentals/on-a-computer/your-user-profile-and-duties#user-menu) via the Background Processes link under SYSTEM.
Background Processes link in the User Menu
## Using the Processes List
The Background Processes screen lists the most recently run processes by the date of creation.
Each process has a unique ID, a Name (based on the process you've run), Queue, Date Created and Status.
Background Processes list
### Queues
Queues are sorted into schedulers run based on the type of process you're running or the configuration of your site (certain processes are allocated higher priority/processing power). Each process has different timeframes and limits. These are listed for technical reference only. If your process consistently fails, it may be useful for Datalink support to identify which queue the process ran on.
AWS computing services used for other processes, such as Generate Merge
### Status
The Status tells you the current stage of the process.
Icon
Stage
Explanation
Queued
This process is still waiting to be run.
Completed
This process has been run, the system will tell you exactly when the process finished.
Failed
The process didn't run. There may be an error which needs to be addressed (such as incorrect parameters or no results), and it may need to be run again.
### Viewing a Process
To view a process, use the ID or Name to open it and access summary information. For Failed processes, this may include an explanation if available.
# Diagnostics
This page explains how to use the Diagnostics screens.
## Overview
Diagnostics is used to ensure that your system continues to run smoothly and can help when obtaining support from the Help Desk.
This screen shows helps you:
* Check for potential application problems and resolve them ([App Data](#app-data))
* [Set a custom location](#custom-location)
* Run automatic maintenance commands to help Datalink support you ([Diagnostics](#diagnostics))
* Find the version of the software that you're running ([Software Information](#software-information))
### Access
Diagnostics is accessed from the [User Menu](/concepts-and-fundamentals/on-a-computer/your-user-profile-and-duties#user-menu) via the Diagnostics link under SYSTEM.
Diagnostics link in the User Menu
### Navigation
All of the Diagnostics are displayed on one page in sections.
You can collapse specific sections using the Hide button.
You can show expand sections using the Show button.
## App Data
App Data gives a snapshot of the health of the system, including the main registers.
Use the Reload Settings button or the Refreshbutton to apply available updates.
The icons indicate as following:
* Spinning loading symbols indicate that the diagnostic is still being run. Please be patient until the process completes. If the spinning continues longer than reasonable reload the settings or contact the Help Desk.
* Green Ticks indicate that these registers are running properly. A green tick at the top right corner indicates that all systems are functioning normally.
* Orange exclamation mark icons flag potential problems. If you are also experiencing problems, contact the Help Desk and which settings were flagged.
Updating settings screen
#### Restart App
Sometimes you may be advised to restart the app to reset your session. Us the Restart App button to shut down the session, log out and log in again automatically.
#### Sign Out
You can sign out using the red Sign Out button.
## Offline functionality support
This setting enables you to enable offline support by going offline or going online.
By default your system will be online, you can go offline using the Go offline button.
If you're offline, you can go online using the Go online button.
## Location Services
Location tracking is used to mark the location of records you create and helps to find nearby assets. Upon starting, the app may ask to connect to location services on the device.
This section holds the current tracking connection status, including the last update and location in latitude and longitude.
For troubleshooting, you can reset location services using the Reset button.
## Custom Location
{% hint style="info" %}
This section may not be available for all users, it is a Site configuration. If you do not have access to this section, this may be for a reason.
{% endhint %}
This setting allows you to enter a custom Latitude and Longitude to simulate being in another location. This can be useful when training or simulating conditions in one location from another.
{% hint style="info" %}
A custom location will affect your default location in maps throughout the system.
{% endhint %}
To set a Custom Location:
1. Enter a decimal value for the Latitude into the **Latitude** box
2. Enter a decimal value for the Longitude into the **Longitude** box
{% hint style="info" %}
The format of the values entered into these fields is important otherwise it will not work.
It should just be decimal numbers and an optional negative prefix in Latitude for South or Longitude for West.
Do not include the degrees symbol, quotes or direction suffix.
The location for Sydney, for example, would entered as be **Latitude** -33.8688 and **Longitude** 151.2093.
You can obtain accurate Latitude and Longitude values for locations through applications like Google Maps.
{% endhint %}
## Diagnostics
This section contains key information to assist Datalink when there are ongoing problems.
Session includes the unique code your system is using to maintain its session.
Do not use the Reset Configuration button unless you've first spoken with Help Desk about.a problem that this may solve as it may have unexpected effects.
Sending Diagnostics to Datalink is helpful if there are ongoing problems. You can do this using the Log Diagnostics button.
## Software Information
This section gives you information on the App and Server version that you are running which can be useful for obtaining support.
Offline Support enables you to use the system offline and synchronise changes when you return to the office.
# Work Summaries
The Work Summaries module is used to record staff work times and work expenses. This page outlines use of the module and managing Work Time and Work Expense entries within them.
## Overview
The Work Summary module helps manage staff work times and expenses for an event. Staff can use the Work Summary module to add their work times, just like a timesheet. [Payroll Managers](#positions) can also enter work times and expenses on behalf of other staff.
The module includes three registers:
* Work Summaries (main)
* [Work Time Entries](/concepts-and-fundamentals/on-a-computer/your-user-profile-and-duties/work-summaries/work-time-entries) (sub-register)
* [Work Expense Entries](/concepts-and-fundamentals/on-a-computer/your-user-profile-and-duties/work-summaries/work-expense-entries) (sub-register)
Think of a Work Summary as a timesheet containing multiple time entries for a period of work. The Work Summary can hold multiple Work Time Entry records can be added for a staff member over a period of time.
Additionally staff can add expenses to Work Summaries for any work expenses they have incurred. Staff can create work summaries and Payroll Managers can also add, approve, reject or cancel them. These expenses can be unpaid or they can be paid by the staff member and require reimbursement.
### Positions
The following table outlines Permits [positions](/concepts-and-fundamentals/concepts-and-fundamentals#events-users-positions-and-duty) and what users with them can do according to their default [security policies](#security-policies):
### Access
To access Work Summaries:
1. Go on duty to the event with a [supported position](#positions).
2. Use the *Manage My Work Times* in the User Profile menu to access the module.
{% hint style="info" %}
If you can't access this link, contact your System Administrator. Work Summaries needs to be properly [setup and configured](#setup-and-configuration). Most built-in positions have **Work Summary User** security policy. That means that you will be able to start using this module immediately to enter your own work summaries, so long as the register has been added to the event you're working in. To manage Work Summaries you must be signed in with either a Payroll Manager position or a position with the Work Summary Coordination security policy.
{% endhint %}
### Setup and Configuration
Refer to: [Configuring the System](/system-administration/configuring-the-system) and [Administration](#administration)
To enable Work Summaries, an Administrator needs to:
1. [Add the Work Summaries register to the Event](/system-administration/managing-events#positions)
2. [Add the appropriate Positions to the Event](/system-administration/managing-events#positions). Most positions support users adding Work Summaries. In addition [security policies](broken://pages/rGPBlfWrNvfvFLAZUZhY#security-policies) for Work Summaries can be assigned to any position.
#### Security Policies
Refer to: [Positions: Security Policies](/system-administration/configuring-the-system/positions#security-policies)
Security Policy explanations
The following security policies apply to Work Summaries:
Security Policy
Use
Work Summary Coordination
Full Access to Work Summary & Time Entry register
Work Summary User
Limited Access to create and view own work summaries or assigned items only
### Operation
Refer to [Workflow](#workflow)
#### New records
As the container for Work Times and Work Expenses, Work Summaries are either automatically created in one of two scenarios:
1. When a Payroll Manager or administrator creates a new record they can select a [Staff Member](#staff-member)
2. When staff enter their own work times through Manage My Work Times in their User Profile (they can access their list of Work Times in their personal Work Summary datagrid)
All newly added Work Summaries begin as Active and are allocated to a staff member.
#### Breaks
Breaks can be represented in one of two ways:
1. Overriding the automatically calculated Hours Worked field in Work Times to adjust (for example because you took an unpaid break)
2. Creating seprate Work Time entries before and after breaks, you can create as many as necessary
#### Submitting and Approving
Once all of the Work Time Entries have been added, the user or Payroll Manager can change the Status to this Submitted and data can no longer be changed.
Payroll Managers can either Reject or Approve or ReOpen. I the Payroll Manager wants to request staff make changes. They can enter a reason back to the user.
### Administration
Administrators are able to set the Work Summaries module up by:
* Add (or removing) the Work Summaries registers from events in the [Event settings](/system-administration/managing-events)
* Enable the Payroll Manager and Work Summary User positions by [adding the positions to the Event](/system-administration/managing-events). Without these positions, users will not be able to use the module.
* [Add the policy of Work Summary User to an existing position](/system-administration/configuring-the-system/positions) if it doesn't have it
* [Add the positions](/system-administration/configuring-the-system/positions) of Payroll Manager or Work Summary User to a user's profile if they need it
* Add or modify Work Locations, Payment Methods, Work and Expense Categories through Lookups
* [Importing work summaries](#importing-data) in bulk
## Finding
{% content-ref url="/pages/Hqx2rS3kEW8IpmSxPLI7" %}
[Searching and Filtering](/concepts-and-fundamentals/on-a-computer/searching-filtering-and-querying-registers)
{% endcontent-ref %}
The register includes a number of features to assist in finding Work Summaries:
* [Datagrid](/concepts-and-fundamentals/on-a-computer/using-the-datagrid#data-grid-view) view
* [Filters](#information-editinganexistinginformationitem-1) including To Reimburse, Workflow and Assignments
* Combination filters and search by most fields
Work Summaries register datagrid sample view
### Filtering
Filters help make management of Work Summaries easier by focusing on specific groups of items on the datagrid.
Filter menu
Filter menu explanations
The following lists some of the filters and how to use them.
For CQL queries consult the [CQL Reference](/security-and-support/technical-reference/cql-reference) and for field definitions consult the [Work Summary Data Dictionary](broken://pages/e656SSppo2U718T392Jk).
Filter Group
Filter/s
CQL
Use
Main
Active
is:active
Finds all Active items (with a Status of Active, Submitted or ReOpen)
Recently Updated
is:active dateUpdated:>today-5d
Finds all items updated in the last 5 days
All
is:any
Finds all items
Workflow
Active
status:active
Finds all Active items (Active, Submitted or ReOpen)
\* May vary based on your system configuration
#### Querying
CQL searches can be performed via either the Filter menu or Search bar.
Query examples
The following provides some sample searches for users. For a list of available fields, consult the [Data Dictionary](broken://pages/kOWwnlRokYfxBf1Za2os).
#### Related Work Expense Entries
* `workexpenses:set` filter records where workexpenses is set to any value
* `workexpenses:unset` filter records where workexpenses is not set
* `workexpenses:(id:123)` search the related record of related record ID 123
* `workexpenses:(field1:value field2:value2)` search the related record by a nested set of filters
#### Related Work Time Entries
* `worktimes:set` filter records where worktimes is set to any value
* `worktimes:unset` filter records where worktimes is not set
* `worktimes:(id:123)` search the related record of related record ID 123
* `worktimes:(field1:value field2:value2)` search the related record by a nested set of filters
## Viewing
Work Summaries are listed in and searchable via the register [Datagrid](/concepts-and-fundamentals/on-a-computer/using-the-datagrid#data-grid-view).
The Work Summaries datagrid totals hours worked, the number of entries, expenses and total reimbursement amount as well as any summaries that have been manager approved. These can be grouped by staff member using the datagrid grouping function.
To view an existing Work Summary:
1. Navigate to the Work Summaries register datagrid.
2. [Find the item](#finding) you wish to view.
3. [View the item](#information-editinganexistinginformationitem-1) using the ID or Status
To return to the Datagrid use the Back button .
## Settings
Work Summary records are divided into the following sections (sections may or may not appear depending on what information is entered, your permissions level, and what mode you're viewing):
| Left Column | Right Column |
| ----------------------------- | ------------------------- |
| [Record Notes](#record-notes) | [Workflow](#workflow) |
| [Work Summary](#work-summary) | [Statistics](#statistics) |
| [Work Times](#work-times) | [Advanced](#advanced) |
| [Expenses](#expenses) | [Activity](#activity) |
### Record Notes
When editing, you can record notes as you make changes which will appear in the Activity log.
Refer to: [Recording Notes](/concepts-and-fundamentals/on-a-computer/using-the-datagrid/editing-items#recording-notes)
### Work Summary
#### Work Times
To add a new Work Time [sub-item](/concepts-and-fundamentals/on-a-computer/using-the-datagrid/editing-items#sub-items) using the Add button under **Add Work Time**.
You can add as many as you need this way.
Refer to [Work Time Entries: Settings](/concepts-and-fundamentals/on-a-computer/your-user-profile-and-duties/work-summaries/work-time-entries#work-time-entry-settings) for more information.
#### Expenses
To add a new Work Expense [sub-item](/concepts-and-fundamentals/on-a-computer/using-the-datagrid/editing-items#sub-items) using the Add button under **Add Work Expense**.
You can add as many as you need this way.
Refer to [Work Expense Entries: Settings](/concepts-and-fundamentals/on-a-computer/your-user-profile-and-duties/work-summaries/work-expense-entries#work-expense-entry-settings) for more information.
### Workflow
#### Staff Member
This setting is selected automatically for staff based on their user account. A Payroll Manager can override this.
{% hint style="info" %}
You must be working within an Event in order to select a Staff Member. This is due to Event security permssions.
{% endhint %}
#### Status
The following table is a guide to the Statuses. For the state machine steps refer to the [Work Summary Workflow Data Dictionary](broken://pages/e656SSppo2U718T392Jk#workflow).
Stage
Datagrid Icon
Description
Active
All Work Summaries begin with this status by default
Submitted
Once all of the Work Time Entries have been added, the user or Payroll Manager can change them to this status. All of the fields become read-only and data can no longer be changed.
ReOpen
Once submitted, changes can only be made when this status is set. Payroll Managers can enter a reason back to the user on what they need to change.
Cancelled
The Summary has been cancelled. Once set to this Status it cannot be un-cancelled.
Rejected
The Payroll Manager has rejected the summary.
ManagerApproved
The Payroll Manager has approved this summary.
#### Period Start
This setting defines the start of the Work Summary period using a [Date Time Selector](/concepts-and-fundamentals/on-a-computer/using-the-datagrid/editing-items#selecting-dates).
#### Period End
This setting defines the end of the Work Summary period using a [Date Time Selector](/concepts-and-fundamentals/on-a-computer/using-the-datagrid/editing-items#selecting-dates).
#### Tags
This setting is used to classify similar work summaries together.
For example logs related to Emergency Operations Centre could use the tag Volunteer to distinguish them from other Work Summaries.
Refer to: [Tagging Items](/concepts-and-fundamentals/on-a-computer/using-the-datagrid/tagging-items)
#### Total Hours Worked
This shows the total hours worked based on the [Work Times](#work-times) added in the Work Summary section.
It appears blank until the first time the Work Summary is saved.
#### Total Expense Amount
This shows the total expense amount based on the [Expenses](#expenses) added in the Work Summary section.
It appears blank until the first time the Work Summary is saved.
### Statistics
This section shows aggregate information for the [Work Times](#work-times) and [Expenses](#expenses) added in the Work Summary section. It appears blank until the first time the Work Summary is saved.
**Number of Work Time Entries** and **Number of Expenses to Reimburse** will total all the sub-items added.
**Total to Remimburse** is calculated based on the sum of expenses that have **Expense Requires reimbursement?** ticked. (Refer to [Work Expense Entries: Settings](/concepts-and-fundamentals/on-a-computer/your-user-profile-and-duties/work-summaries/work-expense-entries#work-expense-entry-settings))
Statistics section
### Advanced
You can change the **Event** that this Work Summary is filed in by selecting it from the drop down list and saving it.
### Activity
Refer to: [Viewing and Opening Register Items: Activity](/concepts-and-fundamentals/on-a-computer/using-the-datagrid/viewing-items#activity)
## Editing
Work Summaries can be edited from the datagrid.
1. Navigate to the register
2. [Find the item](#finding) you wish to edit by using the Edit button
3. Make the necessary changes to the [settings](#settings)
4. Save
## Adding
{% content-ref url="/pages/cRH8ZUNrgFGKBXlnlY6f" %}
[Adding Items](/concepts-and-fundamentals/on-a-computer/using-the-datagrid/adding-items)
{% endcontent-ref %}
To general process to add a Work Summary is:
1. Use the **New Work Summary** button from any screen.
2. Under Work Times, add one or more Work Times using the Add button \
A Work Time requires a **Date**. By adding a **Start time** and **End time**, the **Hours worked** field will automatically calculate the total hours between the two. You can optionally select a Work Location, Category and include a description of the work in the **Details** and **Attachments** fields. Repeat step 2 to add more Work Times.
3. Under Work Expenses, add one or more Work Expenses using the Add button \
A Work Expense requires a **Date** and a **Total Amount** for the expense in dollars.\
Expenses require categorisation using the **Expense Category** and **Payment Method**. Repeat step 2 to add more Work Expenses.
4. Save
## Exporting
Payroll Managers can use the [Export function in the datagrid](#exporting-data) to export work summaries, or the relevant [report in the reporting module](/system-administration/reporting/running-reports).
## Bulk Actions
{% content-ref url="/pages/85HyYT6h2YqK6Qk26AXL" %}
[Bulk Actions](/concepts-and-fundamentals/on-a-computer/using-the-datagrid/bulk-actions)
{% endcontent-ref %}
The following additional bulk actions can be performed via the Actions menu:
| Action | Description |
| ---------------- | -------------------------------------------------------------------------------------------------------------------------------------- |
| Copy IDs | Refer to: [Copy IDs](/concepts-and-fundamentals/on-a-computer/using-the-datagrid/bulk-actions#copy-ids) |
| Export to Report |
|
## Reports
{% content-ref url="/pages/IwhECOjXodLQkcojUf7P" %}
[Running Reports](/system-administration/reporting/running-reports)
{% endcontent-ref %}
The main report is the **Work Summary** report found in [Work Summary Reports](broken://pages/M9ssBY3PGCcYdtrYrwe6).
## Importing
{% content-ref url="/pages/QP6MVwI3qEAEvatbmPc3" %}
[Imports](/system-administration/configuring-the-system/imports)
{% endcontent-ref %}
A System Administrator can import in bulk via the Import system using the [Work Summary Data Import](/system-administration/configuring-the-system/imports/register-items/work-summary-data-import).
# Work Time Entries
This page outlines use of the Work Time Entries register.
## Overview
This register helps manage staff work times for an event by recording the specifics of a shift as a work time entry.
Work Time Entries is a sub-register of Work Summaries. New work times are added as sub-items through a [Work Summary Work Times](/concepts-and-fundamentals/on-a-computer/your-user-profile-and-duties/work-summaries#work-times) as such you can also view them there.
This register is especially useful for [finding](#finding) and [viewing](#viewing) work times, for example by Date, Staff Member or Location, and [editing](#editing) them directly.
{% hint style="info" %}
You can only add new Work Time Entries via the [Work Summary](/concepts-and-fundamentals/on-a-computer/your-user-profile-and-duties/work-summaries).
{% endhint %}
### Access
To access the Work Time Entries register:
1. Go on duty to the event with a [supported position](/concepts-and-fundamentals/on-a-computer/your-user-profile-and-duties/work-summaries#positions).
2. Use the *Manage My Work Times* in the User Profile menu to access the module.
3. Access Work Time Entries via the [Registers menu](/concepts-and-fundamentals/on-a-computer/navigation#registers-menu) on the left.
{% hint style="info" %}
If you can't access this link, contact your System Administrator. Work Summaries needs to be properly [setup and configured](#setup-and-configuration).
{% endhint %}
### Setup and Configuration
To enable Work Time Entries, an Administrator needs to:
1. [Add the Work Time Entries register to the Event](/system-administration/managing-events#positions)
2. [Add the appropriate Positions to the Event](/system-administration/managing-events#positions). Most positions that support users adding Work Summaries also support adding Work Time Entries. In addition [security policies](/concepts-and-fundamentals/on-a-computer/your-user-profile-and-duties/work-summaries#security-policies) for Work Summaries can be assigned to any position.
## Finding
{% content-ref url="/pages/Hqx2rS3kEW8IpmSxPLI7" %}
[Searching and Filtering](/concepts-and-fundamentals/on-a-computer/searching-filtering-and-querying-registers)
{% endcontent-ref %}
The register includes a number of features to assist in finding Work Time Entries:
* [Datagrid](/concepts-and-fundamentals/on-a-computer/using-the-datagrid#data-grid-view) view
* [Filters](#information-editinganexistinginformationitem-1) including Work Location, Category, Workflow and Assignments
* Combination filters and search by most fields
Register datagrid sample view
### Filtering
Filters help make management of Work Time Entries easier by focusing on specific groups of items on the datagrid.
Filter menu
Filter menu explanations
The following lists some of the filters and how to use them.
For CQL queries consult the [CQL Reference](/security-and-support/technical-reference/cql-reference) and for field definitions consult the [Work Summary Data Dictionary](broken://pages/e656SSppo2U718T392Jk).
Filter Group
Filter/s
CQL
Use
Main
Active
is:active
Finds all Active items (with a Status of Active, Submitted or ReOpen)
Recently Updated
is:active dateUpdated:>today-5d
Finds all items updated in the last 5 days
All
is:any
Finds all items
Work Location
[List is based on your system configuration]*
is:active workLocation:
Finds all items for the selected Work Location
Category
[List is based on your system configuration]*
is:active category:
Finds all items for the selected Work Category
Workflow
Active
status:active
Finds all Active items (Active, Submitted or ReOpen)
\* May vary based on your system configuration
#### Querying
CQL searches can be performed via either the Filter menu or Search bar.
Query examples
The following provides some sample searches for users. For a list of available fields, consult the [Data Dictionary](broken://pages/kOWwnlRokYfxBf1Za2os).
#### Related Work Expense Entries
* `workexpenses:set` filter records where workexpenses is set to any value
* `workexpenses:unset` filter records where workexpenses is not set
* `workexpenses:(id:123)` search the related record of related record ID 123
* `workexpenses:(field1:value field2:value2)` search the related record by a nested set of filters
#### Related Work Time Entries
* `worktimes:set` filter records where worktimes is set to any value
* `worktimes:unset` filter records where worktimes is not set
* `worktimes:(id:123)` search the related record of related record ID 123
* `worktimes:(field1:value field2:value2)` search the related record by a nested set of filters
## Viewing
Work Time Entries are listed in and searchable via the register [Datagrid](/concepts-and-fundamentals/on-a-computer/using-the-datagrid#data-grid-view).
The Work Time Entries datagrid shows details on the hours worked per staff member. These can be grouped by staff member using the datagrid grouping function.
Work Time Entries Datagrid
To view an existing Work Time Entry:
1. Navigate to the Work Time Entries register datagrid.
2. Locate the item you wish to view. The register includes filters for Totals, Workflow (Active, Submitted, ReOpen, Cancelled, Rejected, Manager Approved), Staff Members (All Unassigned), Work Location, Category and Active Tags
3. Open the item using the ID or Status
4. To return to the Datagrid use the Back button
## Settings
Work Time Entries are divided into the following sections (sections may or may not appear depending on what information is entered, your permissions level, and what mode you're viewing):
| Left Column | Right Column |
| ----------------------------- | --------------------- |
| [Record Notes](#record-notes) | [Workflow](#workflow) |
| [General](#general) | [Advanced](#advanced) |
| | [Activity](#activity) |
### Record Notes
When editing, you can record notes as you make changes which will appear in the Activity log.
Refer to: [Recording Notes](/concepts-and-fundamentals/on-a-computer/using-the-datagrid/editing-items#recording-notes)
### General
The General section contains details on the date, time, hours work, location and type of work.
Work Time Entries require a **Date** at minimum.
#### Date
This setting indicates the date when the work time starts and is entered using a [Date Selector](/concepts-and-fundamentals/on-a-computer/using-the-datagrid/editing-items#selecting-dates).
#### Start Time
This setting indicates the time when the work time starts.
Variations of shorthand times are accepted as inputs. For example: 9am, 9:00, 9:30 or 9:00am.
#### End Time
#### Hours Worked
This setting indicates how many hours were worked during the work time and can work in one of two ways:
1. Manually entering the total hours worked
2. Automatically based on the Start time and End time. When both are recorded, the field is dynamically calculated.
#### Work Location
This setting records where the shift took place.
In [Edit mode](/concepts-and-fundamentals/on-a-computer/using-the-datagrid/editing-items) it is selected from the pulldown list.
Locations are defined by an administrator using the *Work Summary: Work Location* [lookup](/system-administration/configuring-the-system/lookups).
#### Category
This setting records the mode of work was performed (for example, Travel, On-Site etc). This can be useful for reimbursement claims.
In [Edit mode](/concepts-and-fundamentals/on-a-computer/using-the-datagrid/editing-items) you can search for or select existing categories from the list.
Categories are defined by an administrator using the lookup: *Work Summary: Work Category* [lookup](/system-administration/configuring-the-system/lookups).
#### Details
This setting records any additional information about the work time.
#### Attachments
This setting enables downloading supporting files as attachments.
In [Edit mode](/concepts-and-fundamentals/on-a-computer/using-the-datagrid/editing-items) you can upload a file using the [File Upload](/concepts-and-fundamentals/on-a-computer/using-the-datagrid/editing-items#files) feature.
### Workflow
#### Status
This setting indicates the current step in the process.
The following table is a guide to the Statuses. For the state machine steps refer to the [Work Summary Time Entries Workflow Data Dictionary](broken://pages/XWMQIFUsh81Ggh2iLZQv#workflow).
Stage
Datagrid Icon
Description
Active
All Work Time Entries begin with this status by default
Submitted
Once all of the Work Time Entries have been added, the user or Payroll Manager can change them to this status. All of the fields become read-only and data can no longer be changed.
ReOpen
Once submitted, changes can only be made when this status is set. Payroll Managers can enter a reason back to the user on what they need to change.
Cancelled
The time entry has been cancelled. Once set to this Status it cannot be un-cancelled.
Rejected
The Payroll Manager has rejected the time entry.
ManagerApproved
The Payroll Manager has approved this time entry.
### Advanced
You can change the **Staff Member** in Advanced if your security policy allows.
You can change the **Event** that this Work Summary is filed in by selecting it from the drop down list and saving it if your security policy allows.
### Activity
Refer to: [Viewing and Opening Register Items: Activity](/concepts-and-fundamentals/on-a-computer/using-the-datagrid/viewing-items#activity)
## Editing
Work Time Entries can be edited from the datagrid.
1. Navigate to the register
2. Locate the item you wish to edit by using the Edit button
3. Make the necessary changes to the settings
4. Save
## Adding
Work Time Entries are sub-items of Work Summaries and as such can only be added via the Work Summary [Work Times](/concepts-and-fundamentals/on-a-computer/your-user-profile-and-duties/work-summaries#work-times).
# Work Expense Entries
This page outlines use of the Work Expense Entries register.
## Overview
The Work Expense register helps manage staff costs for an event.
Work Expense Entries is a sub-register of Work Summaries. New work expenses are added as sub-items through a Work Summary Expenses as such you can also view them there.
This register is especially useful for [finding](#finding) and [viewing](#viewing) expenses, for example by Period, Staff Member, and [editing](#editing) them directly.
{% hint style="info" %}
You can only add new Work Expenses via the [Work Summary](/concepts-and-fundamentals/on-a-computer/your-user-profile-and-duties/work-summaries).
{% endhint %}
### Access
To access the Work Expenses register:
1. Go on duty to the event with a [supported position](/concepts-and-fundamentals/on-a-computer/your-user-profile-and-duties/work-summaries#positions).
2. Use the *Manage My Work Times* in the User Profile menu to access the module.
3. Access Work Expenses via the [Registers menu](/concepts-and-fundamentals/on-a-computer/navigation#registers-menu) on the left.
{% hint style="info" %}
If you can't access this link, contact your System Administrator. Work Summaries needs to be properly [setup and configured](#setup-and-configuration).
{% endhint %}
### Setup and Configuration
To enable Work Expense Entries, an Administrator needs to:
1. [Add the Work Expense Entries register to the Event](/system-administration/managing-events#positions)
2. [Add the appropriate Positions to the Event](/system-administration/managing-events#positions). Most positions that support users adding Work Summaries also support adding Work Expense Entries. In addition [security policies](/concepts-and-fundamentals/on-a-computer/your-user-profile-and-duties/work-summaries#security-policies) for Work Summaries can be assigned to any position.
## Finding
The register includes a number of features to assist in finding Work Expense Entries:
* [Datagrid](/concepts-and-fundamentals/on-a-computer/using-the-datagrid#data-grid-view) view
* [Filters](/concepts-and-fundamentals/on-a-computer/your-user-profile-and-duties/work-summaries/work-time-entries#information-editinganexistinginformationitem-1) including To Reimburse, Unpaid Expenses, Expense Category, Payment Method, Workflow and Assignments
* Combination filters and search by most fields
#### Filtering
Filters help make management of Work Time Entries easier by focusing on specific groups of items on the datagrid.Filter menu
 explanations
The following lists some of the filters and how to use them.For CQL queries consult the [CQL Reference](/security-and-support/technical-reference/cql-reference) and for field definitions consult the [Work Summary Expense Data Dictionary](broken://pages/bOf5gUdOxQdhqLOkIM5v).
| Filter Group | Filter/s | CQL | Use |
| ---------------- | ----------------------------------------------- | ------------------------------------------------------------- | ---------------------------------------------------------------------------------------------- |
| Main | | | |
| | Active | `is:active` | Finds all Active items (with a Status of Active, Submitted or ReOpen) |
| | Recently Updated | `is:active dateUpdated:>today-5d` | Finds all items updated in the last 5 days |
| | All | `is:any` | Finds all items |
| Special | | | |
| | To Reimburse | `requiresReimbursement:true status:[ACTIVE,SUBMITTED,REOPEN]` | Finds all items with [Expense Requires reimbursement? ](#expense-requires-reimbursement)ticked |
| | Unpaid Expenses | `paymentMethod:unpaid status:[ACTIVE,SUBMITTED,REOPEN]` | Finds all items with a [Payment Method](#payment-method) of Unpaid |
| Expense Category | \[List is based on your system configuration]\* | `is:active expenseCategory:` | Finds all items with the specified [Expense Category](#expense-category) |
| Payment Method | \[List is based on your system configuration]\* | `is:active paymentMethod:` | Finds all items with the specified [Payment Method](#payment-method) |
| Workflow | | | |
| | Active | `status:active` | Finds all Active items (Active, Submitted or ReOpen) |
| | Cancelled | `status:cancelled` | Finds all items with a Status of *Cancelled* |
| | Manager Approved | `status:approved` | Finds all items with a Status of *Manager Approved* |
| | ReOpen | `status:reopen` | Finds all items with a Status of *ReOpen* |
| | Rejected | `status:rejected` | Finds all items with a Status of *Rejected* |
| | Submitted | `status:submitted` | Finds all items with a Status of *Submitted* |
| Active tags | \[List is based on your system configuration]\* | `is:active #` |
|
| Assignments | \[List is based on your system configuration]\* | `is:active assigned:` | Finds all Items for Staff Member |
\* May vary based on your system configuration
**Querying**
CQL searches can be performed via either the Filter menu or Search bar.
Query examples
## Viewing
Work Expense Entries are listed in and searchable via the register [Datagrid](/concepts-and-fundamentals/on-a-computer/using-the-datagrid#data-grid-view).
The Expense Entries datagrid shows details such as the total amount and payment method staff member. These can be grouped by staff member using the datagrid grouping function.
Work Expense Entries datagrid
To view an existing Work Expense Entry:
1. Navigate to the Work Expense Entries register datagrid.
2. Locate the item you wish to view. The register includes filters for Totals, Workflow (Active, Submitted, ReOpen, Cancelled, Rejected, Manager Approved), Staff Members (All Unassigned), Speical (To Reimburse, Unpaid Expenses), Expense Category, Payment Method and Active Tags
3. Open the item using the ID or Status
4. To return to the Datagrid use the Back button
## Settings
Work Expense Entries are divided into the following sections (sections may or may not appear depending on what information is entered, your permissions level, and what mode you're viewing):
| Left Column | Right Column |
| ----------------------------- | --------------------- |
| [Record Notes](#record-notes) | [Workflow](#workflow) |
| [General](#general) | [Advanced](#advanced) |
| | [Activity](#activity) |
### Record Notes
When editing, you can record notes as you make changes which will appear in the Activity log.
Refer to: [Recording Notes](/concepts-and-fundamentals/on-a-computer/using-the-datagrid/editing-items#recording-notes)
### General
Individual Work Expenses requires at minimum: a [Date](#date), [Total amount](#total-amount)**,** [Expense Category](#expense-category) and Payment Method.
#### Date
This setting and is entered using a [Date Selector](/concepts-and-fundamentals/on-a-computer/using-the-datagrid/editing-items#selecting-dates).
#### Total Amount
This setting indicates the amount of the expense in dollars and accepts two decimals for cents.
#### Expense Category
This settings is used to categorise an expense.
Expense Categories are defined by an administrator using the *Work Summary Expense: Expense Category* [lookup](/system-administration/configuring-the-system/lookups).
Expense categories
#### Payment Method
This setting indicates how the expenses are typically paid. Payment Methods are defined by an administrator using the *Work Summary Expense: Payment Method* [lookup](/system-administration/configuring-the-system/lookups).
Payment methods
#### Description
This setting provides additional details on the expense.
#### Expense Requires reimbursement?
This setting indicates whether it needs reimbursement using a tick box. Expenses marked in this way have a special filter which enables all reimbursement expenses to be viewed.
#### Invoice/Receipt
This setting supports downloading an uploaded copy of the invoice or receipt for the expense.
In Edit mode you can upload a file using the [File Upload](/concepts-and-fundamentals/on-a-computer/using-the-datagrid/editing-items#files) feature.
#### Tags
Refer to: [Tagging Items](/concepts-and-fundamentals/on-a-computer/using-the-datagrid/tagging-items)
### Workflow
#### Status
This setting indicates the current step in the process.
The following table is a guide to the Statuses. For the state machine steps refer to the [Work Summary Expense Workflow Data Dictionary](broken://pages/bOf5gUdOxQdhqLOkIM5v).
Stage
Datagrid Icon
Description
Active
All Work Expense Entries begin with this status by default
Submitted
Once all of the Work Expense Entries have been added, the user or Payroll Manager can change them to this status. All of the fields become read-only and data can no longer be changed.
ReOpen
Once submitted, changes can only be made when this status is set. Payroll Managers can enter a reason back to the user on what they need to change.
Cancelled
The expense entry has been cancelled. Once set to this Status it cannot be un-cancelled.
Rejected
The Payroll Manager has rejected the expense entry.
ManagerApproved
The Payroll Manager has approved this expense entry.
### Advanced
You can change the **Staff Member** in Advanced if your security policy allows.
You can change the **Event** that this Work Summary is filed in by selecting it from the drop down list and saving it if your security policy allows.
### Activity
Refer to: [Viewing and Opening Register Items: Activity](/concepts-and-fundamentals/on-a-computer/using-the-datagrid/viewing-items#activity)
## Editing
You can edit Work Expenses from their parent Work Summary or from the datagrid.
To edit from the datagrid:
1. Navigate to the register
2. Find the item you wish
3. Edit by using the Edit button
4. Make the necessary changes to the [settings](#settings)
5. Save
## Adding
Work Expense Entries are sub-items of Work Summaries and as such can only be added via the Work Summary [Expenses](/concepts-and-fundamentals/on-a-computer/your-user-profile-and-duties/work-summaries#expenses).
# Roster Availability
This page outlines use of the Roster Availability register.
## Overview
The Roster Availability is used to records the availability of [users](/system-administration/user-and-contact-administration) (usually staff) for a given shift.
Roster Availability is used with the Rostering functions but can be used standalone.
### Access
To access Roster Availability:
1. Go on duty to the event with a [supported position](#positions).
2. Use the *Manage My Rostering Availability* in the User Profile menu to access the module.
Manage My Rostering Availability in User Profile
{% hint style="info" %}
If you can't access this link, contact your System Administrator. Roster Availability needs to be properly [setup and configured](#setup-and-configuration). Most built-in positions have **Roster Access** security policy. That means that you will be able to start using this module immediately to enter your own roster availability, so long as the register has been added to the event you're working in. To manage Roster Availability you must be signed in with either an Operations Officer position or a position with the Roster Access security policy.
{% endhint %}
### Operation
Once [setup and configured](#setup-and-configuration), Roster Availability records are created either by users or a Coordinator (refer to [Positions](#positions)).
Users can [add availability](#adding) if they have access to the register by adding dates, times and shifts that they are rostered on for. Coordinators can also add availability for any user including themselves.
When adding new records, the [Availability](#availability) is set to Available by default, although users can set this to either Available or Unavailable. The Unavailable status will override Available for the same date. So if a user is available for three months except for one week, they can create one 'Available' record for three months and one 'Unavailable' record for one week in the middle.
If you're working on an item it can be set to Draft.
For availabilities that have similar date ranges, shifts or users you can use the Template option.
If an item is no longer needed it can be set to Cancelled; Closed (Duplicate); or Closed (Error).
### Positions
The following table outlines [positions](/concepts-and-fundamentals/concepts-and-fundamentals#events-users-positions-and-duty) that can manage this register and what users with them can do according to their default security policies:
Other positions may have similar security policies. A [System Administrato](/system-administration/configuring-the-system/positions)r can establish positions with custom security policies.
### Setup & Configuration
Refer to: [Configuring the System](/system-administration/configuring-the-system) and [Administration](#administration)
To enable Work Summaries, an Administrator needs to:
1. [Add the Resources register to the Event](/system-administration/managing-events#positions)
2. [Add the appropriate Positions to the Event](/system-administration/managing-events#positions). Most positions support users adding Work Summaries. In addition [security policies](#security-policies) for Roster access can be assigned to any position.
3. \[Optional] Configure [shifts](#shift), a default 'Main' shift comes pre-installed.
#### Security Policies
Refer to: [Positions: Security Policies](/system-administration/configuring-the-system/positions#security-policies)
Security Policy explanations
The following security policies apply to the Roster:
Security Policy
Use
Roster Access
Provides read-only access to the roster user interface.
Roster Coordinator
Provides full access to manage rosters
## Finding
{% content-ref url="/pages/Hqx2rS3kEW8IpmSxPLI7" %}
[Searching and Filtering](/concepts-and-fundamentals/on-a-computer/searching-filtering-and-querying-registers)
{% endcontent-ref %}
The find items you can use:
* [Datagrid](/concepts-and-fundamentals/on-a-computer/using-the-datagrid#data-grid-view) view
* [Filters](#information-editinganexistinginformationitem-1) including Active, Workflow (Available, Unavailable etc) and Unassigned
* A combination of filters and search by most fields
Roster Availability datagrid (sample view)
### Filters
Filters help make management of Roster Availability easier by focusing on specific groups of items on the datagrid.
Filters
Filter menu explanations
The following lists some of the filters and how to use them:
Filter Group
Filter/s
CQL
Use
Main
Active
is:active
Finds all Active items (Available, Unavailable or New)
Recently Updated
is:active dateUpdated:>today-5d
Finds all items updated in the last 5 days
All
is:any
Finds all items in the register
Total
Active
toDate:>now-30d
Finds all items with an Date Until less than 30 days away
\* May vary based on your system configuration
## Opening and Viewing
{% content-ref url="/pages/Uj3SUzS7JZj9FENuBTeq" %}
[Viewing Items](/concepts-and-fundamentals/on-a-computer/using-the-datagrid/viewing-items)
{% endcontent-ref %}
When viewing Roster Availability items, sections can be expanded to show information.
As each section is completed, new sections may show additional information.
Screenshot showing read only view of the General section. The user is available for most of the September.
## Settings
Roster Availability has the following sections:
| Left Column | Right Column |
| ----------------------------- | --------------------- |
| [Record Notes](#record-notes) | [Workflow](#workflow) |
| [General](#general) | [Activity](#activity) |
### Record Notes
When editing, record notes in the [rich text field](/concepts-and-fundamentals/on-a-computer/using-the-datagrid/editing-items#rich-text-fields) as you make changes which will appear in the Activity log.
Refer to: [Recording Notes](/concepts-and-fundamentals/on-a-computer/using-the-datagrid/editing-items#recording-notes)
### General
The General section contains the main availability details with the [rich text field](/concepts-and-fundamentals/on-a-computer/using-the-datagrid/editing-items#rich-text-fields) provided.
#### Date From
Use this setting to set the date that the user is available from. This is required.
Refer to: [Setting Dates](/concepts-and-fundamentals/on-a-computer/using-the-datagrid/editing-items#selecting-dates)
#### Date until
Use this setting to set the date that the user is available until. This is required.
Refer to: [Setting Dates](/concepts-and-fundamentals/on-a-computer/using-the-datagrid/editing-items#selecting-dates)
{% hint style="info" %}
It is possible to set a Date until before the Date from, however do not do this as it can affect the availability results.
{% endhint %}
#### Shift
Use this setting to select the shift(s) from the list. This is required.
Once selected, these appear like tags and can be similarly removed by toggling them off the list with the cross.
Shift setting with Main shift added
Shifts are set up by your System Administrator using the Roster Availability Shifts [lookup](/system-administration/configuring-the-system/lookups).
#### Availability
Use this setting to whether the user is Available, Unavailable or something else.
Status
Datagrid Icon
Notes
Available
All new Roster Availability items begin with this status
Unavailable
New
Cancelled
For more information on statuses and workflow for Availability, refer to the [Roster Availability Workflow Data Dictionary](broken://pages/AwHsAIjt5Sh0QLrLBmmu#workflow).
#### User
Use this setting to select a user who the availability is for from the list.
If you don't select a user, it will default to your name (if you have a Roster Access security policy).
#### Details
Use this setting to add details on ths availability. For example, there might be notes about certain days or if the user has limited capacity. They can be added here.
### Workflow
#### Tags
Refer to: [tags](/concepts-and-fundamentals/on-a-computer/using-the-datagrid/tagging-items)
### Activity
Refer to: [Viewing Items: Activity](/concepts-and-fundamentals/on-a-computer/using-the-datagrid/viewing-items#activity)
## Updating
{% content-ref url="/pages/a2eWhKOkTwpBhWsPFV1g" %}
[Editing Items](/concepts-and-fundamentals/on-a-computer/using-the-datagrid/editing-items)
{% endcontent-ref %}
When updating an item:
* Add notes on your edits in the **Record Notes** field
* Complete each section of the [Settings](#register-item-settings) as required. Note that some options may open up new sections to complete.
Editing a sample Roster Availability item
## Adding
{% content-ref url="/pages/cRH8ZUNrgFGKBXlnlY6f" %}
[Adding Items](/concepts-and-fundamentals/on-a-computer/using-the-datagrid/adding-items)
{% endcontent-ref %}
1. From the register, in the New item menu select the **New Roster Availability** button (or drop down the list from any other register and select it)
2. Complete each section of the [Settings](#register-item-settings) as required ([Date from](#date-from), [Date until](#date-until) and [Shift](#shift) are required). If you don't select the [User](#workflow), your user will be used.
3. Save
New Roster Availability screen
## Bulk Actions
{% content-ref url="/pages/85HyYT6h2YqK6Qk26AXL" %}
[Bulk Actions](/concepts-and-fundamentals/on-a-computer/using-the-datagrid/bulk-actions)
{% endcontent-ref %}
The following additional bulk actions can be performed via the Actions menu:
| Action | Description |
| ---------------- | ------------------------------------------------------------------------------------------------------------------------------------------------------------------------------- |
| Copy IDs | Refer to: [Copy IDs](/concepts-and-fundamentals/on-a-computer/using-the-datagrid/bulk-actions#copy-ids) |
| Export to Report |
|
| Bulk Edit | Refer to: [Bulk Edit](/concepts-and-fundamentals/on-a-computer/using-the-datagrid/bulk-actions#bulk-edit) |
## Importing
{% content-ref url="/pages/QP6MVwI3qEAEvatbmPc3" %}
[Imports](/system-administration/configuring-the-system/imports)
{% endcontent-ref %}
A System Administrator can import in bulk via the Import system using the [Availability Periods](/system-administration/configuring-the-system/imports/register-items/availability-periods) option.
## Reports
{% content-ref url="/pages/IwhECOjXodLQkcojUf7P" %}
[Running Reports](/system-administration/reporting/running-reports)
{% endcontent-ref %}
The main report, **Roster Availability** found in [Rostering Reports](broken://pages/Sg2mDOnkmBWamcjmaqdm) can be run from either the Bulk Actions or the Reports menu.
View of some of the Roster Availability Report parameters
# Signing Out
This page explains how to sign out of the system.
Signing out is important for information security and to prevent your user profile from appearing on duty to other users.
There are two options for signing out, these do the same thing, they sign you out and go off duty. If you wish to just go off duty, then [change your duty status](/concepts-and-fundamentals/on-a-computer/your-user-profile-and-duties#setting-your-duties-for-events) instead.
To sign out:
* Open the User Profile menu
* Select 'Go Off Duty' or 'Sign Out'
* In the confirmation page, use the 'Go Off Duty and Sign Out' button
Sign Out options
# Overview
The following section outlines some of the key modules.
[Registers](/concepts-and-fundamentals/on-a-computer/using-the-datagrid), [Positions](/system-administration/configuring-the-system/positions) and [Resources](broken://pages/rGPBlfWrNvfvFLAZUZhY) are grouped into and configured as a **Module**, which are typically found in the main menu navigation. Core modules are included with almost all implementations. Your package may include a combination of core modules and custom-built and configured modules.
Based on the configuration of each module, Register Items may be assigned to users and positions, and they may utilise resources and relate to assets. Additionally, Registers implement [workflows](/concepts-and-fundamentals/concepts-and-fundamentals#workflow-and-communications) using combinations of status, priority, assignment, filters, escalations and [notifications](/concepts-and-fundamentals/on-a-computer/notifications-and-alerts), which help users to effectively manage the event.
The following sections outline some of the built in and custom modules included in the base system. Access to each of these modules will depend on your your position and duties as well as your organisation's configuration.
This following is a brief summary for each of the main system packages:
## Core Features
The mobile app provides users of Android or iOS an easy means of working in the field and includes additional device features for gathering evidence such as GPS, camera and audio.
# Dashboard
This section outlines the dashboard module which provides key widgets for real-time management of the system.
## Overview
The dashboard provides a snapshot of key information on system operation including a near real-time feed of updates.
### Benefits
The Dashboard helps teams prioritise actions quickly by surfacing critical information in one place, specifically it:
* Provides real-time situational awareness
* Live feeds updates across the system so teams can quickly understand what’s happening
* Acts as a central noticeboard for promoted information and key updates during operations
* Reduces information lag and keeps everyone aligned with the latest operational picture
### Features
Dashboards can be customised and configured based on the requirements for a project.
The standard dashboard includes:
* Announcements
* Recent Activity
View of the Dashboard
## Functions
### Announcements
Announcements are used by coordinators to broadcast important information. They appear in yellow sections including the Event that they are from.
### Recent Activity
The Recent Activity feed includes information such as:
* **User** - Sign ins and Duty Status reporting
* **Events** - New, Open and Closed incidents
* **Activities** - Requests, Information, Offers and Cases
* **Log Messages** - brief messages entered from the dashboard
#### Moving between pages
The Activity Feed shows only the most recent 25 or so actions. To show more, use the Next button to navigate between pages.
#### Filtering Recent Activity
Recent Activity feed is automatically filtered based on your permissions.
To increase signal to noise you can filter the feed using the 'Comments' dropdown. This has three options:
* **All** - show all activity
* **For me** - only show activities involving yourself
* **Comments** - activities with accompanying notes
Comments filter
#### Sorting Recent Activity
Recent Activity can be sorted to show newest or oldest activities first. To toggle the sorting drop down the list at the top right of the feed.
Sorting options
# Reports
This page outlines the Reports module and report folders.
## Overview
For instructions on running reports, refer to: [Running Reports](/system-administration/reporting/running-reports).
The Reports module provides reports categorised into folders based on their purpose and to apply security.
### Access
Access to reports is based on:
1. The Event you're signed in to and the registers enabled in it
2. The position you're on duty with and the security policies your administrator has applied to it
Reporting is generally a System Administration function. Ask your administrator if you need access to a specific report or folder.
For information on how to run reports, refer to: [Reporting](/system-administration/reporting)
### Setup and Configuration
Your System Administrator configures report access using security policies.
#### **Security Policies**
Refer to: [Positions: Security Policies](/system-administration/configuring-the-system/positions#security-policies)
Security Policy explanations
The following security policies apply to Reports:
| Security Policy | Use |
| --------------------------------------- | ------------------------------------------------------------------------------ |
| Access to base analytics data | Can access basic reports |
| Access to EMV Recovery Portal Reporting | Access to [EMV Recovery Portal](broken://pages/a1lkrj9L29gsprDjb1Ld) folder |
| Access to library analytics | Access to the [Library Reports](broken://pages/2znzscpbaO2lafV8pP9V) folder |
| Access to operations analytics | Access to the [Operations Reports](broken://pages/rDzS0x7dG5bGlIkFeGEK) folder |
| Access to recovery analytics | Access to the [Recovery Reports](broken://pages/4BZWTfGBU6PxeNo6ehdK) folder |
| Access to resource analytics | Access to the Operations: Resource Report |
| Access to system analytics | Can access protected reports such as audit and system reports. |
# Communication
Report Name
Description/Usage
Communication Message Deliveries
A report listing messages delivered via the Communications module.
Communication Message Statistics
A report that provides statistical information for Communication Messages.
Communication Message SMS Billing
A report listing SMS messages and the number of message parts sent for billing purposes.
For instructions on running reports, refer to: [Running Reports](/system-administration/reporting/running-reports).
# Register Reports
Report Name
Description/Usage
Register records tagged since date
Shows when a tag was set for a register item.
For instructions on running reports, refer to: [Running Reports](/system-administration/reporting/running-reports).
# System Administration Reports
Report Name
Description/Usage
Audit Report
Provides audit action details recorded by the system for a specified time period.
Monthly Statistics of Emails & SMS's sent
Lists the monthly totals of Emails & SMSs sent for a nominated period
Security: Users having positions
Lists each user and their competent positions
Security: Positions having policies
Lists each position and all of its policies
Security: Users having policies based on current duty
Lists each user their effective policies based on their current duties. Note that this changes based on users going on and off duty.
File attachments
Lists file attachments along with their links to register items.
Events positions are involved in
Lists all events positions are involved in
For instructions on running reports, refer to: [Running Reports](/system-administration/reporting/running-reports).
# User Reports
| Report Name | Description/Usage |
| ------------------------------- | ------------------------------------------ |
| Usage Report | Details User accounts |
| User Event Participation Report | Details User Event participation and usage |
For instructions on running reports, refer to: [Running Reports](/system-administration/reporting/running-reports).
# Vulnerable Persons Registers (VPR)
This section explains how to use the Vulnerable Persons Registers (VPR).
## Overview
The *Vulnerable Persons Registers* (VPR) operates across Victoria and provides 24x7 access to data by authorised emergency management agencies.
The system can be accessed via most web enabled devices and includes locality aware functions for mobile devices.
{% file src="/files/QY0zgDB16O3Lc0RYGHK6" %}
The Vulnerable Persons Registers operates at a local level to securely track vulnerable individuals, and provide a searchable database for Victoria Police during emergencies.
Funded Agencies manage the vulnerable client records, while Councils coordinate the registers, allowing Police to access the register in a self-serve way when required. Although each register is local, agencies may span across multiple municipalities, so the VPR offers agencies a single portal to manage their clients across multiple boundaries.
The system provides:
* Distributed management of vulnerable person records by Funded Agencies.
* Workflow rules to ensure data is kept current.
* High security and full auditing of user activity.
* Oversight and coordination at the local level by local governments.
* Self-serve access by Victoria Police to the register when required.
* Integration into council Crisisworks system.
* Geographic tracking and querying, and the ability to interoperate with other geographic systems.
## Client Verification
Clients require re-verification from time to time in order to ensure the data is kept accurate.
* The system will tell agency users when clients require re-verification, by setting the status of the client record to *Revalidate,* and by sending an email to the Agency Coordinators.
* When this occurs, the agency must update the record with current data and then *Verify* the client record.
* This process will typically be required twice a year, but the agency may elect to do it more frequently.
If an agency does not verify the client within 30 days of the record being flagged, the record will lapse into an *Unverified* state and the VPR Coordinator will be notified.
{% hint style="warning" %}
* It is important to keep client records in a *verified* state as much as possible.
* Once a client is removed, it is archived and cannot be reinstated.
* Victoria Police users will see all clients except those that are removed. The *Unverified* status will indicate to them that the client record may not be accurate.
{% endhint %}
## Primary and Secondary Agencies
A client will often have a relationship with multiple agencies at once, so in order to prevent duplication, the system provides a way for agencies to share an existing client record. When multiple agencies share a single client, one agency will take the role of the **Primary Agency*****,*** and the other agencies will become **Secondary Agencies**.
Although all agencies have an equal responsibility to assess the client and obtain a signed privacy consent form, the Primary Agency is the only agency that can input the client's Emergency Considerations. Additionally, the client's overall verification status is dependant on the Primary Agency's verification.
* When an agency enters a new client, a duplicate check is performed and a list of possible duplicate records will be presented to the agency user. If the client is listed, then the agency will link to that existing record and become a Secondary Agency. If no duplicates exist, the agency will be the client's Primary Agency.
* Secondary Agencies can unlink their agency from the client without removing the client from the register.
* Primary Agencies can both unlink their agency from the client, and remove the client permanently from the register.
* If a Primary Agency unlinks their agency from a client, the system will select and promote the Secondary Agency into the role of Primary Agency. If no other agencies exist, the client is referred to the VPR Coordinator for review.
For more information, agency users should consult the [For Agency Users section](/modules/vpr/for-agency-users).
## VPR Webinar Session
[**Training video - VPR for Agency Users**](https://s3.ap-southeast-2.amazonaws.com/cms-static.datalink.com.au/crisisworks/videos/vpr/VPR-Agency-Users-2024-04-Final.mp4) (60 mins)
All FAQs from this video are addressed in this [Guidance document](https://datalink.atlassian.net/wiki/download/attachments/105234738/Guidance%20to%20Support%20Managing%20Vulnerable%20Persons%20Registers%20and%20%E2%80%98At-Risk%E2%80%99%20Local%20Facility%20Lists.pdf?version=1\&modificationDate=1727756535855\&cacheVersion=1\&api=v2)
# Accessing the Register
This section explains how to access and log in to the VPR.
### Logging in
{% hint style="warning" %}
**Local Government VPR Coordinators or VPR Users** (Council officers) will access the VPR through Crisisworks. All other users should follow the directions below.
{% endhint %}
To login as an agency, you will need an active account with a username and password. This applies to Home and Community Care users of council, where applicable.
New agencies can register on the VPR home page. Registrations are sent to your local government agency coordinator for approval. After approval, you will receive access notification.
To log in:
1. Go to [https://vpr.crisisworks.com](https://vpr.crisisworks.com/).
2. In the login box (located on the left hand side of the welcome screen).
1. Enter your username into the Username box.
2. Enter your password into the Password box.
3. Click the "Login" button.
Login screen
Each time you login to the VPR you must agree to the terms and conditions. Tick all three checkboxes and use the "I Agree" button to proceed. You will then be directed to the dashboard and ready to use the system.
User obligations screen
### Updating your personal profile and contact details
To update your profile:
1. Click on the profile link at the top right corner of the screen. It is the first link in the list.
2. Make changes to the fields as required (note that you cannot edit your username).
3. Use the "Update" button.
Where to find the User Profile menu
### To log out / sign out
The **Sign Out** link is on the far top right of the screen. Closing the browser will also sign you out.
It is good practice to sign out when leaving your device unattended to prevent unauthorised access.
Location of sign out link
### To recover a lost password
If you have lost or forgotten your password, the most secure option is to **reset** it. Use the **Password Recovery** feature to do this. Follow these steps if you have an account:can be used for this, assuming that you have an account to begin with.
How to Access the Password Recovery Feature:
1. On the VPR login screen, click the "Forgot your password?" link located below the login button.
Forgot your password?
2. Enter your email address on the Password Recovery screen and click "Reset Password."
3. Keep the window open while you await the password recovery email.
4. Check your email for a 'Reset Code'.
If you have multiple accounts under the same email address in the VPR, the email will provide a reset code for each user. Select the relevant code for your user and enter it into the "Reset Code" field.\
Then, click the "Reset Password" button.
5. You will be directed to the "Reset your password" screen. Enter your new password in both the "Password" and "Verify Password" fields and click the "Reset Password" button.\
**Password Requirements:** Your new password must be at least 7 characters long and include both letters and numbers.
6. You can now log in with your new username and password using the "Login" button.
# For Police Users
This page explains how to use the Vulnerable Persons Register for Victoria Police users.
## Overview
Police Users interact with the VPR to query across all local registers in the event of an emergency (for example to create evacuation reports etc).
The following 6 minute video shows how to use the key functions within the system.
{% hint style="warning" %}
Please note the url for the Vulnerable Persons Register has changed since the recording of this video. **Please go to** [**vpr.crisisworks.com**](https://vpr.crisisworks.com/) **to access the VPR.**
{% endhint %}
{% embed url="" %}
It may be useful to watch the [Agency User Overview](/modules/vpr/for-agency-users) video for a general overview of how funded agencies work with the system.
## Access
Police users are managed by VicPol. Your REMI can set up an account for you (REMI police admin is similar to the [Agency Coordinator](/modules/vpr/for-agency-users/for-agency-coordinators#adding-agency-users) role). It's important to use the account set up by your REMI, not one created by an LGA user, to ensure you can access records across council boundaries.
Access the VPR at [vpr.crisisworks.com](https://vpr.crisisworks.com/)
## Browsing and Querying Registers
This section covers the act of querying the registers to find vulnerable persons (VPs) that match your criteria. There are several different methods to query the registers.
Queries generally fall into three types:
* **Browsing** - generating general results based ad-hoc,
* **Filtering** - generating precise results based on specific known criteria, and
* **Counters** - pre-designed filters designed to quickly access data.
### Browsing the register
Browsing the register allows you to explore the map and view vulnerable persons with geographic features.
* Use the map to pan and zoom
* Use the **Find tool** to focus the map on a specific point/location
### **Using counters**
* Use counter links to access pre-set filters
* Within your LGA
* Proximity and local LGA using your location with a GPS-enabled device
### **Filtering**
* Within Current View
* By Geographical Area
* Radius from a Point
* Polygon
Filters enable you to select a group of VPs to work with based on the criteria you set.
To set a filter
1. Select your filter using the pulldown list
Filter options or search the map
1. Draw on the map
2. Push the **Apply Filter** button
To reset the filter
1. Click on the **Clear Filter** button
For more details on the specific filters available, see the topics below.
### Identifying areas with no coverage
Areas shaded red on the map indicate LGAs that do not participate in the Vulnerable Persons Register.
Note that it is not possible to browse or filter for VPs within these areas. Records within this area may be accessed by contacting the council directly or using an external process/list.
Area shaded in red indicates LGA not participating in the VPR
### Counter Pre-set Filters
There are at least 2 counters which apply preset filters
* **Vulnerable Persons counter** - displays a total of all VPs in the Register
* **50k radius counter** - displays a total of all VPs within 50 kilometres of your location
* **Local LGA counter** - displays a total of all VPs within your current area
To apply a pre-set filter using a counter, click the appropriate counter
Radius counter showing the number of people in the selected area
#### Current View Filter
The Current View filter will select all of the VPs within the map view window on your screen (ie rectangular geographical area).
1. Browse to the area.
2. Select the ‘Current View’ filter
3. Push the 'Apply Filter' button
An example of a rectangular area selected from a current view is shown below
Rectangular area filter
#### Radius Filter
A radius query allows you to select a group of VPs within a circular geographical area using a central point.
To select a radius to work with:
1. Browse to the area.
2. Select 'Radius’ from the pulldown list
3. Click the map to place the centre point.
4. Adjust the radius using the cursor
5. Press the 'Apply Filter' button
Applying a radius filter
#### Polygon filter
The Polygon tool allows you to select a group of VPs within an irregular area that you define. The polygon is comprised of a group of lines connected together with the selected VPs lying in the area within them.
To create a Polygon filter:
1. Browse to the area
2. Select **Polygon**
3. Click the map to draw the polygon each point is connected to the last by a line
4. Close the polygon by clicking the first point.
5. Click **Apply Filter**
#### Polygon from External Layer
The Polygon from External Layer tool enables you to filter with a complex area that has previously been imported into the VPR from an external source. These are centrally managed and can be added to including live feeds from external sources (such as LGA boundaries, State Control Centre incident feeds).
External map layers can be found in the Feeds section and viewed on the map
To apply an external layer filter:
1. Select **Map Layer** from the pulldown list
2. Select the layer you want to use from the **Layer** pulldown list.
3. Click **Apply Filter**.
### Evacuation Reports
Evacuation Reports show a list of all vulnerable clients, emergency contact details and special needs.
With the VPR, Evacuation Reports can be generated in a number of ways:
1. **Show on screen**
2. **Download as a file** - either PDF or CSV (Excel)
3. **Email a PDF** - either to yourself, or to one or more external recipients
#### Report Contents
Evacuation Reports consist of the following core components:
| **Component** |
|
| Personal Listing | Y | Y | Y |
| Personal Detail | Y | Y | Y |
| End Page |
| Y |
|
The End page is left intentionally blank for a reference when printing.
#### Cover Page
Includes:
* The user’s details
* Date, time, IP address of query
* Filter criteria
* Result count
* Overview map
Example of a cover page
#### Person Listings
Includes a list of selected clients in a single table along with their:
* Name, Address & Phone
* Summary of evacuation criteria
* "Consult Health Commander" flag (highlighted in yellow) for clients with special evacuation needs
#### Person Details
Includes individual details for a client:
* Personal details
* Agency & Personal Emergency contacts
* Address (including marker on map)
* Record ID for matching between report pages
### Generating an Evacuation Report
To generate an Evacuation Report:
1. Apply a Filter
2. Push the "**Generate Evacuation Report**" button\

3. Provide the purpose for which the report is to be used in the "Purpose of Report" field (this is mandatory and is required for audit purposes)
4. Specify a report output type\

5. Push the "**Generate Report**" button
#### On Screen Report
The On Screen report provides a view of the report in HTML format on-screen. Note that while maps appear embedded on the page, they are a static view and you cannot pan/zoom or change views.

The On Screen (HTML) version has a print stylesheet optimised for printing that removes the menus and navigation (see below) however the PDF version is preferable for printing.
Print Preview of an on-screen Evacuation Report
#### Downloadable Reports
For downloadable reports (such as PDF or CSV) use the pop-up dialog to save the report your computer and/or open.
The PDF format is better suited to printing and sharing:
Sample PDF version of an Evacuation Report
while CSV (see below) is suited to use with a spreadsheet program such as Excel.
Sample Excel version of Evacuation Report
#### Emailing Reports
If you opt to send the report, it will attach a PDF of the report to a system generated email.
To send to other email addresses, you will need to select this option and enter a list in the field provided before pushing the "Generate button"
Generating a report to send to an email address
\
# For Agency Users
This page explains how to use the Vulnerable Persons Register for Agency users.
## Overview
Agency users represent funded agencies and are responsible for adding and revalidating records for a vulnerable client under their care.
This guide covers two types of Agency Users:
* Agency Users - these users can add, revalidate clients and save agencies
* [Agency Coordinators](/modules/vpr/for-agency-users/for-agency-coordinators) - in addition to the above, these users can edit an agency, add and agency users and grand coordinator privileges
The following 8 minute video shows how to use the key functions within the system:
{% hint style="warning" %}
**MECCCENTRAL is now CRISISWORKS**
Please note the url for the Vulnerable Persons Register has changed since the recording of this video. **Please go to** [**vpr.crisisworks.com**](https://vpr.crisisworks.com/) **to access the VPR.**
{% endhint %}
{% embed url="" %}
### Further VPR videos
* Watch a recording of a webinar sessions for **VPR Agency Users** (60mins).
{% embed url="" %}
{% file src="/files/QY0zgDB16O3Lc0RYGHK6" %}
## Accessing the VPR
To access the VPR, enter the following URL into your device's web browser:
[**https://vpr.crisisworks.com**](https://vpr.crisisworks.com/)
A login box will appear, where you can enter your email address and password.
* If you don't have a username and password, you should check whether your agency has registered.
* If your agency has not used the system before then you can [register your agency](#self-registering-your-agency), otherwise, you should consult your Agency Coordinator to obtain your login credentials.
* If you are the Agency Coordinator for your agency, you can contact your local VPR Coordinator at your council for assistance.
## VPR Help and Documentation
To access the VPR:
1. Enter the following URL into your device's web browser:\
[**https://vpr.crisisworks.com**](https://vpr.crisisworks.com/)
2. Select **Feedback & Support** in the top right hand side corner.
Location of the Feedback & Support link for help
### Registering your Agency
To register your funded Agency to use the Vulnerable Persons Registers (VPR):
1. Go to [http://vpr.crisisworks.com](http://vpr.crisisworks.com/)
2. On the login page, click the "register for an agency account" link.
Register link for an agency account
3. Read the policy outline and push the "Begin Registration" button
Begin registration link
4. Complete the Agency details in the Agency Registration form. Required fields are indicated with an asterisk. This will include:
* Agency Name
* Email Address - this is the general email address for your organisation.
* Website Address - optional, to be displayed on the profile page of your agency
* Summary of Services - optional, to be displayed on the profile page of the agency
* Phone Number - displayed on the profile page of the agency and may be used by those accessing the system to contact the agency directly
* Administering Local Government - nominate the primary LGA that your agency is headquartered in. This council will be responsible for supporting your agency's VPR account (password administration etc)
Agency registration form
5. Complete the Agency Coordinator section, and the optional Additional Agency Coordinator. It is mandatory to nominate at least one Agency Coordinator.
6. It is optional to nominate emergency contacts for the agency.
7. Push the **Register** button
8. Wait - your registration will be sent to the VPR Coordinator at your nominated council for approval. You will receive a confirmation of your registration, including an email which is sent to your nominated Agency contact email address.
Agency Registration page including example account details
## Finding your VPR coordinator for support
For help and support you should first contact your VPR coordinator, this is normally the original (LGA) local government Council that approved your agency registration, even if your agency spans many LGAs. To find out who your LGA contact is:
1. Go to [vpr.crisisworks.com](https://vpr.crisisworks.com/)
2. Click on the **Feedback & Support** link at the top right
Location of the Feedback & Support link for help
3. On the next screen, enter your email address and press ***search***
{% hint style="info" %}
Even if you don't have an account, the VPR will use your email domain name to find your LGA
{% endhint %}
## Adding Clients to the Vulnerable Persons Register
There are two main ways to add new clients to the Vulnerable Persons Register:
1. The **New Client** button which appears on the top right of the screen throughout the Vulnerable Persons Register
2. The **Add** button which appears at the bottom of the datagrid on the "Vulnerable Persons" board
Two ways to add a new client, the New Client button (top right) and the Add button (bottom)
{% hint style="info" %}
**Show Address:** If the address does not appear in the search results, try using an abbreviated road type (e.g., RD for Road, ST for Street, CR for Crescent, CT for Court, DR for Drive, PL for Place)
{% endhint %}
### Existing Client Check
As clients should only be added into the system once, when adding clients, the system will check to see if any existing records match. This is done via a combination of the name, details and location.
In the event that your record closely matches existing records, you will be asked to select the closest match. It is very important to check the details to ensure that they match an\
that you are selecting the same person.
Confirming the right client when there are close matches or creating a new record
### Confirming you have consent
If you are adding a new client record, you must have consent before the record can be added. To confirm you have obtained the signed consent form, tick the box.
Client consent confirmation
### Entering Client Details
The next step is to edit the record, which allows you to complete the new vulnerable person record. Please consult the Protocols for a description on the fields, along with your requirements relating to the management of the new record.
Editing a Client record as a primary agency user
To save your edits, use the **Verify Client** button at the bottom of the form.
## Viewing the Clients List
To view a list of clients, navigate to the Vulnerable Persons board (click on "Vulnerable Persons" in the main menu).
The list of clients that you can see will be based on your level of access.
Location of Vulnerable Persons in the main menu
You can use the filters and column sorting to refine the list of clients.
#### **Record Status**
There are two statuses for clients
1. **Unverified** - meaning that the accuracy of the record is uncertain
2. **Verified** - the record has been checked for accuracy by the agency
## Viewing a Client Record
To view a client record, click on the ID or title wherever it appears in the VPR (for example, the client's list, dashboard etc).
The View Client screen will appear in read-only mode, with the details of the client including:
* Location (map) displaying the client's current address
* The client's Name, Date of Birth and Gender
* Contact details for the client
* Emergency Contacts
* Special Needs
* Managing Agencies
Client record in view mode
## Editing a Client Record
Clients can only be edited from the client view screen.
To edit a client:
1. Navigate to the client (ie from the Vulnerable Persons screen)
Click on the clients name to open their record
2. On the Client profile screen, press the **Edit** button.
Location of the edit client button
### Permissions
Edit rights are controlled by permissions:
* **Primary Agencies** - may update the record as they have primary responsibility for the client
* **Secondary Agencies** - may only update the *Agency Reference.* This is an internal code for the client that is specific to each managing agency, which can help you to reconcile your data in your client management database against the VPR.
A message prompt will display to inform you which type of access you have to the client record after you click the Edit button.
### Fields
As a primary agency, the edit client record screen allows editing of most fields including:
* Name, Gender and Date of Birth
* Contact details
* Address - enter an address into the Address field to locate on the map using the "Show Address" button
* Agency Reference
* Status - Verified/Unverified
* Emergency Contacts - Name, Phone, Mobile, Relationship to client
* Special Needs - a series of checks including sections detailing Mobility; Equipment; Access & Security; Communications & Cognitive and an area for additional notes
* Consent Form - You can upload and attach a consent form. Note that only the consent of the Primary Agency will be visible to a VPR Coordinator, therefore it is best for the Primary Agency to upload these.
3. Fill in the electronic form and push the **Update** button
Location of the Update button at the bottom of the Client profile form
## Revalidating Clients
Clients require re-verification from time to time in order to ensure the data is kept accurate. This process will typically be required twice a year and typically occurs in April and October.
The VPR System will tell Agency Users when clients require re-verification, by setting the status of the client record to ***Revalidate**,* and by sending an email to the Agency Coordinators. When this occurs, the agency must update the record with current data and then ***Verify*** the client record.
To revalidate a client:
1. If your Agency has clients requiring revalidation, you will see a message at the top of this screen and see clients with the status REVALIDATE.
2. Navigate to the client that requires revalidation.
Client records requiring verification and the Revalidate status
3. On the Client profile screen, press the **Edit Client** button.
Location of the Edit Client button on the Client profile
4. Review the client's details and ensure all information is up to date and correct. Then complete the process using the **Verify Client** button
Location of the Verify Client button at the bottom of the Client Profile in Edit mode
5. Your client has now been revalidated and has a VERIFIED status.
Verified Status indicates that the client has been Revalidated
## Removing a client
Removing has two meanings in the VPR:
1. This client is still vulnerable but is no longer receiving services from your agency. Here you are removing the relationship between you and the client. This is known as "unlinking".
2. This client is no longer vulnerable. Here removing a client will remove it from the system altogether.
To remove a client when the client is no longer vulnerable:
1. Navigate to the Client screen and use the **Edit** button.
2. Use the **Remove** button at the bottom of the form
Location of Remove client button
3. Depending on your relationship with the client, the removal screen will offer different options. As a Primary Agency, who wishes to remove the Client from the VPR, as they are no longer vulnerable, select the second option as shown below.
Removing a client screen
4. Selecting this option will result in a number of removal reasons to appear. You must select a removal reason and then acknowledge(tick) the confirmation statement.
Fields to specify a reason for client removal
5. Use the **Remove from Register** button to process the removal request.
## Changing which agency is the Primary Agency
When multiple agencies have a relationship with a client, it is possible for agencies to change which agency is the Primary Agency.
### As the Primary Agency
If you are the Primary Agency:
1. View the client record
2. Use the **Edit Client button** to enter Edit mode
3. Use the **Remove** button
4. Select the reason "This client is still vulnerable but is no longer receiving services from this agency"
5. You can then select the secondary agency that should become the primary
6. Use the **Submit** button to process the change of agency
All agencies and the VPR Coordinator will be notified of the change.
### As the Secondary Agency
If you are a Secondary Agency then contact the Primary Agency or the VPR Coordinator to have the client reassigned to you.
## Transferring the Clients Agency
When a client only has one agency, if you wish to transfer them to another Agency it is similar to the previous section (on changing the primary agency).
We recommend this process:
1. Ask the New agency to add the same client to their VPR list. (This will add the client as a secondary agency for them)
2. Wait until this is done. You know it has been done if you can see the secondary agency listed.
3. Have the original agency remove this client after this is done. (This will automatically promote the secondary agency to become the primary agency)
Doing it in this order will insure that the client is always on the VPR list at all times.
### As the Primary Agency
If you are the Primary Agency:
1. View the client record
2. Use the **Edit Client button** to enter Edit mode
3. Use the Remove button
4. Select the reason "This client is still vulnerable but is no longer receiving services from this agency"
5. You can then select the secondary agency that should become the primary
6. Use the **Submit** button to process the transfer
# For Agency Coordinators
This page explains how to use the Vulnerable Persons Register for Agency Coordinators.
## Overview
In addition to the standard [Agency User](/modules/vpr/for-agency-users) functions, Agency Coordinators are nominated by VPR Coordinators and have permission to [manage agency users](#adding-agency-users), by [adding them](#adding-agency-users-1), [removing them](#removing-agency-users) and [setting agency coordinator privileges](#setting-agency-coordinator-access-privileges).
## Access
To access the VPR as an Agency Coordinator your VPR Coordinator needs to enable this either when your Agency User account is created or by upgrading your privileges. Another Agency Coordinator can also grant you access.
## Edit My Agency
To edit your agency details:
1. Sign in as an Agency Coordinator
2. Navigate to **My Agency** in the main menu
3. Use the **Edit Agency** button to switch to edit mode\

4. Make changes as required (note this is how you change your Agency's name as the administering LGA if needed)
5. Use the **Update** button to save
## Managing Agency Users
#### Adding Agency Users
1. Sign in as an Agency Coordinator
2. There are two ways to add new users, both essentially do the same
1. On the *My Agency* tab use the **Manage Users** button (this effectively does the same as option 2)
2. Visit the *Users* tab
3\. On the Users tab, use the **Add Agency User** button
Location of the Add Agency User button
4. Complete the Create New User form including the following fields:
1. Email - Contact email for a new user (used to send an invitation and as their username)
2. Agency - this shows your agency and cannot be changed
3. This user is the agency emergency contact - tick if this is a nominated emergency contact (there can be more than one emergency contact for your agency)
4. This user is a coordinator - grants coordinator access rights to the user
5. Push the **Submit** button
Location of the Submit button at the bottom of the Create a new User form
#### Removing Agency Users
To mark an Agency User as removed in the VPR:
1. Sign in as an Agency Coordinator
2. Access the *Users* tab
3. Select and edit the Agency User you wish to remove
4. Select Edit Profile
5. Use the **Delete** button at the bottom of the page to complete the removal
Location of the Delete button at the bottom of the Edit Profile form
#### Setting Agency Coordinator access privileges
To make an Agency User that is not currently an Agency Coordinator an Agency Coordinator:
1. Open the user's profile via the user's name in the Users list, Dashboard etc.
2. Edit the user's profile.
3. Select the *Roles & Security* tab.
4. Tick the checkbox labelled *This user is a coordinator* (or untick if removing the privilege)
5. Use the **Update** button to save the form
The Roles & Security tab in the Edit Profile screen is only available to Agency Coordinators
# For VPR Coordinators
This page explains how to use the Vulnerable Persons Register for VPR Coordinators at councils.
## Overview
VPR Coordinators are council officers that access their local VPR through Crisisworks. The VPR Coordinator is responsible for coordinating and supporting agencies within their local area, and resolving any changes to an agency's client relationship.
{% hint style="success" %}
A VPR Coordinator cannot add clients to the VPR. Only an Agency user can do this. It is possible for a VPR Coordinator to also be set up as an Agency.
{% endhint %}
The following 9 minute video summarises the key information needed by VPR Coordinators to use the system:
{% hint style="warning" %}
**MECCCENTRAL is now CRISISWORKS**\
Please note the url for the Vulnerable Persons Register has changed since the recording of this video. **Please go to** [**vpr.crisisworks.com**](https://vpr.crisisworks.com/) **to access the VPR.**
{% endhint %}
#### Further VPR training videos
* Watch a recording of a webinar session for **Council VPR Coordinators** (60 mins).
{% embed url="" %}
{% file src="/files/QY0zgDB16O3Lc0RYGHK6" %}
* Watch the [**Agency User Overview video**](/modules/vpr/for-agency-users#overview) to understand how agency users will work with the system.
{% hint style="info" %}
Some organisations block video streaming into their networks, and if this is the case, try viewing from another device such as a mobile data-enabled iPad. The videos are only small in file size.
{% endhint %}
## Accessing the VPR
1. [Log in to Crisisworks](/concepts-and-fundamentals/on-a-computer/getting-access)
2. If you have previously been set up to access the VPR, you can simply use the **Vulnerable Persons Register** link in the left-hand side panel from the Dashboard. This will automatically log you into the register. If you haven't been set up with VPR access, you will need to request that your Crisisworks Administrator update your user permissions.
Vulnerable Persons Register link in Crisisworks
{% hint style="info" %}
If you are a VPR Coordinator for multiple LGAs, it is possible to [configure common access across all the LGAs](#advanced-topic-sharing-access-across-multiple-lgas) you work in, regardless if which Crisisworks you access the VPR from.
{% endhint %}
## Viewing the Agency List
The Agency List will display any agencies that you have permission to view and/or edit.
To access the agency list:
1. Sign in as a VPR Coordinator.
2. Select the **Agencies** tab in the main menu.
Location of the Agencies list in the main menu
The agency list is several navigation features including:
* Filters - filters the list using the applied criteria
* Sortable Columns - click each data column to re-sort table ascending or descending
* Data Export - exports a CSV (Excel spreadsheet compatible) file containing the contact details for each agency matching the currently set filter
The agency status field is set based on the agency's primary clients. If all clients are verified, the agency is verified. If any client is requiring validation or is unverified, then the agency record will also show that state. Additionally, the *new* status is used to identify new agencies that have self-registered but are not yet active.
### Viewing an Agency
To view an agency:
1. Access the **Agencies** tab in the main menu to view a list of all agencies in your area.
2. Then, use the ID blue link for the agency you want to view. You can also filter your agency list using the filters to the left.
Location of the Agency ID links and filters
## Managing Agency Users
As a VPR Coordinator, you can add and edit agency users on behalf of your agencies.
This allows you to:
* Add new users to an agency
* Edit the details of an existing agency user to update their email address, password and contact information
* Make a user active or inactive
* Promote or demote the user from the [Agency Coordinator](/modules/vpr/for-agency-users/for-agency-coordinators) role
Step by step:
1. Log in as a VPR Coordinator
2. In the Agencies tab search for the agency you wish to manage and [View the agency details](#viewing-an-agency). The agency's users are listed on the right hand side of the agency details screen.
3. To edit a user, open the user you wish to manage to view that user's profile, then use the **Edit** button. If adding a new user, use the **Add User** button instead.
4. From the edit screen, change the details you wish to change, then use the **Save** button to update the details.
## Adding New Agencies
VPR Coordinators may register new agencies into the system.
To add a new agency:
1. Sign in as a VPR Coordinator
2. Access the Agencies tab
3. Use the **Add** button at the bottom of the screen
Location of the Agencies tab and Add button to add new Agencies
4. Complete the Agency details in the Agency Registration form. Details on how to use this form can be found in the [Agency Registration ](/modules/vpr/for-agency-users#self-registering-your-agency)section.
## Approving or Denying new Agency Requests
Before an Agency user can access the system, the Agency must be approved by a VPR Coordinator of the responsible LGA.
VPR Coordinators will receive an email notification when Agencies have requested to be added to the VPR. Newly added records will be marked with a status of *New*.
Only VPR Coordinators can approve agencies.
### Approving New Agencies
To approve an Agency request:
1. Sign in as a VPR Coordinator
2. View the Agency Page marked with the status of *New* that you wish to approve (use the Agency link in email notification, the Agencies list etc)
3. Use the **Approve** button. Once approved, the Agency will be sent a notification and be able to begin using the VPR.
Location of the Approve button on the New Agency profile
### Declining New Agencies
To decline an Agency request:
1. Sign in as a VPR Coordinator
2. View the Agency Page marked with the status of *New* that you wish to decline (use the Agency link in email notification, the Agencies list etc)
3. Use the **Decline** button. Once declined, the Agency will be removed from the VPR.
Location of the Decline button on the New Agency profile
## Editing an Agency
To update the details of an Verified Agency, use the Edit Agency button at the bottom of the form. You cannot edit an Unvalidated or New Agency until it has been approved.
The edit form can be used to update the Agency Name, Email, Website, Service Summary, Phone contacts, Administering Local Government and Emergency Contacts among other details.
To edit an agency:
1. [Find and view the Agency](#viewing-an-agency) you wish to edit
2. On the Agency profile page use the **Edit Agency** button at the bottom of the Agency profile screen
Location of the Edit Agency button on the Agency profile screen
### Deactivating and Reactivating Agencies
You can deactivate a Verified Agency using the **Deactivate** button when editing the Agency record at the bottom of the screen next to the Update button. If the Agency has clients it cannot be deactivated. In such a case the clients should be transferred to another agency first.
Update and Deactivate buttons
An Inactive Agency can be Activated similarly if it becomes active again using the **Activate** button.
## Managing Council VPR users
Council users are managed from within Crisisworks, by the [Crisisworks Administrator](/system-administration/configuring-the-system).
### Granting VPR Coordinator Access
Refer to: [Managing Users](/system-administration/user-and-contact-administration)
To grant VPR Coordinator access:
1. Edit the user's profile
2. Add the *VPR Coordinator* [Position](/system-administration/configuring-the-system/positions) into the **Positions** field
3. Save
{% hint style="info" %}
Note that the contact's [Organisation field](broken://pages/LA4Q1JYzBEpq4X9RdhIY#organisation) must also be set to 'Council' or it will not save. Do not change the value of this field if it is set properly. This is required to apply the VPR Coordinator security policy.
{% endhint %}
The VPR Coordinator position in a Crisisworks user account
#### Removing VPR Coordinator Access
Refer to: [Managing Users](/system-administration/user-and-contact-administration)
To remove VPR Coordinator access:
1. Edit the user's profile
2. Remove the *VPR Coordinator* [Position](/system-administration/configuring-the-system/positions) in the **Positions** field (use the cross to remove the position)
3. Save
{% hint style="info" %}
If the user is no longer with council, you may also wish to [Deactivate their User account](/system-administration/user-and-contact-administration#activating-and-deactivating-contacts). It is very important however that you perform the steps above first as that is what triggers the removal of their name from the VPR Coordinators list on the VPR website.
{% endhint %}
### VPR Coordinators spanning multiple councils
It is possible for a single VPR Coordinator to span multiple councils. The procedure for doing so is as follows:
1. Decide on a primary email address for the user, and temporarily set the user's email address in the profile of each Crisisworks instance.
2. In each Crisisworks, activate the VPR Coordinator position for that user.
3. Once you have done this, the email addresses within Crisisworks can be reset to their previous settings.
By following this procedure, a VPR Coordinator with user accounts in multiple Crisisworks instances will be able to get visibility in the register across all their councils at once, regardless of which Crisisworks they use to log into the register.
## Removing persons from the register that have no primary agency
A VPR Coordinator can permanently remove clients that have no assigned agency.
Before removing the client, the onus is on the VPR Coordinator to ensure that the client is no longer vulnerable for the purposes of the VPR system.
{% hint style="danger" %}
Important: This client will no longer be considered vulnerable by police and they will no longer appear in any searches or reports.
{% endhint %}
**Important:**\
\
To remove the client:
1. Log in as a VPR Coordinator
2. Find the vulnerable person
3. Verify the person has no primary agency
4. Use the **Remove** button and specify the removal reason.
The following screenshot shows how to verify the person has no primary agency, along with the location of the remove button.
Location of the Remove button in the Client Details screen (only available to VPR Coordinators)
## Removing Agency from vulnerable person’s record
If an Agency is now longer actively managing a client and the VPR Coordinator is unable to contact the Agency so that they can remove themselves as the Primary Agency, the VPR Coordinator will need to remove the Agency. This is currently done by submitting a request to Datalink Support. To do this, the VPR Coordinator should [Contact Support](/security-and-support/maintenance-and-support/accessing-support) with the following details:
* The record ID of the person
* The name of the Agency to be removed.
### Advanced Topic: Sharing access across multiple LGAs
Some VPR Coordinators will be the same across multiple councils, and in this case, the Vulnerable Persons Registers system allows for that user to create a single view across multiple LGAs.
To set up a common view across multiple LGAs, follow these steps.
1. Decide upon an email address to be your primary email address.
2. In each Crisisworks that you are a VPR Coordinator, edit your email address to set it to the common email address.
3. Now, have your Crisisworks Administrator add the VPR Coordinator role to your account. If you have already had this role, uncheck the box and save your profile, then recheck the box and save again.
4. Now you should be able to log in from any of the Crisisworks instances, and view clients and agencies across all your boundaries.
5. After you have logged in from each Crisisworks for the first time, you can change your email address in Crisisworks back to whatever it was originally.
If you have any problems then please contact our [Service Desk](/security-and-support/maintenance-and-support/accessing-support) for assistance.
# Frequently Asked Questions
This page provides some answers to some of the questions more frequently asked by Vulnerable Persons Registers (VPR) users.
## General
### Who can add vulnerable person records?
There are a few different classes of user in the VPR, but only [Agency Users](https://datalink.atlassian.net/wiki/spaces/KB/pages/105235312/For+Agency+Users) can add or edit vulnerable persons records.
### How does the revalidation process work?
The validation process is primarily an agency responsibility. Twice a year, agencies are required to validate each of their client records. If the agency has no clients, then they can validate their agency as having no records at this time.Clients require re-verification from time to time in order to ensure the data is kept accurate. This process will typically be required twice a year currently in **April** and **October.**
**How an agency revalidates clients**
****The process of validating clients is covered in more detail in the following article: [For Agency Users > Revalidating Clients](/modules/vpr/for-agency-users#revalidating-clients)
1. An agency edits each client record, makes changes as needed and use the **Validate Client** button
2. When all an agency's client records are revalidated, their agency is automatically marked as validated.
**How an agency revalidates where it has no clients**
If an agency has no clients at the time of validation, a message appears above the Vulnerable Persons data grid with a link that they can use to assert that they have no vulnerable clients at this time.
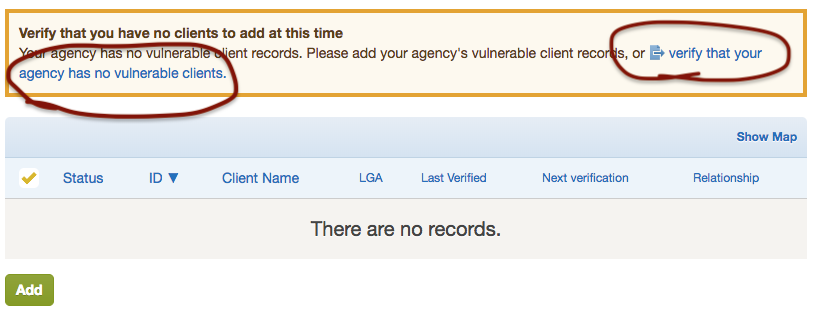
**The role of the VPR Coordinator with agency revalidation**
There is no direct way for VPR Coordinators to validate agencies in the system. The role is instead to coordinate the agencies themselves to help them to revalidate their own agencies.
The system is designed to have a primary municipality that is responsible for this role, however, in practice any VPR Coordinator at any LGA can reach out to any agency to which they have a relationship, to help them to revalidate their client records.
## VPR Coordinators
### Why can't I edit a vulnerable person?
Only VPR Agency Users can edit clients.
The role of a VPR Coordinator is to coordinate agencies to manage their own client records and revalidation. Therefore VPR Coordinators can not add, edit or update clients.
There is sometimes confusion on this point because it's sometimes the case that the same council officer is both a VPR Coordinator for their council and an Agency Coordinator for their HACC service.
If you need to determine which user account to use, log in as a VPR Coordinator, find your council's agency and you will find the list of authorised agency users for that agency. You can add yourself if you are not on that list, and you can reset the user's password by editing that user's profile. Once you know the email address and password you can log in at [https://vpr.crisisworks.com](https://vpr.crisisworks.com/).
### An agency has reported to me that client does not have an address in Vicmap
The VPR system uses the authoritative government address database known as *Vicmap.* Sometimes addresses in rural areas can have well-known but informal addresses, and these addresses may be known to other service providers such as Australia Post or Google, but are not in the Vicmap database.
You should speak with your GIS Officer for advice on the best way to resolve the address. They can either locate the formal address, or advise Vicmap of the missing address.
It is important that all clients have Vicmap addresses, because all the emergency services agencies also use Vicmap for their work, and they may not be able to help that client in times of need if they cannot find them easily.
See if you can find the address in if it is not there, then contact the council to see if they can figure out why it is not in VicMap.
### I am trying to change the status of a client in Crisisworks but I do not see an 'Edit' button, just 'Comment' and 'Remove'.
As a VPR Coordinator, you do not have the ability to edit a Client record, only Agency Users have this level of access.
The role of a VPR Coordinator is to coordinate agencies to manage their own Client records and revalidation. Therefore VPR Coordinators can not add, edit or update Clients.
VPR Coordinators however can remove a Client from the VPR when they no longer have an Agency assigned.
If the Client is no longer vulnerable, and does not need to participate in the VPR program, then follow the [removal process](/modules/vpr/for-agency-users#removing-a-client).
If the Client is still vulnerable there are two options:
1. There is an Agency responsible for this Client.\
Contact the responsible Agency and ask them to add the Client into the VPR. The system should recognise that the Client already exists and prompt the Agency to [add an 'exisiting' Client](/modules/vpr/for-agency-users#existing-client-check).
2. There is no responsible Agency.\
The Emergency Management contact at your regional DFFH office should be able to provide advise.
### What does the counter "Clients Requiring Attention" represent?

The "Clients Requiring Attention" is a count of clients with a "revalidate" or "unverified" status who also have an associated primary agency.
This is why its value is often different to the combined totals of 'To Revalidate' and 'Unverified' counts.
### I have a Client with no Agency, what do I do?
It is possible, and valid, in the VPR system, for an Agency to remove themselves from a Client if they no longer provide services for that Client.When an Agency removes a Client, they are presented with two options:
1. The Client is still vulnerable but is no longer receiving services from your Agency.\
Here the link between the Client and the Agency is removed, but the Client remains active in the VPR because they are still considered vulnerable.
2. This Client is no longer vulnerable. When this option is selected, the Client is removed from the VPR system altogether.
When the first option is selected the Client remains visible in the VPR system but they are not linked to an Agency.As the VPR Coordinator, when you see that a Client has no Agency, DFFH suggests undertaking the the following:
1. Contact the last known Agency to confirm the Client's address and whether they are to remain on the Register (ie the Client is still vulnerable). To find the last known agency, look at the Activity Log on the Client page, you should be able to see the last Agency attached to the Client.\
a) If the Client is no longer vulnerable, and should no longer be listed in the VPR, as the VPR Coordinator, you have to ability to remove the Client record.\
b) If the Client is still vulnerable, seek the details of the client's current service provider (ie Agency) if known.
2. If known (from step 1) contact the clients current Agency and ask them to add them as their Client in the VPR.
3. If the current Agency is not known, where possible, contact the Client listed on the Register directly to confirm their information and circumstances.
4. If the Client can not be contacted, attempt to contact the Client's emergency contacts to establish if the individual still resides at the listed address and is still vulnerable.
5. After exhausting all local options, and you can not match the client to an Agency, you can contact DFFH and request that the Client be referred to the Red Cross Emergency Services.
### How do we consolidate agencies?
Overtime, as different people come and go from an organisation, you might find that the same agency has been added into the VPR more than once and their clients are spread across these agency account and they wish to consolidate them. To do this:
1. Select one agency as the 'main' one you wish to keep and move all clients to.
2. An agency user of the 'main' agency, should login and add all the clients you want to move across from the agency you want to close.\
When they go through the process of adding the client, if they use the matching name and date for birth of an existing client, the VPR will pick up that the vulnerable person is already in the system and ask the agency if they want to add the existing client, or create a new one. This will set up 'main' agency as the secondary agency for these clients.\
This process is outlined in the online documentation that you can forward to the agency as well.\
Refer to: [Existing Client Check](/modules/vpr/for-agency-users#existing-client-check)
3. Log in as the agency user for the agency to be closed. For each client go through the removal process, this will include an option to transfer the client to the secondary agency - in this case it will be the 'main' agency due to the steps followed in point 2 above.\
Refer to [changing an agency](/modules/vpr/for-agency-users#changing-which-agency-is-the-primary-agency-inlineextension).
4. Once all the clients are moved, as the administering LGA coordinator for agency to be closed can now deactivate/remove the unwanted agency. Before doing so, they may want to ensure that those agency users, aligned to the closing agency, who need continued access, are set up with a user account for the main agency.
### Why are names of inactive VPR Coordinators appearing in the contact list
The most likely cause is that the steps to remove VPR Coordinators aren't followed and users have been deactivated whilst still having the VPR Coordinator position in Crisisworks.
The position should be [removed from their accounts](/modules/vpr/for-vpr-coordinators#removing-vpr-coordinator-access) first when they are no longer acting as VPR Coordinators. This should be before and in addition to deactivating the user account.
Removing the position will trigger an update to the list upon save usually overnight.
For this you'll need to have your Crisisworks administrator[ remove the VPR Coordinator position](/system-administration/user-and-contact-administration#positions), re-save and deactivate their user account. The saving of the record without the position should trigger a refresh/update of the VPR Coordinators list on the website without further intervention. If it still doesn't, contact Help Desk for assistance.
## Agency Users
### My client has an RMB address, and it cannot be verified in Vicmap. What do I do?
An RMB ("Regional Mail Box") address is an older style of address used in rural areas.
These addresses were phased out over 10 years ago, and are no longer valid addresses in Victoria. Each RMB address was replaced with a standard address format with a street number and street name, where the street number was the number of metres from the start of the road. For example, 1600 Country Road would be 1.6 kms from the start of Country Road.
As RMB addresses are no longer official property addresses, you will need to get the property's official address. You can do this in a number of ways:
1. By contacting your client - they should know of the new address.
2. By contacting your *VPR Coordinator*, who can consult with the council GIS Officer to identify the address.
3. By visiting [Land Victoria's Online Map](http://services.land.vic.gov.au/maps/interactive.jsp), and browsing the street to identify the address.
Once you have the valid address, you can enter that into the VPR.
### I cannot find my client's address in the VPR
The VPR system uses the authoritative government address database known as *Vicmap.* This is important because all the emergency services agencies also use Vicmap for their work.
If you cannot find your client's address in Vicmap, it's possible that you have the wrong address. It's also possible that Vicmap does not contain the address.
Either way, follow these steps to resolve the issue:
1. Double-check the address. If you know the house exists from visiting the home, you can visit [Land Victoria's Online Map](http://services.land.vic.gov.au/maps/interactive.jsp) and browse the street to identify the address using the interactive map. Any address that appears within Land Victoria's map also appears within VPR.
2. Contact your VPR Coordinator. Your VPR Coordinator works for your local council, who is responsible for managing the local addresses for the area. If you think the address is valid but not listed in Vicmap, as your VPR Coordinator to speak with their GIS Officer to investigate the address. Councils typically update Vicmap with new addresses weekly, so if an address is missing from Vicmap then this approach allows the address to be added to Vicmap, which also ensures all emergency services agencies are able to locate the property in times of need.
### Our Agency Coordinator has left - how can I get access to our account?
Agency accounts are accessed via individual user accounts, so if a user leaves the organisation without handing over their access credentials, you may find your agency is locked out of the VPR.
To obtain access, contact one of the following people for assistance:
1. The *VPR Coordinator* at your local council (preferred contact),
2. The Emergency Management contact at your regional DFFH office
Only the *VPR Coordinator* can grant access to locked-out agency accounts. The regional Emergency management contact can look up your VPR Coordinator for you.
You can also enter your email address into this form () to see if it can look up your VPR Coordinator based on your email address.
### We have a client on the Vulnerable Persons Register who has been entered twice. Is it possible to merge the records?
There is no automatic way to merge the two client records.
The best approach is to select the client that is the most accurate (lets call this the primary record) and copy across any information that is needed into this record from the secondary record.\
Place a comment against the primary record including the id of the secondary record. For example "*Merging information from duplicate client id 12345*".
Once this is done, then remove the secondary client record using the process outlined in the VPR documentation in the section headed "[To remove a client when the client is no longer vulnerable](https://datalink.atlassian.net/wiki/display/KB/For+Agency+Users#ForAgencyUsers-ToremoveaclientwhentheclientisnolongervulnerableremoveClient)".
During the removal process make sure to add a comment making reference to the primary client record for future reference. For example "*Removing duplicate client. This client is a duplicate of client id 54321.*".
## Police
### How do I access the VPR?
Police users are managed by VicPol, so please contact your MERC or REMI for access.
# Troubleshooting
# Configuring the System
This section outlines the System Administration functions including managing users, positions, lookup items and other system functions.
## Overview
System Administration includes maintenance tasks for the system and adding users.
### System Administration Positions
System Administrators can have different positions with different levels of access. Please ensure you're on duty with the right position for the type of tasks you wish to undertake.
These are as follows:
Position
Permissions overview
System Admin & Data Entry
Access all and configure registers in the the System Administration area
System Admin - User management
Access Positions and Position Groups
View, add and edit Contacts type of Users
## Access
The System menu is available to System Administrators via the [user menu](/concepts-and-fundamentals/on-a-computer/your-user-profile-and-duties).
If you aren't on duty with a System Administration position you will not see the System Administration area.
You will only see the System Administration link under System if you are on duty with a [System Administration position](#system-administration-positions).
System section of the User menu
{% hint style="info" %}
You will need a System Administrator position in your user account to access System Administration. This can only be added by another administrator. Contact your administrator first if you need this permission. For information security reasons, the Datalink Help Desk requires authorisation to perform this task.
{% endhint %}
{% hint style="info" %}
In order to perform System Administration functions you must be on duty to at least one event with a System Administration position. If you aren't you may be able to access System Administration areas but not perform functions.
{% endhint %}
## System Administration Settings
The System Administration menu provides access to registers other users cannot access.
{% hint style="info" %}
To add new items into these registers, use the New Item button within each register.
{% endhint %}
{% hint style="info" %}
Users are managed via the Operations module's [Contacts](broken://pages/rGTm9vyCA4TordShc02E) register not through the System Administration menu.
Events is another system register that is [navigated to](/concepts-and-fundamentals/on-a-computer/working-with-events) and [managed separately](/system-administration/managing-events) through the Events menu.
{% endhint %}
The following sections outline the System Administration registers available for use in your system along with their key administration functions.
# Positions
This section explains how to add new positions to the system.
## Overview
Positions provide permission profiles which can be used to restrict access to certain system functions based on a user's role.
Positions are grouped together by [Position Groups](/system-administration/configuring-the-system/position-groups) to help organise them.
Positions support Role Based Access Control (RBAC) via [security policies](#security-policies).
{% hint style="info" %}
Some positions, known as System Positions, are special and cannot be edited. These are typically established when your system is first set up.
{% endhint %}
### Access
To access Positions you will need to sign in with [*System Admin & Data Entry* position](/system-administration/configuring-the-system#system-administration-positions).
You can find the register under **System Administration** **> Positions**.
## Viewing
Positions are listed in and searchable via the register [Datagrid](/concepts-and-fundamentals/on-a-computer/using-the-datagrid#data-grid-view).
Sample Positions Register datagrid
To view an existing Position:
1. Navigate to the Position register datagrid.
2. Locate the item you wish to view. The register includes filters for Workflow (Active/Inactive) and Region
3. Open the item using the ID
4. To return to the Datagrid use the Back button
View of a sample position including the link to the position group
## Settings
Note that System Positions can be viewed but cannot be modified.
| Left Column | Right Column |
| ----------------------------- | --------------------- |
| [Record Notes](#record-notes) | [Workflow](#workflow) |
| [General](#general) | [Activity](#activity) |
### Record Notes
When editing, record notes in the [rich text field](/concepts-and-fundamentals/on-a-computer/using-the-datagrid/editing-items#rich-text-fields) as you make changes which will appear in the Activity log.
Refer to: [Recording Notes](/concepts-and-fundamentals/on-a-computer/using-the-datagrid/editing-items#recording-notes)
### General
#### Title
Use this setting to name the position. This is required.
#### Short name for lists
Use this to setting to create an abbreviated name to appear in lists. Note that you should include the organisation's details/acronym in this as well in order to identify it in lists.
#### Description
Use this setting to provide a brief description of the position to ensure that users know how and what it should be used for.
#### Position Group
Use this setting to categorise the position. Any existing position group can be removed using the cross. To add a new Position Group, search from the available ones.
#### Organisation
Use this setting to enable linking with a Contact of type Organisation. This can be used to provide access for user accounts that have the same organisation as a resource to see and edit the record. This is helpful when working with subcontractors that will log into Crisisworks to view and edit their own tasks.
#### Security Policies
{% content-ref url="/pages/rQOZmsZuoi7rz1cJIJEh" %}
[Built-in Security Policies](/system-administration/configuring-the-system/positions/built-in-security-policies)
{% endcontent-ref %}
Use this setting to add (or remove) any number of policies to the position. Each policy that you add grants permissions based on the description of the policy. There are a large number of security policies that cover most aspects of the system. Keep in mind that policies may contradict each other so it is best to read their descriptions carefully and to only add those that are necessary.
You'll find security policies relating to each module in their respective guide.
### Workflow
Positions have only two statuses: Active and Inactive. Active positions are enabled for use. Inactive positions cannot be added to users but can be reactivated and re-added if needed.
### Activity
Refer to: [Viewing Items: Activity](/concepts-and-fundamentals/on-a-computer/using-the-datagrid/viewing-items#activity)
## Editing
Positions can be edited from the datagrid.
1. Navigate to the Positions register
2. Locate the Position you wish to edit by using the Edit button
3. Make the necessary changes to the [settings](#position-settings)
4. Save to save your changes
## Adding
To add a position:
1. Use the [New Item button](/concepts-and-fundamentals/on-a-computer/using-the-datagrid/adding-items) for New Position button
2. Enter a **Title**, **Position Group**, **Organisation** and at lease one Security Policy in **Security Policies**
3. Use the **Save** button
## Bulk Actions
{% content-ref url="/pages/85HyYT6h2YqK6Qk26AXL" %}
[Bulk Actions](/concepts-and-fundamentals/on-a-computer/using-the-datagrid/bulk-actions)
{% endcontent-ref %}
| Action |
| ------------------------------------------------------------------------------------------------------------------------- |
| [Copy IDs](#copy-ids) |
| [Export to Positions with Policies Report](#export-to-positions-with-policies-report) |
| [Export to Positions and users based on current duty Report](#export-to-positions-and-users-based-on-current-duty-report) |
| [Copy](#copy) |
### Copy IDs
Refer to: [Copy IDs](/concepts-and-fundamentals/on-a-computer/using-the-datagrid/bulk-actions#copy-ids)
### Export to Positions with Policies Report
Refer to: [Export to Report](/concepts-and-fundamentals/on-a-computer/using-the-datagrid/bulk-actions#export-to-report) and [Reports](/modules/reports)
Use this action to generate the *Positions with Policies Report* for selected Positions.
### Export to Positions and users based on current duty Report
Refer to: [Export to Report](/concepts-and-fundamentals/on-a-computer/using-the-datagrid/bulk-actions#export-to-report) and [Reports](/modules/reports)
Use this action to generate the *Positions and users based on current duty Report* for selected Positions.
### Copy
Refer to: [Copying](#copying)
Positions can contain a number of settings including policies for security permissions which can be useful to reuse.
Copying reproduces the security permissions which makes it much easier than setting them from scratch.
{% hint style="info" %}
The process will only complete if you are on duty to an event with a System Administration position
{% endhint %}
To copy position/s:
1. Select one or more positions to copy and use the Actions menu
2. Select the Copy Position action from the Bulk Actions menu
3. Use the Proceed button
## Reports
Administrators can also access reports for positions, including which events have which positions enabled and positions that have specific policies, and export them.
These can be found in the [Reports Module](/system-administration/reporting) by searching for Positions.
Additionally, these reports can be accessed via:
* A link to the **Event positions are involved in** can also be found on the Position screen
* The Actions menu
Actions menu for Positions showing Export to Report options
Refer to [Reports](/system-administration/reporting) for more information on generating an export.
# Built-in Security Policies
This article details use of security policies.
This article explains the concepts of permissions.
If you are looking for built-in positions refer to the [positions](/system-administration/configuring-the-system/positions) list for your system or the security policies for a specific [module](/modules/overview) that you're using.
### Naming conventions
The following naming conventions are in use:
* "Coordination" — means full access to data with assignment and moving
* "Officer" — means full access to data without assignment and moving
* "Basic" — means limited access only to assigned events and/or records
* "ReadOnly" — means the user cannot write or create
* "New" — adds the ability to add a new record
* "Special" — means a custom rule that does not fit any convention
Additionally, the following register group names are used:
* "recovery" means all the registers in the recovery module
* "operations" means request, message, offer, log, contact
* "reference" means "wiki"
### Register Permissions Glossary
When viewing configured register security permissions, the following access options are available.
| | |
| --------------------------------------------------------- | ---------------------------------------------------------------------------------- |
| Can access the register | The user can see the register in navigation |
| Can access a set of items | The user can view lists of items in data grids and lists |
| Can indirectly update an item | Can edit items that are embedded in sub-forms |
| Can directly see the register in the user interface | Controls whether this register is included user interfaces such as navigation |
| Can directly view an item | Can view a full item record in the UI and via the API |
| Can directly create an item | This controls the "New" button on the UI, and allows top-level items to be created |
| Can directly edit an item | Controls the "Edit button on the UI, and disallows top-level edits to items |
| Can assign an item | Can assign items to users, positions and resources |
| Can add a comment to an item | Can add a note to be added to the history of a record using the yellow comment box |
| Can move an item between events | Can move items between events including global workspace events. |
| Can see the unassigned counter | Can see the counter for non-assigned, active records |
| Can create an item without Register Workflow Restrictions | Can bypass workflow states to set any status code at any time |
# Position Groups
Position groups are used to group positions together to make them easier to identify and manage. This section explains how to manage position groups.
## Overview
Position groups help you organise your positions. They're not just a filing system, they are used for example when assigning, to separated positions into categories and when editing an event you can bulk add or remove positions in the same position group.
As a System Administrator you can [view](#viewing-position-groups), [add](#adding-position-groups) and [update](#editing-position-groups) any Position Groups that isn't a special system group.
You may decide to create position groups based on Physical areas or based on business units or a mixture of both such as North West Division, Executives etc
{% hint style="info" %}
Some Position Groups, known as System Position Groups, are special and cannot be edited. These are typically established when your system is first set up.
{% endhint %}
### Access
To access the Position Groups register you will need to sign in with [*System Admin & Data Entry* position](/system-administration/configuring-the-system#system-administration-positions).
You can find the *Position Groups* register under **System Administration** **> Position Groups**.
## Viewing
Position Groups are listed in and searchable via the register [Datagrid](/concepts-and-fundamentals/on-a-computer/using-the-datagrid#data-grid-view).
Sample Position Groups datagrid
To view an existing Position Group:
1. Navigate to the Position Groups register datagrid.
2. Locate the item you wish to view. The register includes additional filters for Workflow Status (Active/Inactive) and Region
3. Open the item using the ID
4. To return to the Datagrid use the Back button
View of a sample position including the link to the position group
## Settings
{% hint style="info" %}
Note that System Position Groups can be viewed but cannot be modified.
{% endhint %}
Position Groups are divided into the following sections (sections may or may not appear depending on what information is entered, your permissions level, and what mode you're viewing):
| Left Column | Right Column |
| ----------------------------- | --------------------- |
| [Record Notes](#record-notes) | [Workflow](#workflow) |
| [General](#general) | [Activity](#activity) |
### Record Notes
When editing, record notes in the [rich text field](/concepts-and-fundamentals/on-a-computer/using-the-datagrid/editing-items#rich-text-fields) as you make changes which will appear in the Activity log.
Refer to: [Recording Notes](/concepts-and-fundamentals/on-a-computer/using-the-datagrid/editing-items#recording-notes)
### General
The **Position Group Title** field is used to name the position group and is required.
### Workflow
Position Groups have only two statuses: Active and Inactive. Active position groups are enabled for use. Inactive position groups cannot be added to users but can be reactivated and readded if needed.
### Activity
Refer to: [Viewing Items: Activity](/concepts-and-fundamentals/on-a-computer/using-the-datagrid/viewing-items#activity)
## Editing
Position Groups can be edited from the datagrid.
{% hint style="info" %}
Note that you cannot edit System Position Groups
{% endhint %}
1. Navigate to the Positions Groups register
2. Locate the Position Group you wish to edit by using the Edit button
3. Make the necessary changes to the [settings](#position-group-settings)
4. Save to save your changes
## Adding
To add a position group:
1. Use the [New Item button](/concepts-and-fundamentals/on-a-computer/using-the-datagrid/adding-items) for New Position Group button
2. Enter a **Position Group Title**
3. Use the **Save** button
# Mail Merge Templates
This section explains how to manage mail merge templates which can be used to dynamically insert item data into letters.
## Overview
The Mail Merge Templates powers correspondence for mass mailings using Microsoft Word or HTML/PDF including the insertion of content from registers and items to address or personalise for sending to individuals.
Mail Merge templates can be used to generate warnings and notices among other types of correspondence, however they are not used for messaging (for example Email or Text).
HTML templates have the additional ability to include logic for producing [smart templates](/security-and-support/technical-reference/merge-template-reference) that can adapt to multiple uses.
Some common uses for Mail Merge templates:
* Letters, of all types including addressed envelopes
* Compliance, such as to to send warnings, notices to comply. Fire Prevention Notices in Victoria are one example. Permit approve or decline letters are another.
* Court or Prosecution matters, including Appeal letter templates
* Insurance, for example a detailed case profile can be created from the information held in a Cases or Inspections
* Forms generation, including pre-filled forms
* Authorisation letters - for officers or organisations
Administrators can [access](#requests-usingrequests), [view](#viewing-mail-merge-templates), [add](#adding-mail-merge-templates), [edit](#editing-mail-merge-templates) and [configure](#settings) Mail Merge Templates. Once added and configured, users will be able to [generate mail merges](/concepts-and-fundamentals/on-a-computer/using-the-datagrid/bulk-actions#generate-merge) in enabled registers (such as Inspections and Cases) or by editing an item and using the [Correspondence](/concepts-and-fundamentals/on-a-computer/using-the-datagrid/editing-items#correspondence) feature in the right hand area settings.
{% hint style="info" %}
While the system has built-in mail merging capabilities, it also supports exporting data from a register to run your own merge externally using a program such as Microsoft Word. The advantage of using the built-in functions is that your system's users don't have to have to use a separate program and it is integrated with the system's workflow and reports.
{% endhint %}
### Access
To access the Mail Merge Templates register you will need to sign in with [*System Admin & Data Entry* position](/system-administration/configuring-the-system#system-administration-positions).
You can find the *Mail Merge Templates* register under **System Administration** **> Mail Merge Templates**.
System section of the User menu
## Viewing
Mail Merge Templates are listed in and searchable via the register [Datagrid](/concepts-and-fundamentals/on-a-computer/using-the-datagrid#data-grid-view).
Sample Mail Merge Templates datagrid
To view an existing Mail Merge Temple:
1. Navigate to the Mail Merge Templates register datagrid.
2. Locate the item you wish to view. The register includes additional filters for Workflow Status (Active/Inactive) and Region
3. Open the item using the ID
4. To return to the Datagrid use the Back button
View of a sample Mail Merge Template
## Settings
Mail Merge Templates are divided into the following sections (sections may or may not appear depending on what information is entered, your permissions level, and what mode you're viewing):
| Left Column | Right Column |
| ----------------------------------- | --------------------- |
| [Record Notes](#record-notes) | [Workflow](#workflow) |
| [General](#general) | [Activity](#activity) |
| [Advanced](#advanced) | |
| [Token Reference](#token-reference) | |
### Record Notes
When editing, record notes in the [rich text field](/concepts-and-fundamentals/on-a-computer/using-the-datagrid/editing-items#rich-text-fields) as you make changes which will appear in the Activity log.
Refer to: [Recording Notes](/concepts-and-fundamentals/on-a-computer/using-the-datagrid/editing-items#recording-notes)
### General
#### Template Name
Use this setting to name the template. This will appear for end users wanting to generate correspondence so should be suitably descriptive of the template's function and usage.
#### Description
Use this setting to further elaborate on the template's intended usage.
General settings
#### **Compatible Registers**
Use this setting to enable or disable the [Correspondence](/concepts-and-fundamentals/on-a-computer/using-the-datagrid/editing-items#correspondence) section in specific Registers. Note that this list of registers must still be globally configured for your site in order for you to add or remove them. Add by searching the list and remove using the cross next to each.
#### **Template Type**
Use this setting to specify whether the template is a *Microsoft Word* document or *HTML/PDF*.
Use Microsoft Word if your template is straightforward and should you need to make edits post merge. This is the default option.
Use HTML/PDF if you are a power user to get control of your template, including the addition of smart logic using special programming snippets including Cascading Style Sheets (CSS) for layout and styling.
If in doubt, Microsoft Word is the easiest option to both maintain and for end users and other administrators to understand.
### Word Template Settings
#### **Template File**
Use this field to upload your Microsoft Word template file using the [Add File button](/concepts-and-fundamentals/on-a-computer/using-the-datagrid/editing-items#attaching-files).
### HTML/PDF Settings
HTML/PDF templates support additional configuration and flexibility in addition to those mentioned in the above section.
Power users can create and modify advanced templates, or use code snippets. refer to the Technical Reference: [Merge Template Reference](/security-and-support/technical-reference/merge-template-reference).
#### **Template Content**
Use this setting to create or paste in HTML to compose the template. This field supports the insertion of tokens and Smarty semantics. Smarty is a web template engine written in PHP.
Do not use inline styles in your HTML as this can cause the template [not to save](/security-and-support/faqs/troubleshooting/system-administration/mail-merge-your-form-could-not-be-saved), make sure you style your template using the [Additional CSS](#additional-css) setting.
{% hint style="info" %}
Consult the [Merge Template Reference](/security-and-support/technical-reference/merge-template-reference) for more information on the HTML codes you can use.
{% endhint %}
#### **Template Resources**
Use this setting to set where the template's resources are stored. If the template is solely configured in the Mail Merge Templates item then select 'No resources'.
#### **Letterhead background**
Use this setting to upload a blank PDF to serve as the background image to a template. The letterhead can have a header and footer including branding.
This setting supports single page letterheads only.
CSS borders and padding can be used to avoid overlapping merged text with the background.
{% hint style="info" %}
Multi-page letterheads are possible, however for this do not use the Letterhead background field. To enable multi-page letterheads please [contact the Service Desk](/security-and-support/maintenance-and-support/accessing-support). If you have a multi-page letterhead enabled you will need to leave this field blank.
{% endhint %}
#### Left Margin
Use this setting to change the indent for the whole left side of the page. The typical default page margins are 20mm. This attribute is defined in the template's [base style](/security-and-support/technical-reference/merge-template-reference/style-your-template#overview).
#### Right Margin
Use this setting to change the indent for the whole right side of the page. The typical default page margins are 20mm. This attribute is defined in the template's [base style](/security-and-support/technical-reference/merge-template-reference/style-your-template#overview).
#### Top Margin
Use this setting to change the indent for the whole top of the page. The typical default page margins are 20mm. This attribute is defined in the template's [base style](/security-and-support/technical-reference/merge-template-reference/style-your-template#overview).
#### **Address Top**
Use this setting to help align *address* to fit within your windowed envelopes. This attribute is defined in the template's [base style](/security-and-support/technical-reference/merge-template-reference/style-your-template#overview).
{% hint style="warning" %}
This setting will only work if your HTML contains an \ block
{% endhint %}
#### Address Left
Use this setting to help align *address* to fit within your windowed envelopes. This attribute is defined in the template's [base style](/security-and-support/technical-reference/merge-template-reference/style-your-template#overview).
{% hint style="warning" %}
This setting will only work if your HTML contains an \ block
{% endhint %}
#### Additional CSS
Use this setting to include your own styles using style sheets in Cascading Style Sheet (CSS) format. You will need to include styles in the Template Content HTML in order to modify them using the CSS. Refer to [Style your template](/security-and-support/technical-reference/merge-template-reference/style-your-template) for further instructions.
#### Show Page Header
Use this setting to display the date will appear at the top of each PDF page. Note that this can affect the margins of your page.
#### Show Page Footer
Use this setting to display the date will appear at the bottom of each PDF page. Note that this can affect the margins of your page.
### Advanced
#### Generate one letter per asset contact
Use this setting to generate individual letters to individual contacts where an Asset has more than one contact. For example, a residence may have more than one owner at different addresses, this option will generate a mail merge for each so you can print individual letters and post them to individual owners. Tick this box to enable this option. It is off by default.
#### Process workflow rules when merging
Use this setting to enable a status transition upon generating documents. Some registers support processing workflow rules when merging templates. For example, the Status of Fire Prevention Notices will usually go from Hazard Exists to Hazard Exists (Printed) when a notices are printed. This will enforce that rule. Tick this box to enable this option. It is off by default which means you would have to manually set the status on any items.
Advanced Settings
### Token Reference
This is not a setting as such, but it has a useful list of tokens which get replaced by actual data from the corresponding field of the register item when the merge is generated. Each token is accompanied by a description of its potential use in your template.
{% hint style="info" %}
Tokens will only work in a register if that register you are generating the correspondence from contains those fields.
{% endhint %}
You can copy and paste, or use the token code or use the icon to copy it to your clipboard. Put these in your Word file or HTML to automatically insert text from the item into the output file when it is processed.
For example, placing the text *${MERGE\_DATE}* into your template document will output the current date when you process the merge.
Extract from the token reference
{% hint style="info" %}
Tokens sometimes get updated so it is a good idea to check and update old templates for any errors or updated tokens.
{% endhint %}
### Workflow
#### Status
Use this setting to activate or deactivate your templates. Inactive templates cannot be added to users but can be reactivated and re-added if needed.
### Activity
Refer to: [Viewing Items: Activity](/concepts-and-fundamentals/on-a-computer/using-the-datagrid/viewing-items#activity)
## Editing
Mail Merge Templates can be edited from the datagrid.
1. Navigate to the Mail Merge Templates register
2. Locate the Mail Merge Template you wish to edit by using the Edit button
3. Make the necessary changes to the [settings](#mail-merge-template-settings-word-and-html-pdf)
4. Save to save your changes
## Adding
To add a mail merge template:
1. Use the [New Item button](/concepts-and-fundamentals/on-a-computer/using-the-datagrid/adding-items) for New Mail Merge Template
2. Enter a **Template Name** and choose at least on **Compatible Register**
3. Select a **Template Type** (MS Word or HTML/PDF) and upload or insert the template
4. Configure any additional [settings](#mail-merge-template-settings-word-and-html-pdf) as needed
5. Use the **Save** button
## Bulk Actions
{% content-ref url="/pages/85HyYT6h2YqK6Qk26AXL" %}
[Bulk Actions](/concepts-and-fundamentals/on-a-computer/using-the-datagrid/bulk-actions)
{% endcontent-ref %}
The following additional bulk actions can be performed via the Actions menu:
| Action | Description |
| ------------------------- | --------------------------------------------------------------------------------------------------------------------------------------------------------------------------------------------- |
| Copy IDs | Refer to: [Copy IDs](/concepts-and-fundamentals/on-a-computer/using-the-datagrid/bulk-actions#copy-ids) |
| Create a Copy of Template |
|
# Lookups
This section explains how to manage lookups to add or change the options in specific drop-down lists across the system.
## Overview
As an administrator you can [create](#adding-lookups) or [modify](#editing-lookups) options for lookup lists (also called drop-down lists, list boxes or picklists) such as categories. These are specific to your system and allow limited modification to the underlying database.
Mutli-level categories are also possible.
{% hint style="info" %}
Not all lists in the system can be edited. Refer to the [list of available lookup categories](/system-administration/configuring-the-system/lookups/list-of-supported-lookups) for those that are supported.
{% endhint %}
{% hint style="info" %}
Editing existing lookups is generally not recommended as this can affect filters and reporting (results for the old values may still appear affecting totals). Instead, it is best to deactivate an existing lookup and add a new one in its place.
{% endhint %}
Expertise categories ... an example of lookup lists (including sub-lists) that can be modified with custom potions using Lookups
### Multi-Level Categories
Chained Category and Sub-Category fields may be configured onto various forms.
To manage these, follow these rules:
* Keep the values of the categories to lowercase (the label is the wording that is shown to the end user)
* The value of the sub-category lookup should be prefixed with the value of its category — e.g. for a category of `food`, sub-category values might be `food/burger` and `food/french-fries`.
* A parent category should have at least one sub-category.
Expertise Experience Subcategories Values prefixed with expertise-experience/ indicate to the system that they are subcategories
### Access
To access the Lookups register you will need to sign in with [*System Admin & Data Entry* position](/system-administration/configuring-the-system#system-administration-positions).
You can find the *Lookups* register under **System Administration** **> Lookups**.
## Viewing Lookups
Lookups are listed in and searchable via the register [Datagrid](/concepts-and-fundamentals/on-a-computer/using-the-datagrid#data-grid-view). Viewing them in this datagrid may not make much sense and they are rarely if ever changed once created.
To view an existing Lookup:
1. Navigate to the Lookups register datagrid.
2. Locate the item you wish to view. The register includes additional filters for Workflow Status (Active/Inactive) and Region
3. Open the item using the ID
4. To return to the Datagrid use the Back button
View of a sample lookups register
## Settings
Lookups are divided into the following sections (sections may or may not appear depending on what information is entered, your permissions level, and what mode you're viewing):
| Left Column | Right Column |
| ----------------------------- | --------------------- |
| [Record Notes](#record-notes) | [Workflow](#workflow) |
| [General](#general) | [Activity](#activity) |
### Record Notes
When editing, record notes in the [rich text field](/concepts-and-fundamentals/on-a-computer/using-the-datagrid/editing-items#rich-text-fields) as you make changes which will appear in the Activity log.
Refer to: [Recording Notes](/concepts-and-fundamentals/on-a-computer/using-the-datagrid/editing-items#recording-notes)
### General
#### Category
This field defines the list that the item belongs to.
#### Value
This field defines what gets stored in the database, so it typically contains no spaces and is all lower case. Use an underscore or dash as a substitute to spaces.
For example, if the label is Temporary Accommodation, the value would be set to: 'temporary\_accommodation'.
#### Label
This field defines users will see when they go to select the option from the list.
For example, if you want to add Temporary Accommodation to a list, use this as the label.
### Workflow
#### Status
Lookups have only two statuses: Active and Inactive. Active lookups are enabled for use. Inactive lookups cannot be selected as options by users. They can be reactivated and re-added if needed.
Note that reports can still be generated on Inactive or modified lookup options. As such it is advisable to deactivate rather than change them as it can otherwise negatively affect reports.
#### System ID
This field is visible in Edit mode however cannot be edited and is controlled by the system. Do not attempt to change it.
### Activity
Refer to: [Viewing Items: Activity](/concepts-and-fundamentals/on-a-computer/using-the-datagrid/viewing-items#activity)
## Editing Lookups
To edit a Lookup:
1. Navigate to the Lookups register
2. Locate the Lookup you wish to edit by using the Edit button
3. Make the necessary changes to the [settings](#lookup-settings)
4. Save to save your changes
## Adding Lookups
To add a Lookup:
1. Use the [New Item button](/concepts-and-fundamentals/on-a-computer/using-the-datagrid/adding-items) for New Lookup
2. Select a **Category** and enter a **Value** and **Label** for the Lookup
3. Use the **Save** button
{% hint style="info" %}
If your new Lookup does not appear in a list immediately, you may need to [Reload App Data](/concepts-and-fundamentals/on-a-computer/your-user-profile-and-duties#app-data) in your User Profile to update the lists on your site.
{% endhint %}
# List of supported lookups
This page contains a list of register item lists that support modification using Lookups.
| **Category Name** | **Module/s** | **Function** | **Example/s** |
| ---------------------------------------------- | --------------------------------------------------------------- | --------------------------------------------------------------------------------------------------------------------------- | ---------------------------------------------------------------------- |
| Mecc Position | | A selectable list of positions used in Victorian councils. | “Municipal Emergency Management Officer” |
| Contact: Classification | Contacts | A selectable list that can be used to classify/add contacts in a list. Appears in the Workflow section of Contact records. | “External Distribution” |
| Expertise Category |
Operations > Contacts
Operations > Expertise
| A selectable high level grouping of expertise types for Contacts. List appears when adding Expertise to Contacts. | “Qualifications” |
| Expertise Sub-Category |
Operations > Contacts
Operations > Expertise
| A selectable list of expertises for contacts. List appears when adding Expertise to Contacts. | “Apply First Aid” (under “Qualifications”) |
| Expertise Level of Proficiency |
Operations > Contacts
Operations > Expertise
| A selectable list of proficiency levels for contacts in an Expertise. List appears when adding Expertise to Contacts. | “Intermediate” |
| Payment Application : Property Use | Administration > Emergency Relief Fund | A selectable list of Property Uses. Usually but not always aligns with Property Uses in Recovery Case. | “Residential - Primary” |
| Roster: Availability Shifts | Administration > Rostering | A selectable list of shifts for Rostering. Appears when viewing or adding people to a Roster. | “Morning 8am-12pm” |
| Offer: Category | Operations > Offers | A selectable list of Offer categories. Appears when adding an Offer. | “Accommodation” |
| Offer: Sub-Category | Operations > Offers | A selectable list of Offer Sub-categories. Appears when adding an Offer. |
“Short Term Accommodation” (sub-category of “Accommodation”)
|
| Offer: Work Area | Operations > Offers | | |
| Permit: CFA Brigade | Operations > Permits | A selectable list of local CFA Brigades. Appears in the Permits when entering a Permit to Burn. | |
| Permit Type | Operations > Permits | A selectable list of Permit types. Must be accompanied by a schema for each permit form. | “Permit to Burn” |
| Recovery: Language | Recovery > Persons | A selectable list of spoken languages if a translator/intepreter is required. | “French” |
| Recovery: Relation to Primary Contact | Recovery > Persons | A selectable list of types of relationships that people can have to another person. | “Parent, Guardian or Carer” |
| Recovery: Affected Livestock Category | Recovery > Livestock | A selectable list of types of livestock. | “Poultry” |
| Recovery: Private Asset Category | Recovery > Private Assets | A selectable list of asset categories for private assets. | “Structure” |
| Recovery: Private Asset Type | Recovery > Private Assets | A selectable list of sub-categories for private assets. |
“Fencing” (sub-category of “Structure”)
|
| Recovery: Applicant’s relationship to property | Recovery > Private Assets\* | A selectable list of relationships to the property a primary contact can have | “Owner” |
| Recovery: Immediate Need Category | Recovery > Needs & Tasks | A selectable list of needs for case tasks including referrals. | “Counselling” |
| Recovery: Infrastructure Repair | Recovery > Infrastructure | A selectable list of types of infrastructure repair | “Grade Road” |
| Recovery: Agriculture Types | Recovery > Agriculture | A selectable list of different agriculture (crop) types | “Wheat” |
| Recovery: Relief Centres |
Recovery > Relief Registration
Recovery > Persons
| A selectable list of local relief or evacuation centres | |
| Recovery: Property Type | Recovery > Private Asset | A selectable list of different property categories | “Residential” |
| Recovery: Property Damage |
Recovery > Private Asset
Recovery > Infrastructure
| A selectable list of damage gradings | “Partially Destroyed” |
| Recovery: Case Relationship to Property | Recovery > Private Assets | A selectable list of relationships to the property a primary contact can have | “Tenant” |
| Recovery: Infrastructure Type | Recovery > Infrastructure | A selectable list of types of infrastructure | “Footpath” |
| Recovery: Case Referral Source | Recovery > Case | A selectable list of referral sources for the case (if created by an external source) | “Red Cross” |
| Recovery: Case Classification | Recovery > Case | A selectable list of classifications. These function similarly to Crisisworks tags but must be created by an administrator. | |
| Recovery: Relief Registration Type | Recovery > Relief Registration | A selectable list of relief registration types. There are two built-in types, “Emergency Relief Centre” and “Leave Early”. | |
| Item: Geospatial Category | Library > Library Items | A selectable list of geospatial categories for geospatial library categories. |
“Area of Interest”
“Council Facility”
|
| Request: Cost Recovery Method | Operations > Request | A selectable list of methods for cost recovery, for example authorisation roles | |
| Weed: Weed Species | Inspections > Weed & Pest Assessments | A selectable list of weed species. | |
| Weed: Percentage Cover | Inspections > Weed & Pest Assessments | A selectable list of ranges of % cover for weed inspections | |
| Weed: Treatment Method | Inspections > Weed & Pest Assessments | A selectable list of weed treatment methods. | “Spot Spray” |
| Weed: Chemical | Inspections > Weed & Pest Assessments | A selectable list of weed treatment chemicals used. | |
| Weed: Wind Direction | Inspections > Weed & Pest Assessments | A selectable list of wind directions. Preset as cardinal and intercardinal compass headings. | “NW” |
| Weed: Wind Speed | Inspections > Weed & Pest Assessments | A selectable list of wind speed ranges. Preset as ranges in Kilometres Per Hour (KPH) format in increments of 5. | “5-10” |
| Weed: Wind Temperature | Inspections > Weed & Pest Assessments | A selectable list of wind temperature ranges. Preset as ranges in degrees Celsius format in increments of 5. | “0-5” |
| Work Summary: Work Location | Administration > Work Summaries | A selectable list of work locations for timesheeting. | “Emergency Relief Centre” |
| Work Summary: Work Category | Administration > Work Summaries > Work Times | A selectable list of types of work. | “On-Site” |
| Work Summary Expense: Expense Category | Administration > Work Summaries > Work Expenses | A selectable list of types of expense categories. | “Food” |
| Work Summary Expense: Payment Method | Administration > Work Summaries > Work Expenses | A selectable list of types of payment methods for reimbursement. | “Direct Deposit” |
# Map Layers
This page explains how to use the Map Layers register for site-wide maps management.
## Overview
The Map Layers register provides a method of importing geospatial data for system-wide mapping that can only be managed by administrators. The register enables layers of different types and formats to be configured and supports real-time data updates. These maps can include the dashboard map, register map view, asset selection maps or for viewing and editing map annotations.
For individual events, users can upload geospatial features can use the [Library module](broken://pages/1mmv1NYkigJyyvWIV27Y) to feature layers using the [Geospatial Feature](broken://pages/d776FxR0tnyTxbLSJAIw) type. Note that only Map Layers are selectable via the mapping user interface.
Administrators can [add](#adding), [update](#updating), activate and [deactivate](#deactivating) layers using the register. They can also control the visibility of layers so that they are available on varoius map screens and registers.
### Access
To access the Map Layers register you will need to sign in with [*System Admin & Data Entry* position](/system-administration/configuring-the-system#system-administration-positions).
You can find the *Map Layers* register under **System Administration** **> Map Layers**.
### Layer Types
There are two supported Layer Types:
* **Base Layer** - static images or tiles configured as the background map. Depending on your configuration, base layers may be included with your system such as maps or satellite image for your local area where available (these may be subject to separate licensing arrangements). [Open Street Map](#osm) is usually included as standard.
* **Feature Layer** - (or Overlays) features displayed over base layers, such as points, polygons and icons (these may need to have transparent or semi-transparent backgrounds so as not to obscure the base layer underneath). Some feature layers are included as standard for each of the main registers in use on your site. Overlays can also be added via the [Library](broken://pages/1mmv1NYkigJyyvWIV27Y#types-of-library-items) as a [geospatial feature](broken://pages/d776FxR0tnyTxbLSJAIw), those have the additional benefit of being able to search within.
Map Layer selection including Overlays and Base Layers
### Formats
The system accepts data from a wide range of standard geospatial formats and additionally has the ability to create custom queries.
{% hint style="info" %}
If you wish to reference images and files (such as icons) they need to be hosted on the web (outside of system) and correctly referenced by absolute URI. Failure to do this correctly will result in the icons not displaying. As some GIS have their own export format, the KML files may need to be manually edited.
{% endhint %}
The following formats are accepted (you can select the most suitable format/s for your project):
Retrieve specific map tiles from an external source.
#### Crisisworks Query Language (CQL)
{% content-ref url="/pages/9Kc7PL6rbrU1gmjAeqAg" %}
[Field type queries](/security-and-support/technical-reference/cql-reference/cql-for-different-field-types)
{% endcontent-ref %}
You can create a map layer based on a query. This is useful if you want to show a filtered view of map data, for example all of the items within a specific zone.
To do this, you'll first need to know the [Register](/concepts-and-fundamentals/on-a-computer/using-the-datagrid) you want to query and then write a query for it.
You can create a query using the filtering system which can be for a single event or all events.
#### GeoJSON
GeoJSON is an open standard for simple geographical features and their attributes.
You can use this to define points, linestrings and polygons and to describe the geospatial features that they point to.
The Map Layers register allows you to use either an uploaded or external URL as a source for GeoJSON data and specify basic attributes such as colours.
GeoJSON feeds provide real-time geographical data. The GeoRSS format (no longer supported) can be converted by web services into this.
#### Keyhole Markup Language (KML)
Keyhole Markup Language (KML) is an interoperable international standard notation for Internet mapping which is based on XML and is compatible. Use this format for adding layers representing information that change infrequently (ie. Municipal boundaries, 1-in-100 year flood extent etc).
The latest versions of MapInfo and ArcGIS are capable of exporting to this format. Shapefiles can be converted using tools such as [shape2ge](http://code.google.com/p/shape2ge/). [Google Earth Pro](http://www.google.com/earth/businesses/) can also be used for editing and managing KML files. Note: Datalink cannot support you in the use of these third party tools.
* Only valid KML files with a .kml extension are accepted, KMZ (.kmz) archives or any other variant of KML are not accepted.
* It can only process the one KML file and although it is possible to upload an archive, the map layer will not display.
* To use information bubbles on the map, add data into the `name` and `description` attributes of the feature. It is common for geospatial tools to support writing an HTML table into the `description` attribute.
Example of a KML layer to define a zone (area filled in green)
#### Open Street Map (OSM)
With the OSM function, you can use this free open license map database which is maintained by open collaboration. OSM is usually configured by default as a Base Layer, though you may use your local map provider instead. As such there is nothing you need to do with this. It can be deactivated if not wanted or needed.
Example of an Open Street Maps street map in Map View
#### Web Feature Service (WFS)
With this function you can use the WFS standard to request geographical features over the web. It supports databases, files and other web services using a Spatial Referencing System (SRS) by referencing the Source and source data layer.
#### Web Map Service (WMS)
With the WMS function to add map images from an external source or map server server like ArcGIS, Nearmap, Google Maps, QGIS, MapServer, ArcIMS, Bing Maps etc. Note that unlike Open Street Maps, these will be licensed separately to your system. If you have a license you can connect a layer or the Internet this way be specifying the source, layer, format and other dimensions such as Spatial Referencing System (SRS).
An example of a Web Map Service base layer for aerial Imagery of Victoria, Australia
#### Web Map Tile Service (WMTS)
With the WTMS you can access pre-reendered map tiles over the Internet. This supports improved performance over WMS. Tiles are sourced via an external URL referenced using a source layer and matrix set.
#### XYZ Tile URL
Using this function, you can retrieve specific map tiles from an external source using:
* {z} zoom level
* {x} the column
* {y} the row of the tile
* {s} optional subdomain
* {extension} specifies the file type (e.g. .png, .jpg)
### Access
To access Map Layers you will need to sign in with the *System Admin & Data Entry* role.
Locate the *Map Layers* register under **Administration > Map Layers** in the menu.
### Administration
Administrators are able to set up and maintain Map Layers by:
* Adding new base or feature Map Layers as required
* Updating the settings including visibility
* Removing any unneeded Map Layers using the Inactive Status
## Finding Map Layers
{% content-ref url="/pages/Hqx2rS3kEW8IpmSxPLI7" %}
[Searching and Filtering](/concepts-and-fundamentals/on-a-computer/searching-filtering-and-querying-registers)
{% endcontent-ref %}
The register includes a number of features to assist in finding *Map Layers*:
* [Datagrid](/concepts-and-fundamentals/on-a-computer/using-the-datagrid#data-grid-view) view
* [Filters](#information-editinganexistinginformationitem-1) including Active, Inactive or All
* Combination filters and search by most fields such as Name or Status
Map Layers Register
### Filters
Filters help make management of *Map Layers* easier by focusing on specific groups of items on the datagrid.
Map Layers filter/counter menu
Filter menu explanations
The following lists some of the filters and how to use them:
Filter Group
Filter/s
Use
Main
Active Recently Updated All
Region*
\* May vary based on your system configuration
## Opening and Viewing
{% content-ref url="/pages/Uj3SUzS7JZj9FENuBTeq" %}
[Viewing Items](/concepts-and-fundamentals/on-a-computer/using-the-datagrid/viewing-items)
{% endcontent-ref %}
When viewing *Map Layers*, sections can be expanded to show information.
As each section is completed, new sections may show additional information.
Source Type is the main setting which opens up additional data fields for specifying the additional settings for each type.
View of a typical map layer showing the main sections and settings including Name, Layer Type and Workflow Status
## Settings
Map Layers are divided into the following sections (sections may or may not appear depending on what information is entered, your permissions level, and what mode you're viewing):
| Left Column | Right Column |
| --------------------------------- | --------------------- |
| [Record Notes](#record-notes) | [Workflow](#workflow) |
| [General](#general) | [Activity](#activity) |
| [Layer Settings](#layer-settings) | |
### Record Notes
When editing, record notes in the [rich text field](/concepts-and-fundamentals/on-a-computer/using-the-datagrid/editing-items#rich-text-fields) as you make changes which will appear in the Activity log.
Refer to: [Recording Notes](/concepts-and-fundamentals/on-a-computer/using-the-datagrid/editing-items#recording-notes)
### General
The General section is used to name the map layer, to select the Source Type and specify any additional details required for that type.
#### Name
Use this to specify the name of the Map Layer. It is important to give it a name that end users will understand and that matches their expectation of what it represents as this name will appear for end users to select the layer.
#### Source Type
Use this field to select the [Source Type](#source-type). This will open additional data fields for using that type, some may be required.
### Layer Settings
The Layer Sections setting is used to configure the area where the layer is visible.
Layer Settings section in edit mode
#### Layer Type
This field is used to specify what [Layer Type](#layer-types) is being used (i.e. a Base Layer or a Feature Layer).
#### Default Visibility
This section contains field that control where the Map Layer is available.
Use the checkbox to toggle visibility on or off for:
* **Dashboard** map
* **Register** map - when using the [map view](/concepts-and-fundamentals/on-a-computer/using-the-datagrid#map-view) mode
* **Asset selection** map - when [using the map to edit a location](/concepts-and-fundamentals/on-a-computer/using-the-datagrid/editing-items#location) of a register item
* **Form Map (Edit)** - when [annotating a map](/concepts-and-fundamentals/on-a-computer/using-the-datagrid/editing-items#editing-the-map) in a register item
* **Form Map (View)** - when [viewing](/concepts-and-fundamentals/on-a-computer/using-the-datagrid/viewing-items) register items
### Workflow
Map Layers have only two statuses: Active and Inactive. Active Map Layers are enabled for use. Inactive lookups cannot be selected as options by users. They can be reactivated and re-added if needed.
### Activity
Refer to: [Viewing Items: Activity](/concepts-and-fundamentals/on-a-computer/using-the-datagrid/viewing-items#activity)
## Updating
{% content-ref url="/pages/a2eWhKOkTwpBhWsPFV1g" %}
[Editing Items](/concepts-and-fundamentals/on-a-computer/using-the-datagrid/editing-items)
{% endcontent-ref %}
When updating *Map Layers*:
* Add notes on your edits in the **Record Notes** field
* Complete each section of the [Settings](#register-item-settings) and Layer Settings as required. Note that some options may open up new sections to complete.
* Do not attempt to change the Source Type you may lose data
Edit mode for a Vulnerable Facilities CQL query
### Activating and Deactivating
To deactivate a Map Layer that is no longer needed (or reactivating a previously inactive layer):
1. Edit the layer
2. Change the Status to Inactive when deactivating or Active when reactivating
3. Save
An Inactive layer will no longer be selectable by end users.
## Adding
{% content-ref url="/pages/cRH8ZUNrgFGKBXlnlY6f" %}
[Adding Items](/concepts-and-fundamentals/on-a-computer/using-the-datagrid/adding-items)
{% endcontent-ref %}
To add a new Map Layer:
1. From the register, in the New item menu select the **New Map Layer** button
2. Complete each section of the [Settings](#register-item-settings) as required. It is important to first select the [Source Type](#source-type) and give it a [Name](#name) and specify the [Layer Type](#layer-types) (Base or Feature Layer).
3. Other Settings will depend on the Source Type.
4. Save
Screenshot of New Map Layer screen
## Bulk Actions
{% content-ref url="/pages/85HyYT6h2YqK6Qk26AXL" %}
[Bulk Actions](/concepts-and-fundamentals/on-a-computer/using-the-datagrid/bulk-actions)
{% endcontent-ref %}
The following additional bulk actions can be performed via the Actions menu:
| Action | Description |
| -------- | ------------------------------------------------------------------------------------------------------- |
| Copy IDs | Refer to: [Copy IDs](/concepts-and-fundamentals/on-a-computer/using-the-datagrid/bulk-actions#copy-ids) |
# Imports
This section outlines the imports system which enables data to be imported into registers.
## Overview
The imports register enables data to be imported into Registers and Assets.
System Administrators can [run](/system-administration/reporting/running-reports) imports for [Register Items](#register-items) and [Assets](#assets). The System administrator configures the [settings](#imports-settings) including the [parsing rules](#parsing-rules) and once the import file has been uploaded and saved, can view the [result](#result).
The Import operates using a parser to map the fields to the database and insert them using a **Parsing Rule**. Each Parsing Rule also has a default method of updating the database.
{% hint style="info" %}
It is important to select the correct Parsing Rule for the data you wish to import as your import may otherwise fail. It is also important to make sure that the data is in the correct format, including all of the required columns and that the columns are correctly named, otherwise your import may fail. For a guide on field mappings and expected formats, see [Field Mappings and File Types](/system-administration/configuring-the-system/imports/register-items/contacts-import).
{% endhint %}
#### Import formats
Most (but not all) are imported in Comma Separated Value (CSV) format. Some asset imports also accept ZIP files containing other formats.
{% hint style="info" %}
If your import data file is in another format, such as Microsoft Excel, you will need to save or convert it to CSV or the specified file type prior to uploading it.
{% endhint %}
If you're updating or adding to an existing list of items you can also create a CSV file from existing data by exporting register items to a report first using the Export function from the datagrid. Files exported are compatible with the import system.
#### **Clearing Field Data**
If column headings or data is not specified in your import file for existing items, the existing data will usually not be removed.
If you wish to remove data for a field of an existing item, set the value "\[NULL]" into the field in your import data. If this value is found in your import data, it will clear the existing value. For example if you wish to clear tags for the userId of "bob", simply type "\[NULL]" in the Tags column of your data on Bob's record and all existing tags for Bob will be removed.
### Access
To access the Imports register you will need to sign in with [*System Admin & Data Entry* position](/system-administration/configuring-the-system#system-administration-positions).
You can find the *Imports* register under **System Administration** **> Imports**.
### Register Items
Register Items is used to add to or update the respective [registers](/concepts-and-fundamentals/on-a-computer/using-the-datagrid).
Refer to the Register Items import page for more details on this option:
{% content-ref url="/pages/sL6jVFayIXrgsbUSu6Dl" %}
[Register Items](/system-administration/configuring-the-system/imports/register-items)
{% endcontent-ref %}
### Assets
Assets imports are used to add to or update the [Asset database](/concepts-and-fundamentals/concepts-and-fundamentals#register-assets-and-resources). There are no registers for this, they are stored internally and can only be imported or reimported.
Refer to the Assets import page for more details on this option:
{% content-ref url="/pages/qUPwvqRqKpNxQLIMjtQr" %}
[Assets](/system-administration/configuring-the-system/imports/assets)
{% endcontent-ref %}
### Workflow
Imports use a similar workflow process to the Reports module in that they do not run instantly. They are first Queued, then Run before becoming either Finished or Failed.
| Status | Icon | Description |
| --------- | --------------------------------------------------------------- | ------------------------------------------------------------------------------------------------------------------------------ |
| New | | The Import has been created but has not yet been run. You will rarely see this as most imports run automatically when created. |
| Queued | | The report is scheduled to run but is waiting for other processes to run first |
| Running | | The Import is in the process of running |
| Finished | | Your data has been imported successfully. |
| Failed | | Failed to run. Look at the logs to determine the reason/s. Correct and try again. |
| Cancelled | | The import was cancelled while still queued or running. |
## Viewing Imports
Imports are listed in and searchable via the register [Datagrid](/concepts-and-fundamentals/on-a-computer/using-the-datagrid#data-grid-view).
{% hint style="info" %}
Imports only stay Active while they are being run. Most imports that have already been run will not show up under Active. Use the Totals filter or one of the Workflow filters (such as Finished) to find these.
{% endhint %}
To view an existing Import:
1. Navigate to the Imports register datagrid.
2. Locate the item you wish to view. The register includes additional filters for Workflow Status (New; Queued; Running; Finished; Failed; Cancelled)
3. Open the item using the ID
4. To return to the Datagrid use the Back button
View of sample Imports register including the status of imports (finished or failed)
## Settings
| Left Column | Right Column |
| --------------------------------- | ------------------------------------------- |
| [Record Notes](#record-notes) | [Workflow](#workflow-1) |
| [General](#general) | [Import Instructions](#import-instructions) |
| [Categorisation](#categorisation) | [Activity](#activity) |
| [Advanced](#advanced) | |
| [Result](#result) | |
### Record Notes
When editing, record notes in the [rich text field](/concepts-and-fundamentals/on-a-computer/using-the-datagrid/editing-items#rich-text-fields) as you make changes which will appear in the Activity log.
Refer to: [Recording Notes](/concepts-and-fundamentals/on-a-computer/using-the-datagrid/editing-items#recording-notes)
### General
#### **Type**
These options choose the type of Import. There are currently only two types: Register Items; and Assets.
#### **Parsing Rules**
The **Parsing Rule** setting is used to determine the Register/s the import is being run for and the method for updating the database. Consider this carefully to make sure you're importing your data into the correct register.
The default rule for all imports is *Insert new records, update matching records* (see below). You can override this method using the **Override parser defaults** checkbox.
To override the default and choose a rule for how to handle the import, select a Match Rule.
Match rule field
When your rule involves updating existing items, you'll be required to select a **Record matching strategy** (the exception is when you're not overriding the default rule in which case the system chooses one for you automatically). This can be an External ID, Record ID or Related Asset. This settings helps ensure that the existing items that need updating are properly identified.
Selecting a Record matching strategy to update existing items
The following rules are available depending on which parser you've selected (you can only use one):
* **Delete data and replace with import data** - will delete all data in the register prior to importing data from your import file
* **Insert new records, update matching records** - adds records, but also matches existing ones. To update existing items you must select a matching strategy. You can update existing items that are inactive by ticking the *Include active records when matching* box. By default these are ignored\

* **Insert Only (do not update matching records)** - adds items to your register without either deleting or updating existing items. Only use this if you are adding new items.
* **Update Only (do not insert non-matching records)** - won't add any new records and only matches existing ones. To update existing items you must select a matching strategy. You can update existing items that are inactive by ticking the *Include active records when matching* box. By default these are ignored.
### Categorisation
The Categorisation section gives you the option to associate an event, tag or region to the import.
Categorisation section options
#### Event ID
{% hint style="info" %}
Assets don't link to events, therefore if you have selected Assets, the Event ID option will not be available.
{% endhint %}
To import your register items into a specific event, put the ID of the event in this field. You can find the ID in the [Event register](/system-administration/managing-events). Note that if you've already got an Event ID in your import file, that will be used instead.
If you want to specify different events for different items and the Import enables it, use the Event or Event ID in the import file. This will override what is specified here.
#### Tag
Refer to: [Tagging items](/concepts-and-fundamentals/on-a-computer/using-the-datagrid/tagging-items)
To tag all the items, type your tag name into this field. This is not a standard tag selection field. If you're using an existing tag, you'll need to match its spelling exactly.
#### Region
Refer to: [Sites and Regions](/concepts-and-fundamentals/concepts-and-fundamentals#sites-and-regions)
To associate your import with a specific region, select it from the list. Note that if you've already got a region specified in your import file, that will be used instead.
### Advanced
**Test Only** lets you test your import before actually importing your data. To do this, place a tick in the Test Only checkbox. This will run through the import process and attempt to import each line of the import file but it won't actually save the records. Once the test import is complete it will return a status allowing you to view the details of any errors so you can fix up any issues before performing an actual import of your data.
**Rollback on Error** will roll back any changes if any errors with your import is detected. This includes any items where a match didn't succeed. Nothing will be inserted, updated or deleted. Do not use this setting unless necessary for testing or it may prevent your import from running.
**Check that all columns in the input file match known attributes** will analyse the import file and will alert you if there are any issues with your column headings. This option is useful as it will performs two checks:
1. that all required fields for the import type exist in the import file
2. if you have any additional fields in your import file that are not specified for this import type. This can be helpful to look at as it is possible that a field can be misspelt or not have the correct spaces or capitalisation required. If you get an error about the additional fields in your spreadsheet, you can either remove these additional fields from your input file or you can untick this option to ignored them.
**Create separate audit records for each record** will displayed on the Dashboard and audit history log for each item once the import is complete. Leave this field blank if you do not wish to add a comment for audit history. This is a useful option to enable.
**Bypass state machine rules** ignores restrictions that the system places to prevent updates to records where the status moves to an incompatible state. This option is generally not recommended.
Advanced section
### Result
The Result section summarises the results of the import (how many records and the status of the import of each row in the file).
### Workflow
**Date Started** and **Date Completed** are filled in automatically by the system.
Workflow section in Edit mode
**Status** registers the current [Workflow](#workflow) state. Unlike other register items you cannot change the Status of an import. This is automatically set to New by the import process.
### Import Instructions
The Import Instructions section contacts specific instructions.
#### Import Field Mappings
The Import Field Mappings section includes a table with instructions on the structure and contents of your import file in order for the import to work as expected.
Your import file must match these settings otherwise the import will fail.
The first column contains the field name. It is essential that your import file columns match these headings exactly. You can use the Copy icon to add this to your clipboard to paste.
The Description column includes specific instructions for the data expected in each row.
The Required Field indicates which fields must be present in your import file. These fields will say Yes.
Import Instructions section and Import Field Mappings
### Activity
Refer to: [Viewing Items: Activity](/concepts-and-fundamentals/on-a-computer/using-the-datagrid/viewing-items#activity)
## Editing Imports
Imports can be edited from the datagrid. Editing an import is usually for re-running (resubmitting) it.
1. Navigate to the Imports register
2. Locate the Import you wish to edit by using the Edit button
3. Make the necessary changes to the [Settings](#imports-settings)
4. Save
## Running an Import
To run an Import:
1. Use the [New Item button](/concepts-and-fundamentals/on-a-computer/using-the-datagrid/adding-items) for New Import
2. Select a **Type** and **Parsing Rule** and use the Add File button to **Import File**
3. Make any other configurations changes necessary in the [Settings](#imports-settings)
4. Use the **Save** button
This will initiate the workflow process. You can check the datagrid status or the Result section to see whether the import ran successfully.
{% hint style="warning" %}
Note that the imported items may not show up in the register straight away. Depending on the number of records it may take some time for the items to display and for the counters to update. Please be patient once the import has been run.
{% endhint %}
# Register Items
This page explains how to import Register items.
## Overview
The Imports facility allows you to import Register Items of different types in bulk.
Most register imports are in CSV formats.
This section outlines some of the common register items, if your organisation uses other registers that support importing, you may also find the instructions for those here.
Please refer to general instructions for importing:
{% content-ref url="/pages/QP6MVwI3qEAEvatbmPc3" %}
[Imports](/system-administration/configuring-the-system/imports)
{% endcontent-ref %}
## Importing Assets
### Import Process
Refer to the general instructions under [Imports](/system-administration/configuring-the-system/imports).
When importing Assets, in the **Type** field, choose *Register Items*.
For **Parsing Rule**, select one of the following :
### Using the Test Only option to check for errors
It is strongly encouraged to tick the *Test Only* option before you import your Register items to see if any errors are generated before actually doing a full import of your data. The Test Only option will display any error or success messages that would happen on a normal import but it will not import any assets. Once the *Test Only* option has no error messages you can then untick the Test Only checkbox and run your import.
Enter an optional comment for the Audit log and click the Import button to begin importing your Assets.
# Assessments (AgVic)
This page explains how to use the AgVic Impact Assessment import option. AgVic Impact Assessment V1 - comments only (match on address)
## Overview
The AgVic Impact Assessment is used by Victorian councils to add Agriculture Victoria comments into existing Recovery [Cases](broken://pages/Sfj9Pht3MY5OyzcTaJAs). This is used to help assess the extent to which farm/s have been impacted.
This is usually performed for a specific event.
Refer to the register page for general instructions:
{% content-ref url="/pages/QP6MVwI3qEAEvatbmPc3" %}
[Imports](/system-administration/configuring-the-system/imports)
{% endcontent-ref %}
### Considerations
When importing consider the following:
* **Code Field** - use this to match to the address an [Asset](broken://pages/eIC3EKq3W5hWtAu59Baw) (using a property number)
#### Categorisations
* **Event** - set this to the specific event you need to import to
* **Region** - set this to your council's region
* **Tag** - use an 'agvic' tag to keep track of comments from Agriculture Victoria
## Import File
A CSV format file is required with the correct field mappings.
Refer to the Import Field Mappings section in the [Import Instructions](/system-administration/configuring-the-system/imports#import-instructions) section for the latest import file requirements.
## Import Steps
To import the file:
1. Refer to the general instructions in [Imports](/system-administration/configuring-the-system/imports).
2. In the General section select **Type**: *Register Items*
3. For **Parsing Rule:** select *AgVic Impact Assessment V1 - comments only (match on address)*
1. **Overwrite parser defaults** is usually set
2. **Match Rule** is usually set to *Update only*
4. Under **Import File:** use the **Add file** button
5. Save and Check Results
# Assessments (General)
This page explains how to use the Assets (General) Import option.
## Overview
You can add/or update [Assessments](broken://pages/0Cl1Wd56OaRXyYpTkPKd) in bulk using the Assessments (General) import option.
Assessments typically come from an external source of property damage and hazard reports, such as an agency. To obtain a working import file the external agency should be advised on the correct field mappings.
{% hint style="info" %}
Some agencies may have their own specific import file and parsing rule. Check with the agency for the preferred method, it may be a different parsing rule this general one.
{% endhint %}
Refer to the register page for general instructions:
{% content-ref url="/pages/QP6MVwI3qEAEvatbmPc3" %}
[Imports](/system-administration/configuring-the-system/imports)
{% endcontent-ref %}
## Import File
A CSV format file is required with the correct field mappings.
Refer to the Import Field Mappings section in the [Import Instructions](/system-administration/configuring-the-system/imports#import-instructions) section for the latest import file requirements.
## Import Steps
To import the file:
1. Refer to the general instructions in [Imports](/system-administration/configuring-the-system/imports).
2. In the General section select **Type**: *Register Items*
3. For **Parsing Rule:** select *Assessments (General)*
4. Under **Import File:** use the **Add file** button
5. Save and Check Results
# Assessments (FRV)
This page explains how to use the Assets (FRV) Import option for Victorian councils.
## Overview
[Assessments](broken://pages/0Cl1Wd56OaRXyYpTkPKd) including Initial Impact Assessments from Fire Rescue Victoria (FRV), must be imported separately from the Assessments (General) import option.
[Contact the Service Desk](/security-and-support/maintenance-and-support/accessing-support) for the most current advice for working with FRV data.
{% hint style="info" %}
**Please only use Assessments (FRV 2026) this is the latest version at time of writing. Older importers may have different schemas for importing legacy data.**
{% endhint %}
### Accessing FRV IIA data
FRV Initial Impact Assessment (IIA) data can be downloaded from the EM Impact Dashboard [https://emimpact.em.vic.gov.au](https://emimpact.em.vic.gov.au/).
For assistance with accessing and downloading FRV data, including instructions on how to export data (explained on page 21), please refer to the EM Impact Dashboard User Guide.
**Note:** This is an external guide provided for your convenience. For support, please contact EM-Impact Support directly.
{% file src="/files/HVGTRAcjskZ0UDPFS3aB" %}
{% hint style="info" %}
The import needs the detailed SIA report
{% endhint %}
### Important Considerations
Please consider the following important notes when working with FRV data:
* Use the Register Item to select is "Assessments (FRV 2026)". This is for all FRV data imported after 2026.
* Only import your own council's data (it is often mixed with other councils - you may need to filter or remove records relating to other councils)
* Photo URLs from FRV expire in 24 hours, so it is very important to check the image links are still working before importing
* Omit status of **Hazard/Safety** (these should be for Infrastructure assessment only)
* Omit status of **No Damage / Habitable**
* Omit addresses that don't have a street number
* Inspections and re-inspections are supplied by FRV in the same file. These need to be imported in two batches:\
1\. Import on Address text (for new FRV Inspections)\
2\. Update only based on external ID (FRV record ID)
* The data has no way to identify re-inspections, so this is an involved process
{% hint style="warning" %}
Checking photo URLs is essential prior to importing.
To check, copy a couple of the Photo URLs into your web browser to see if you see an image or an error, this is an example of an expired photo URL
{% endhint %}
{% hint style="info" %}
EXCEL NOTE: The FRV address data has a non-standard Unicode character for “-” (used in ranges like 35-45), which excel has issues with. If you edit the data, you will need to look for weird characters like “â€" and re-enter the “-” character.
{% endhint %}
Refer to the register page for general instructions:
{% content-ref url="/pages/QP6MVwI3qEAEvatbmPc3" %}
[Imports](/system-administration/configuring-the-system/imports)
{% endcontent-ref %}
## Import File
A CSV format file is required with the correct field mappings.
Refer to the Import Field Mappings section in the [Import Instructions](/system-administration/configuring-the-system/imports#import-instructions) section for the latest import file requirements.
## Import Steps
To import the file:
1. Refer to the general instructions in [Imports](/system-administration/configuring-the-system/imports).
2. In the General section select **Type**: *Register Items*
3. For **Parsing Rule:** select *Assessments (FRV 2026)*
4. Under **Import File:** use the **Add file** button\
You will need to repeat this for both batches.\
1\. Import on Address text (for new FRV Inspections)\
2\. Update only based on external ID (FRV record ID)
5. Save and Check Results
# Availability Periods
# Contacts Import
This page explains how to use the Contacts Import option.
## Overview
You can add/or update [Contacts](/system-administration/user-and-contact-administration) in bulk using the Contacts Import option.
{% hint style="info" %}
As of version 5, for security reasons, users are no longer imported in bulk. You must first import Contacts as items and then use Edit commands in the Contacts register to upgrade them to Users.
{% endhint %}
Refer to the register page for general instructions:
{% content-ref url="/pages/QP6MVwI3qEAEvatbmPc3" %}
[Imports](/system-administration/configuring-the-system/imports)
{% endcontent-ref %}
## Import File
A CSV format file is required with the correct field mappings.
Refer to the Import Field Mappings section in the [Import Instructions](/system-administration/configuring-the-system/imports#import-instructions) section for the latest import file requirements.
## Import Steps
To import the file:
1. Refer to the general instructions in [Imports](/system-administration/configuring-the-system/imports).
2. In the General section select **Type**: *Register Items*
3. For **Parsing Rule:** select *Contacts Import*
4. Under **Import File:** use the **Add file** button
5. Save and Check Results
# Expertise Import
This page explains how to use the Expertise Import option.
## Overview
You can add/or update [Expertise](broken://pages/U3jQIUBfnzUpuOpCleAR) in bulk using the Expertise Import option.
Note that this import requires you to link each Expertise item to a Contact.
Refer to the register page for general instructions:
{% content-ref url="/pages/QP6MVwI3qEAEvatbmPc3" %}
[Imports](/system-administration/configuring-the-system/imports)
{% endcontent-ref %}
### Considerations
When importing Expertise:
* Link each Expertise item to a Contact via a Contact ID.
* Use existing categories from the [Lookup](/system-administration/configuring-the-system/lookups) for **Expertise Category** and its subcategories **Area of Expertise and Area** of **Expertise (other)** as well as the **Level of Proficiency**. Categories not matched are not added.
## Import File
A CSV format file is required with the correct field mappings.
Refer to the Import Field Mappings section in the [Import Instructions](/system-administration/configuring-the-system/imports#import-instructions) section for the latest import file requirements.
## Import Steps
To import the file:
1. Refer to the general instructions in [Imports](/system-administration/configuring-the-system/imports).
2. In the General section select **Type**: *Register Items*
3. For **Parsing Rule:** select *Expertise Import*
4. Under **Import File:** use the **Add file** button
5. Save and Check Results
# Fire Prevention Notice Import
This page explains how to use the Fire Prevention Notice Import option.
## Overview
You can add/or update Fire Prevention Notices in bulk using the Fire Prevention Notice Import option.
Refer to the register page for general instructions:
{% content-ref url="/pages/QP6MVwI3qEAEvatbmPc3" %}
[Imports](/system-administration/configuring-the-system/imports)
{% endcontent-ref %}
### Considerations
* **Asset Code** - it is essential that the Asset code matches the property number.
* **Status** - Fire Prevention Notices imported will default to Draft Inspection. To change this, set the Status field. For properties which require an inspection, set them to 1st Inspection Required, for properties that already have known hazards, set he status to .
* **Assignment** - if you are assigning notices during the import, make sure that the officer exists in the system
## Import File
A CSV format file is required with the correct field mappings.
Refer to the Import Field Mappings section in the [Import Instructions](/system-administration/configuring-the-system/imports#import-instructions) section for the latest import file requirements.
## Import Steps
To import the file:
1. Refer to the general instructions in [Imports](/system-administration/configuring-the-system/imports).
2. In the General section select **Type**: *Register Items*
3. For **Parsing Rule:** select *Fire Prevention Notice Import*
4. Under **Import File:** use the **Add file** button
5. Save and Check Results
# Infrastructure Assessments Import
This page explains how to use the Infrastructure Assessments Import option.
## Overview
You can add/or update [Infrastructure](broken://pages/S4Vi1g255T0pGZOB48B9) Assessments in bulk using the Infrastructure Assessments Import option.
Refer to the register page for general instructions:
{% content-ref url="/pages/QP6MVwI3qEAEvatbmPc3" %}
[Imports](/system-administration/configuring-the-system/imports)
{% endcontent-ref %}
### Considerations
When importing consider the following:
* **ID** - use this to update an existing item
#### Categorisations
* **Event ID** - this is required set this to the specific event you need to import to. This will override the setting in Categorisation if present.
## Import File
A CSV format file is required with the correct field mappings.
Refer to the Import Field Mappings section in the [Import Instructions](/system-administration/configuring-the-system/imports#import-instructions) section for the latest import file requirements.
## Import Steps
To import the file:
1. Refer to the general instructions in [Imports](/system-administration/configuring-the-system/imports).
2. In the General section select **Type**: *Register Items*
3. For **Parsing Rule:** select *Infrastructure Assessments Import*
4. Under **Import File:** use the **Add file** button
# Library Item (Document schema) Import
This page explains how to use the Library Item (Document schema) Import option.
## Overview
You can add/or update Library [Documents](broken://pages/dECPbSGzBreV4hZijpP8) in bulk using the Library Item (Document schema) Import option.
Refer to the register page for general instructions:
{% content-ref url="/pages/QP6MVwI3qEAEvatbmPc3" %}
[Imports](/system-administration/configuring-the-system/imports)
{% endcontent-ref %}
### Considerations
When importing consider the following:
* **Title** - this is required for all documents
* **ID** - use this to update an existing item
* **Status** - if unspecified documents will be set to Current. Use this to import drafts or other statuses.
#### Categorisations
* **Event ID** - this is used to assign documents to a Workspace.
## Import File
A CSV format file is required with the correct field mappings.
Refer to the Import Field Mappings section in the [Import Instructions](/system-administration/configuring-the-system/imports#import-instructions) section for the latest import file requirements.
## Import Steps
To import the file:
1. Refer to the general instructions in [Imports](/system-administration/configuring-the-system/imports).
2. In the General section select **Type**: *Register Items*
3. For **Parsing Rule:** select *Library Item (Document schema) Import*
4. Under **Import File:** use the **Add file** button
# Library Item > Geospatial
This page explains how to use the Library Item (Geospatial) Import option.
## Overview
You can add/or update Library [Geospatial Feature](broken://pages/d776FxR0tnyTxbLSJAIw)s in bulk using the Library Item (Geospatial) Import options.
There are several variations of this report, the difference being that when the following imports are specified the Category and Map Icon are set by default to the desired type.
* Council Facility
* Critical Infrastructure
* General
* Relief Centre
* Staging Area
* Vulnerable Facility
If using a mix of Categories, use the All Categories import.
Refer to the register page for general instructions:
{% content-ref url="/pages/QP6MVwI3qEAEvatbmPc3" %}
[Imports](/system-administration/configuring-the-system/imports)
{% endcontent-ref %}
### Considerations
When importing consider the following:
* **Name** - is required for all geospatial items
* **ID** - use this to update an existing item.
* **Assigned** - if assigning to a specific officer.
* **Event ID** - to assign the geospatial item to a specific event.
## Import File
A CSV format file is required with the correct field mappings.
Refer to the Import Field Mappings section in the [Import Instructions](/system-administration/configuring-the-system/imports#import-instructions) section for the latest import file requirements.
## Import Steps
To import the file:
1. Refer to the general instructions in [Imports](/system-administration/configuring-the-system/imports).
2. In the General section select **Type**: *Register Items*
3. For **Parsing Rule:** select *Library Item > Geospatial* (select a specific parser if you are importing items for the same category otherwise select *Library Item > Geospatial > All Categories*)
4. Under **Import File:** use the **Add file** button
# Private Assets Import
This page explains how to use the Private Assets Import option.
## Overview
You can add/or update [Private Asset](broken://pages/eIC3EKq3W5hWtAu59Baw)s in bulk using the Private Assets Import options.
Private Assets are used in [Recovery](broken://pages/iX5K34MTmeOQC8xMW0Kw) [Cases](broken://pages/Sfj9Pht3MY5OyzcTaJAs) for tracking affected people.
This import assumes that private assets are damaged and is used to record the severity of the impact.
Refer to the register page for general instructions:
{% content-ref url="/pages/QP6MVwI3qEAEvatbmPc3" %}
[Imports](/system-administration/configuring-the-system/imports)
{% endcontent-ref %}
### Considerations
When importing consider the following:
* **Name** - is required for all geospatial items
* **Case ID** - to link the private assets to specific Case/s
* **ID or Asset** - use this to match/update an existing item.
* **Status** - defaults to DAMAGED.
* **Building Category** and **Building Type** - are used in conjunction with [lookup](/system-administration/configuring-the-system/lookups)s to record the type of building.
## Import File
A CSV format file is required with the correct field mappings.
Refer to the Import Field Mappings section in the [Import Instructions](/system-administration/configuring-the-system/imports#import-instructions) section for the latest import file requirements.
## Import Steps
To import the file:
1. Refer to the general instructions in [Imports](/system-administration/configuring-the-system/imports).
2. In the General section select **Type**: *Register Items*
{% hint style="info" %}
Despite the name, Private Assets is not in the Type: Assets, as [Private Asset](broken://pages/eIC3EKq3W5hWtAu59Baw)s is a register
{% endhint %}
3. For **Parsing Rule:** select *Private Assets Import*
4. Under **Import File:** use the **Add file** button
# Recovery Case Import
This page explains how to use the Recovery Case Import option.
### Overview
You can add/or update [Recovery](broken://pages/iX5K34MTmeOQC8xMW0Kw) [Cases](broken://pages/Sfj9Pht3MY5OyzcTaJAs) in bulk using the Recovery Case Import options. For more information on Recovery and Cases refer to the following sections:
Refer to the register page for general instructions on importing:
{% content-ref url="/pages/QP6MVwI3qEAEvatbmPc3" %}
[Imports](/system-administration/configuring-the-system/imports)
{% endcontent-ref %}
#### Considerations
When importing consider the following:
* **Name** - is required for all geospatial items
* **Case ID** - if updating specific Case/s
* **Applicant Contact ID** - required to update an existing applicant associated with a case. This ID needs to match the ID of the applicant and can be exported in bulk via the [Reporting](/system-administration/reporting) function.
You can add related applicant data to your case by adding the applicant fields to your input spreadsheet.
{% hint style="info" %}
If you don't specify an Applicant Contact ID in your input file, a new applicant will be created for the case.
{% endhint %}
### Import File
A CSV format file is required with the correct field mappings.
Refer to the Import Field Mappings section in the [Import Instructions](/system-administration/configuring-the-system/imports#import-instructions) section for the latest import file requirements.
### Import Steps
To import the file:
1. Refer to the general instructions in [Imports](/system-administration/configuring-the-system/imports).
2. In the General section select **Type**: *Register Items*
3. For **Parsing Rule:** select *Recovery Case Import*
4. Under **Import File:** use the **Add file** button
# Recovery Contact and Related Case Import
This page explains how to use the Recovery Contact and Related Case Import option.
### Overview
You can add/or update [Person](broken://pages/EHEPjigCz1DuA1EC5mC5)s (Recovery Contacts) and in bulk using the Recovery Contact and Related Case Import option. This is intended for use with [Case](broken://pages/Sfj9Pht3MY5OyzcTaJAs)s. For Relief Registrations please use the Relief Registrations Import instead.
Refer to the register page for general instructions on importing:
{% content-ref url="/pages/QP6MVwI3qEAEvatbmPc3" %}
[Imports](/system-administration/configuring-the-system/imports)
{% endcontent-ref %}
#### Considerations
When importing this data, the import system will perform a check on the address that the affected person has provided. If a recovery case does not exist with this address, a new recovery [Case](broken://pages/Sfj9Pht3MY5OyzcTaJAs) will be created. The contact will then be created as the case's applicant. If the case does already exist (and therefore already has an applicant), the contact will be created and linked to this case as a related affected person.
This means that if more than one contact in the import file have the same address, a recovery case will be created and the first contact will be created and linked as the applicant. Subsequent contacts with the same address will also be created and then linked as related affected people into the same case.
When importing consider the following:
* **Contact Type** - defaults to Individual if not set. If you want to import Organisations you will need to change this
* **Address** - is used to match to existing Person/s or Related Cases
### Import File
A CSV format file is required with the correct field mappings.
Refer to the Import Field Mappings section in the [Import Instructions](https://app.gitbook.com/o/XTVHxRDLJsgVRj4dNFUc/s/Ny7IznbrPLUq6GJDDQDk/system-administration/system-administration/imports#import-instructions) section for the latest import file requirements.
### Import Steps
To import the file:
1. Refer to the general instructions in [Imports](https://app.gitbook.com/o/XTVHxRDLJsgVRj4dNFUc/s/Ny7IznbrPLUq6GJDDQDk/system-administration/system-administration/imports).
2. In the General section select **Type**: *Register Items*
3. For **Parsing Rule:** select *Recovery Contact and Related Case Import*
4. Under **Import File:** use the **Add file** button
# Recovery Task Import
This page explains how to use the Recovery Task Import option.
### Overview
You can add/or update [Needs & Tasks](broken://pages/cbvxkWADYBnySUMuIgVf) and in bulk using the Recovery Task Import option. This is intended for use with tasks related to [Case](broken://pages/Sfj9Pht3MY5OyzcTaJAs)s only.
Refer to the register page for general instructions on importing:
{% content-ref url="/pages/QP6MVwI3qEAEvatbmPc3" %}
[Imports](/system-administration/configuring-the-system/imports)
{% endcontent-ref %}
#### Considerations
When importing consider the following:
* **ID** - is used to match to existing tasks if updating
* **Status** - must be numeric
* **Case ID** - if linking to an existing Case
### Import File
A CSV format file is required with the correct field mappings.
Refer to the Import Field Mappings section in the [Import Instructions](https://app.gitbook.com/o/XTVHxRDLJsgVRj4dNFUc/s/Ny7IznbrPLUq6GJDDQDk/system-administration/system-administration/imports#import-instructions) section for the latest import file requirements.
### Import Steps
To import the file:
1. Refer to the general instructions in [Imports](https://app.gitbook.com/o/XTVHxRDLJsgVRj4dNFUc/s/Ny7IznbrPLUq6GJDDQDk/system-administration/system-administration/imports).
2. In the General section select **Type**: *Register Items*
3. For **Parsing Rule:** select *Recovery Task*
4. Under **Import File:** use the **Add file** button
# Relief Registration Import
This page explains how to use the Relief Registration Import option.
### Overview
You can add/or update [Relief Registration](broken://pages/n7XAqOkn1XDA8TglQ6Io)s and in bulk using the Relief Registration Import option.
Refer to the register page for general instructions on importing:
{% content-ref url="/pages/QP6MVwI3qEAEvatbmPc3" %}
[Imports](/system-administration/configuring-the-system/imports)
{% endcontent-ref %}
#### Considerations
When importing consider the following:
* **ID** - is used to match to existing tasks if updating
* **Contact ID** - if linking to an existing Contact/Person
### Import File
A CSV format file is required with the correct field mappings.
Refer to the Import Field Mappings section in the [Import Instructions](/system-administration/configuring-the-system/imports#import-instructions) section for the latest import file requirements.
### Import Steps
To import the file:
1. Refer to the general instructions in [Imports](/system-administration/configuring-the-system/imports).
2. In the General section select **Type**: *Register Items*
3. For **Parsing Rule:** select *Relief Registration Import*
4. Under **Import File:** use the **Add file** button
# Work Summary Data Import
# Assets
This page explains how to import Assets.
## Overview
The Imports facility allows you to import Assets of different types including infrastructure and roads in bulk.
Importing of variety of assets in different formats (including Shapefile (SHP), TAB and CSV) is supported.
Please refer to general instructions for importing:
{% content-ref url="/pages/QP6MVwI3qEAEvatbmPc3" %}
[Imports](/system-administration/configuring-the-system/imports)
{% endcontent-ref %}
{% hint style="info" %}
To import individual assets you can use the Library [Geospatial Feature](broken://pages/d776FxR0tnyTxbLSJAIw) instead.
{% endhint %}
## Importing Assets
### Format
The Asset import feature supports ZIP to be uploaded into the Import File field. For SHP and TAB files, ensure you upload this as a ZIP file containing the other associated files needed. You cannot upload a SHP or TAB file directly into the Import File field, it must be contained within a ZIP file with its associated files.
{% hint style="info" %}
Asset data is expected in SHP or TAB files with the GDA2020 (EPSG:7844) projection, but can also accept GDA94 (EPSG:3283) or WGS84 "Web Mercator" (EPSG:3857).
These will need to be compressed into a ZIP file for importing
{% endhint %}
### Import Process
Refer to the general instructions under [Imports](/system-administration/configuring-the-system/imports).
When importing Assets, in the **Type** field, choose *Assets*.
For **Parsing Rule**, select one of the following :
### Using the Test Only option to check for errors
It is strongly encouraged to tick the Test Only option before you import your Assets to see if any errors are generated before actually doing a full import of your asset data. The Test Only option will display any error or success messages that would happen on a normal import but it will not import any assets. Once the Test Only option has no error messages you can then untick the Test Only checkbox and run your asset import.
Enter an optional comment for the Audit log and click the Import button to begin importing your Assets.
### Importing Assets from Spatial Data Providers
Importing data from a geospatial information service or Spatial Data Provider is also supported.
Note that this data is not licensed by Datalink, so you will need to arrange the relevant licensing from the Spatial Provider. Some Spatial Providers provide freely licensed products, however there may be other licensing restrictions, so consult your local spatial provider.
For **Parsing Rule**, select one of the following based on your state and Spatial Data Provider:
State
Imports Available
Spatial Data Provider
Import
Queensland
Private Assets and Infrastructure
Queensland Spatial (QSpatial)
Queensland Spatial Property Address Import QLD customers can import data manually using the Asset Property General Import.
Not required. Datalink maintains this data as a service for Victorian customers.
Roads
Vicmap
Asset Road Import using Vicmap Generated Data
{% hint style="info" %}
Other state-based services and Spatial Data Providers may be supported. Contact Help Desk to discuss your import requirements and options.
{% endhint %}
# Asset Property General Import
This page explains how to use the Asset Property General Import option.
## Overview
You can import Properties (Private Assets) into the system using the Asset Property General Import option.
{% hint style="info" %}
This option is not required for Victorian councils. Refer to [Vicmap import](/system-administration/configuring-the-system/imports/assets#importing-assets-from-spatial-data-providers).
{% endhint %}
Refer to the register page for general instructions:
{% content-ref url="/pages/QP6MVwI3qEAEvatbmPc3" %}
[Imports](/system-administration/configuring-the-system/imports)
{% endcontent-ref %}
## Import File
A Shapefile contained within a zip file is required for this import.
Refer to the Import Field Mappings section in the [Import Instructions](/system-administration/configuring-the-system/imports#import-instructions) section for the latest import file requirements.
## Import Process
{% hint style="info" %}
Do not use Rollback on Error unless you are testing, as it can prevent a final import from running.
{% endhint %}
To import Contacts:
1. Refer to the general instructions in [Imports](/system-administration/configuring-the-system/imports).
2. In the General section select **Type**: *Assets*
3. For **Parsing Rule:** select *Asset Property General Import*
4. The default **Match Rule** will be *Delete data and replace with import data*
5. Under **Import File:** use the **Add file** button to upload your import file
6. Save and Check Results
# Asset Contacts General Import
This page explains how to use the Asset Contacts General Import option.
## Overview
You can import owner details for properties into the system using the Asset Contacts General Import option.
Contacts may be exported from existing data in your organisation (such as a ratepayer database). To avoid the import failing, make sure to plan the correct field mappings.
{% hint style="warning" %}
Note that the Asset Contacts import will delete all Asset Contact data prior to importing data from your import file. This is to avoid duplicate contacts being added by successive imports.
{% endhint %}
{% hint style="info" %}
Data is imported via a primary asset key. It is important to use the correct key based on what is configured in the system. Some organisations use different asset keys to others.
{% endhint %}
Refer to the register page for general instructions:
{% content-ref url="/pages/QP6MVwI3qEAEvatbmPc3" %}
[Imports](/system-administration/configuring-the-system/imports)
{% endcontent-ref %}
## Import File
A CSV file is required for this import with the correct field mappings.
Refer to the Import Field Mappings section in the [Import Instructions](/system-administration/configuring-the-system/imports#import-instructions) section for the latest import file requirements.
{% hint style="info" %}
If you want multiple contacts per asset you will need to add multiple line items in your import file. You will also need to have the [Generate one letter per asset contact setting](/system-administration/configuring-the-system/mail-merge-templates#advanced) enabled in the template to output them.
{% endhint %}
## Import Process
{% hint style="info" %}
Do not use Rollback on Error unless you are testing, as it can prevent a final import from running.
{% endhint %}
To import Contacts:
1. Refer to the general instructions in [Imports](/system-administration/configuring-the-system/imports).
2. In the General section select **Type**: *Assets*
3. For **Parsing Rule:** select *Asset Contacts General Import*
4. The default **Match Rule** will be *Delete data and replace with import data*
5. Under **Import File:** use the **Add file** button to upload your import file
6. Save and Check Results
# Asset Point of Interest General Import
This page explains how to use the Asset Point of Interest General Import option.
## Overview
You can add or update points of interest (specific locations that have a particular purpose for people, for example tourist attractions, cultural sites, commercial premises and parks) in bulk using the Asset Point of Interest General Import option.
Points of Interest may be exported from an existing data in your organisation (such as a your Geographical Information System). When exporting and importing to avoid the import failing, make sure to plan the correct field mappings.
Refer to the register page for general instructions:
{% content-ref url="/pages/QP6MVwI3qEAEvatbmPc3" %}
[Imports](/system-administration/configuring-the-system/imports)
{% endcontent-ref %}
## Import File
The supported import file is a ZIP containing SHP and TAB files. You cannot upload a SHP or TAB file directly into the Import File field, it must be contained within a ZIP file with its associated files.
Refer to the Import Field Mappings section in the [Import Instructions](/system-administration/configuring-the-system/imports#import-instructions) section for the latest import file requirements.
### Sample
The following is a sample you can use for testing and training.
{% file src="/files/8hBoLtbhJSWxUZxc4TAS" %}
## Import Process
To import Infrastructure:
1. Refer to the general instructions in [Imports](/system-administration/configuring-the-system/imports).
2. In the General section select **Type**: *Assets*
3. For **Parsing Rule:** select *Asset Point of Interest General Import*
4. Under **Import File:** use the **Add file** button to upload your import file
5. Save and Check Results
# Asset Infrastructure General Import
This page contains instructions and field mappings for importing Infrastructure.
## Overview
You can add and update [Infrastructure](broken://pages/S4Vi1g255T0pGZOB48B9) (such as bridges, culverts, car parks, footpaths, facilities, reserves, storm water pipes and storm water pits) in bulk using the Asset Infrastructure General Import option.
Infrastructure data be exported from your organisation's existing systems (such as a your Geographical Information System). When exporting and importing to avoid the import failing, make sure to plan the correct field mappings.
Refer to the register page for general instructions:
{% content-ref url="/pages/QP6MVwI3qEAEvatbmPc3" %}
[Imports](/system-administration/configuring-the-system/imports)
{% endcontent-ref %}
## Import File
A CSV file is preferred for this import with the correct field mappings.
Refer to the Import Field Mappings section in the [Import Instructions](/system-administration/configuring-the-system/imports#import-instructions) section for the latest import file requirements.
### Sample
The following is an example you can use for testing and training.
{% file src="/files/6HBWt5U241Ptf3Nfjynt" %}
## Import Process
To import Infrastructure:
1. Refer to the general instructions in [Imports](/system-administration/configuring-the-system/imports).
2. In the General section select **Type**: *Assets*
3. For **Parsing Rule:** select *Asset Infrastructure General Import*
4. Under **Import File:** use the **Add file** button to upload your import file
5. Save and Check Results
# Asset Road General Import
This page explains how to use the Asset Road General Import option.
### Overview
You can add/or update road and road segment information using the Asset Road General Import option.
Road data may be exported from your organisation's systems (such as a your Geographical Information System). When exporting and importing to avoid the import failing, make sure to plan the correct field mappings.
It it preferred to import each road segment with a meaningful name to help users that select the asset to work with, e.g: long road name, segment 6 (333m – 555m).\
If possible have the whole road as an extra asset.
Refer to the register page for general instructions:
{% content-ref url="/pages/QP6MVwI3qEAEvatbmPc3" %}
[Imports](/system-administration/configuring-the-system/imports)
{% endcontent-ref %}
### Import File
A CSV file is preferred for this import with the correct field mappings.
Refer to the Import Field Mappings section in the [Import Instructions](/system-administration/configuring-the-system/imports#import-instructions) section for the latest import file requirements.
### Import Process
To import road assets:
1. Refer to the general instructions in [Imports](/system-administration/configuring-the-system/imports).
2. In the General section select **Type**: *Assets*
3. For **Parsing Rule:** select *Asset Road General Import*
4. Under **Import File:** use the **Add file** button to upload your import file
5. Save and Check Results
# Dynamic Recipients
This section outlines the Dynamic Recipients system which enables creation of self updating distribution lists.
## Overview
The Dynamic Recipients register enables creation of recipient lists for the [Communication module](broken://pages/96Wl4ZyuvvALoh43jcys). Dynamic Recipients are distribution lists that evolve over time. For example, when you add a Contact and classify them in a certain way, they can be automatically added to the communication list so that Communications Managers can email or text them as required.
The system comes pre-configured with some generic recipient lists. Refer to the [List of Dynamic Recipients](/system-administration/configuring-the-system/dynamic-recipients/list-of-dynamic-recipients) and their usage.
At present this function can be used with the following register items:
| Module | Register item | Recipient |
| ------------- | ---------------- | ------------- |
| Operations | Contact | Contact |
| Recovery | Person | Person |
| Communication | Inline Recipient | Contact |
| Permits | Permit | Asset Contact |
A Communications Manager can easily include them in a Communication by adding the name of the Dynamic Recipient as a message recipient.
Managing this module requires use of CQL, the query language used in the system. CQL queries can be generated through the filtering system and then copied and pasted into a Dynamic Recipient item.
{% hint style="info" %}
Only users with the position of Communications Manager can add a Dynamic Recipients to Communications.
{% endhint %}
### Access
To access the Dynamic Recipients register you will need to sign in with [*System Admin & Data Entry* position](/system-administration/configuring-the-system#system-administration-positions).
You can find the *Dynamic Recipients* register under **System Administration** **> Dynamic Recipients**.
## Viewing Dynamic Recipients
Dynamic Recipients are listed in and searchable via the register [Datagrid](/concepts-and-fundamentals/on-a-computer/using-the-datagrid#data-grid-view). Viewing them in this datagrid may not make much sense and they are rarely if ever changed once created.
To view an existing Dynamic Recipient:
1. Navigate to the Dynamic Recipients register datagrid.
2. Locate the item you wish to view. The register includes additional filters for Workflow Status (Active/Inactive) and Active Tags
3. Open the item using the ID
4. To return to the Datagrid use the Back button
View of a sample Dynamic Recipient register
Example of a Dynamic Recipient
## Dynamic Recipient Settings
### General
**Recipient Type** defines the type of recipient, at present the only option is **CQL Recipients**.
**Name** is what appears when the Communications Manager searches and enters it in the recipients list of a Communication. It helps identify the Dynamic Recipient.
**CQL** is the query to perform to find the recipients. This will need to retrieve compatible records in order to work. For more information on CQL see [Search, Filter and Query Registers](/concepts-and-fundamentals/on-a-computer/searching-filtering-and-querying-registers).
**Register** enables the Dynamic Recipient to be added into compatible register items. Only a single register is supported.
**Tags** enables tags to be attached to the item.
### Workflow
Dynamic Recipients have only two statuses: Active and Inactive. Active are enabled for use. Inactive cannot be selected as options by users. They can be reactivated and re-added if needed.
## Editing Dynamic Recipients
Dynamic Recipients can be edited from the datagrid.
1. Navigate to the Dynamic Recipients
2. Locate the Dynamic Recipient you wish to edit by using the Edit button
3. Make the necessary changes to the [settings](#lookup-settings)
4. Save to save your changes
## Adding Dynamic Recipients
To add a Dynamic Recipient:
1. Use the [New Item button](/concepts-and-fundamentals/on-a-computer/using-the-datagrid/adding-items) for New Dynamic Recipient
2. Select a **Recipient Type** and enter a **Name** and **CQL** for the Dynamic Recipient and select a **Register** to enable it in
3. Make any other configurations changes necessary in the [settings](#dynamic-recipient-settings)
4. Use the **Save** button
# List of Dynamic Recipients
This page contains a list of pre-configured Dynamic Recipients.
| Name | CQL | Usage |
| --------------------------------- | --------------------------------------------------- | ---------------------------------------------------------------------------- |
| All On-Duty In Current Event | | Use to message all users that are currently on duty for the event |
| \[Position] in \[Event] (On-Duty) | | Used to message a specific \[Position] that is on-duty to the named \[Event] |
| External Distribution | systemClassification:externalDistribution is:active | Use to message all contacts classified as External Distribution |
| Internal Distribution | systemClassification:internalDistribution is:active | Use to message all contacts classified as Internal Distribution |
# Managing Events
This section covers managing events including creating new events.
With the Events register (only available to administrators) you can [view](#viewing-a-list-of-events), [update](#updating-events), [create new Events](#creating-a-new-event) (and special types of events such as [event templates](#template), [global events](/system-administration/managing-events/global-events) or [test only events](#category)) and [close Events](#closing-events) when they are over or no longer needed. You can also use it to enable [positions](/system-administration/configuring-the-system/positions), [registers](#registers) and for certain registers, [public forms](#public-forms).
For more information on how Events are used, refer to [Working within Events](/concepts-and-fundamentals/on-a-computer/working-with-events).
### Access
To access the Events register:
1. Go [on duty](/concepts-and-fundamentals/on-a-computer/working-with-events#setting-your-duties-for-events) with an appropriate role such as a System Administrator (See [System Administration Positions](/system-administration/configuring-the-system#system-administration-positions)) or have a relevant Coordinator position with Event permissions.
2. Open the Events menu, administrators can access additional options:
1. [View All Events](#view-all-events)
2. [Create Event](#creating-a-new-event)
If you can't access these and you need to, ask your administrator to check your permissions.
### Setup and Configuration
Administrators can configure Events access using a combination of Positions and Security Policies.
#### **Security Policies**
Refer to: [Positions: Security Policies](/system-administration/configuring-the-system/positions#security-policies)
Security Policy explanations
The following security policies apply to Events:
| Security Policy | Use |
| -------------------------- | ------------------------------------------------------------------------------------ |
| Event Coordination Limited | Full management and coordination of existing events. Cannot create new events |
| Events Coordination | Full management and coordination to all events, with the power to create new events. |
| Events Create & Manage | Can create and edit events from templates you have access to |
| View Event | Can View an Events’s overview details such as positions & people on duty |
#### Special Event Types
Administrators can also configure:
* [Event Templates](#process) using the [Template](#template) setting under Advanced
* [Global Events](/system-administration/managing-events/global-events) using the [This is a global event](#this-is-a-global-event) setting under Advanced
* [Public Forms](#public-forms) using the Public Forms section
## Finding Events
The register includes a number of features to assist in finding Events:
* [Datagrid](/concepts-and-fundamentals/on-a-computer/using-the-datagrid#data-grid-view) view
* [Map](/concepts-and-fundamentals/on-a-computer/using-the-datagrid#map-view) view
* Filters including Totals, Workflow, Special (templates, global) and [tags](/concepts-and-fundamentals/on-a-computer/using-the-datagrid/tagging-items)
* Search (on Event name only - CQL is not currently enabled for Events)
**Filters**
Filters help make management easier by focusing on specific groups of items on the datagrid.
Events filter menu
Filter menu explanations
The following lists some of the filters and how to use them:
Filter Group
Filter/s
Use
Totals
Active
Finds all Events with a Status of Open
Total
Finds all Events (either a Status of Open or Closed)
Workflow
Open
Finds all Events with a Status of Open
Closed
Finds all Events with a Status of Closed
Special
Templates
Finds all items with This is a template ticked
Global
Finds all items with This is a global event ticked
\* May vary based on your system configuration
#### Viewing a single Event
Refer to: [Viewing Event Details](/concepts-and-fundamentals/on-a-computer/working-with-events#viewing-event-details)
#### View All Events
The Events register holds a listing of Events, including both open and closed.
To view the Event List:
1. Open the Events menu
2. Under 'Manage Events', select *View All Events*
3. The Events register will list all the events and let you view the details for any Events listed. See [Registers and Datagrid](/concepts-and-fundamentals/on-a-computer/using-the-datagrid) for how to navigate this register.
Sample Events register datagrid
## Event Settings
| Left Column | Right Column |
| -------------------------------------------------------------------- | --------------------- |
| [General](#general) | [Workflow](#workflow) |
| [Regions](#regions) | [Advanced](#advanced) |
| [Registers](#registers) | |
| [Positions](/system-administration/configuring-the-system/positions) | |
| [Public Forms](#public-forms) | |
| [Workflow](#workflow) | |
Required fields are indicated with an asterisk.
### General
This section contains fundamental details for the event.
#### Title
This field should contain a short descriptive name for the event.
#### **Start Date/Time**
This field automatically sets to the time you opened the form, but you can back-date or forward date an event.
Refer to: [Setting Dates](/concepts-and-fundamentals/on-a-computer/using-the-datagrid/editing-items#selecting-dates)
#### **End Date/Time**
The date is typically left blank for emergency events and incidents.\
For events that represent fixed shifts, this allows the event to automatically have its status set to **Closed** at the end date/time.
Refer to: [Setting Dates](/concepts-and-fundamentals/on-a-computer/using-the-datagrid/editing-items#selecting-dates)
#### **Template\***
You're required to select a template that best suits your event. This is done from a list of configured in [Event Templates](/system-administration/managing-events/event-templates). Templates pre-select the positions, registers and resources, and pre-create key requests, information and other data to kick-start events. Administrators can create templates.
Refer to: [Event Templates](/system-administration/managing-events/event-templates)
#### **Category\***
You're required to select a category to describe the type or severity of the event.
By default the category list contains an event risk level, but this can be customised per site so your site may have different categories.
{% hint style="info" %}
*Test Only* is a special category designed primarily for tests and drills. When this category is used, all communications from the system are labelled clearly with **\*\* TEST \*\*** so that users know that it is not a real event.
{% endhint %}
#### **Code**
A short code, if required, is used to facilitate data sharing between sites and systems. Leave blank if unused by your organisation.
#### **Description**
This field contains a short description of the event. This is not meant to be a detailed description, which is better left to an Information record within the event, but is used when reviewing events in aggregate at a later time.
### Regions
Regions are configured specifically for your system and the list is customised based on your local area.
#### Region
You're required to set at least one Region for each event.
This field contains a list of available geographical regions, and those that are associated with the event.
If your system has only one region configured, make sure that is selected.
### Registers
This section section contains a list of Registers enabled for the event.
* The selected **Template** determines which Registers are enabled in this section.
* Tick the Registers relevant to your event. You can modify this list later if needed.
* It is recommended that you include the basic registers in **Operations**, including **Information** and **Contact**.
Registers section
### Positions
This section contains a list of Positions that can sign into the event.
* Based on the **Template** selected, some positions are pre-selected.
* Tick the positions required for your event. You can modify this list later if needed.
* At the bottom of this section, select a Coordinator position - this role has overall responsibility for the event.
Positions section
### Public Forms
Public forms can be enabled to allow members of the public to enter information directly into your system. For example Permits, Relief Registrations and Offers.
* The Public Submissions Portal groups forms by Event.
* Multiple events can have active public forms simultaneously.
Example of public Relief Registration form
When activated, public forms appear on a landing page known as the **Public Submission Portal** at:
```
[Site URL]/[Site Name]/public
```
Where:
* Site URL is the [URL used for access](/concepts-and-fundamentals/on-a-computer/getting-access) (for example: app.cw\.crisisworks.com)
* Site Name is the name of your [Site](/concepts-and-fundamentals/concepts-and-fundamentals#sites-and-regions) (all lowercase without spaces)
{% hint style="info" %}
for example: app.cw\.crisisworks.com/yourcouncilname/public
{% endhint %}
The Public Submissions Portal groups forms by Event. Users press the Start button to submit a form.
An example public submission form with forms grouped by event
The title for each section defaults to the Event name, however you can override this using the **Public Title** field on the Event page.
To enable a Public Form type, tick the relevant checkbox.
Public Forms section
#### Configure help text for Public forms
Help text for the public forms is defined in [System Text Library](broken://pages/rdQfq7QPl6jffHieReye#system-text) items pre-configured in your system's Global Workspace. This will set the help text for all forms of that type.
You can change the content of the help text by finding the relevant Library item and editing it.
### Workflow
The Workflow section contains the following fields:
#### Status
Events have only two statuses, they are set either to Open or Closed. New events are set to 'Open' by default. Closed events are archived and no longer able to be worked with unless reopened.
#### Automatically put you on duty
This setting puts you on duty for the new event as soon as the Event is created (recommended as it saves time, otherwise you will need to [go on duty](/concepts-and-fundamentals/on-a-computer/working-with-events#setting-your-duties-for-events)).
#### Automatically put on-call users on duty
This setting places users on duty to the Event with all matching positions if the user is "[On Call](broken://pages/LA4Q1JYzBEpq4X9RdhIY#on-call)" (recommended as it saves time, otherwise individual users will need to [go on duty](/concepts-and-fundamentals/on-a-computer/working-with-events#setting-your-duties-for-events) or you will need to find these users and [set their duties in bulk](/system-administration/user-and-contact-administration#bulk-actions)).
#### Tags
Refer to: [Tagging Items](/concepts-and-fundamentals/on-a-computer/using-the-datagrid/tagging-items).
Tags can be useful to organise Events when existing fields don’t capture what you need.
### Advanced
#### This is a template
This setting create a template that future Events can be created from. When [creating a New Event](#creating-a-new-event), the title of the template will appear in the [Template](#template) selection.
This option is only available when [Updating Events](#updating-events).
{% content-ref url="/pages/FAFxgoH9zwtWBb3isDAQ" %}
[Event Templates](/system-administration/managing-events/event-templates)
{% endcontent-ref %}
#### This is a global event
Global events are active irrespective of which event is selected. Note that they may not show up in the Event menu.
Use this to manage Events that all users can access, that may contain shared items. Examples include the [Contacts](broken://pages/LA4Q1JYzBEpq4X9RdhIY) Directory, Library [Workspaces](broken://pages/dECPbSGzBreV4hZijpP8#workspaces), Global [Resources](broken://pages/rGPBlfWrNvfvFLAZUZhY) and [Roster Availability](/concepts-and-fundamentals/on-a-computer/your-user-profile-and-duties/roster-availability).
This option is only available when [Updating Events](#updating-events).
{% content-ref url="/pages/3ITAlfML7wlFg7V300eF" %}
[Global Events](/system-administration/managing-events/global-events)
{% endcontent-ref %}
#### Security mode
This setting is used specifically for [global events](/system-administration/managing-events/global-events) and determines how users can access the Event's data.
There are two available modes:
Security mode
Explanation
Duty-based
Users must go on duty with a participating position(s) to access this Event's data
Policy-based
Any user with access to an included register can access this Event's data
## Creating a New Event
To create the new event:
1. In the Events menu use the**Create Event** option
2. Complete each section of the [Settings](#event-settings) as required, you must select at least one:
1. [Region](#regions) by ticking the relevant box(es) in the Region section
2. [Register](#registers) by ticking the relevant box(es) in the Register section
3. [Position](/system-administration/configuring-the-system/positions) by ticking the relevant box(es) in the Positions section
3. Save
Create Event in the menu
{% hint style="info" %}
Take care to add the right Registers, Positions and Regions. Without them users will not be able to find or access your new Event. If you have only one Region, this will be ticked by default.
{% endhint %}
### After event has been created
After an event has been created, you would typically:
1. [Go on duty](/concepts-and-fundamentals/on-a-computer/working-with-events#setting-your-duties-for-events) for the event, if you didn't do so during the event creation process (the [Automatically put you on duty](#automatically-put-you-on-duty) setting does this for you)
2. [Switch to the event](/concepts-and-fundamentals/on-a-computer/working-with-events#switching-between-events)
3. Optionally: Add an [Information record](broken://pages/nQaLaful7q945ISCYKvS) with details of the event, and use a [Communication](broken://pages/96Wl4ZyuvvALoh43jcys) to let others know. Note that users who are opted in to communications may already receive [automated notifications](/concepts-and-fundamentals/on-a-computer/notifications-and-alerts).
## Updating Events
For security reasons, updating Events is done differently to editing items from other registers.
To Edit an Event:
1. [Find the Event](#finding-events)
2. [View the Event's details](/concepts-and-fundamentals/on-a-computer/working-with-events#viewing-an-events-details)
3. If you have access, use the Edit Event button (at the bottom of the General Information section)
When updating *Events*:
* Complete each section of the [Settings](#register-item-settings) as required. Note that some options may open up new sections to complete.
Edit event screen
### Closing Events
Events should be closed when they are no longer needed.
To close an event:
1. Set the optional **End Date/Time** (see [Selecting Dates](/concepts-and-fundamentals/on-a-computer/using-the-datagrid/editing-items#selecting-dates)). If not set, the End/Date time will default to the time you close and save the event.
2. Change the [Status](#status) to **Closed**
3. Save.
# Event Templates
Event Templates allow administrators to preconfigure event items, participants and other preferences that are automatically applied when a new event is created.
Use Event templates to:
* Save time by preloading event details
* Enforce consistency and reduce errors
* Automatically create items such as announcements to participants and on call users
Large organisations can implement many of the checklists from their planning by entering them into an event template or into a global reference library. This will make access to the information during an emergency far quicker and more effective.
## Creating an event template
To create an event template:
1. [Create an event](/system-administration/managing-events#creating-a-new-event)
2. Go on duty and select the event to work with it
3. Add any [supported template elements](#supported-template-elements) you wish to include. These items will be created automatically in events based on this template.
4. When you are happy with the event settings, [Edit the Event](/system-administration/managing-events#event-settings)
5. In the Advanced section, tick the **This is a template** checkbox\

6. Save
You will be taken off duty for the event and it will no longer be available for use as a regular event, and it will become available within the Event Templates select box for future event creation.
To edit this event template again, you can uncheck the template checkbox to convert it back to a regular event, then go on duty to manage its records.
### Supported Template Elements
Elements that can be pre-created in an event template include:
Element
Usage
Positions
Add all of the positions you would like to have access, knowing you can always add more later if the Event grows lager than expected.
Registers
Most of the time you will use all of the registers you have licensed, however you can add registers that you need for the Event.
Requests
Any requests saved in an event template will be cited into the new event, this includes all data elements in the request, including the assignment of the requests.
Information
Information can be set up, some could be place holders for information to be added later. Any information added in the Rich Text area will come across, so you can have information such as check lists or tables pre created to edit in the new event.
Contacts
Contacts will also be copied into the new event however if you know your contacts in advance, consider using 'Global' contacts, as these contacts are available in all events for all users that have a matching position in the Global Events.
Library
Pre-populate the Event Library with materials you may need specific to each Event.
### Reverting to a regular event
Templates that are no longer needed can be converted into a regular event. Events previously created using the template will not be affected.
To revert to a regular event:
1. [Edit the Event](/system-administration/managing-events#event-settings)
2. In the Advanced section, untick the **This is a global event** checkbox
## Creating events based on event templates
To create an event based on a previously created event template, simply select the event template from the Event Templates selector when [creating a new event](/system-administration/managing-events#creating-a-new-event).
# Global Events
This page explains how to use Global events to store information for access across multiple events.
## Overview
Global events are special type of event used to store information for access across multiple other events. These events remain accessible regardless of which event a user is currently working in.
Some common examples include:
* Contacts - directories for shared contacts
* Shared Workspaces that all users can access - for example the Library module in this event could hold documents that are relevant to everyone
* Resources - available to all events
* Rostering and availability - for all staff
{% hint style="warning" %}
Global events are not for incidents. The name does not imply a disaster that affects the whole globe. For any real emergency, do not create a global event.
Global events can not be selected in the event selector, nor in the manage duty Screen. This means users cannot go on duty for global events. Instead, users are automatically given access to global events whenever any of their competent positions match positions allocated to a global event.
{% endhint %}
Global events are useful for securely storing documentation, contact lists and other information that does not pertain to any specific incident or event. Data in global events are only accessible by users sharing a position that is attached to the event, meaning secure workspaces can be easily created.
Use global events if you want a private place to put contacts or library records that can only be seen by some positions which will be accessible across all events.
### Security Modes
There are two security modes for Global Events:
* *Policy-based*: Users need a have a position matching one in this event to access the data
* *Duty-based***:** Users must go on duty for a position in this event to access the data
## Finding Global Events
You can identify Global Events in the [Events Datagrid](/system-administration/managing-events#finding-events):
* The Type column will say 'global' for any Global Events
* The Special filter group contains the filter 'Global' which runs the CQL query `special:isGlobal`
## Managing global events
Global events are managed like any other event, where you add and remove positions to the event to provide access. Unlike regular events, users cannot go on duty for global events, so security is granted immediately based on the user having a competency for any position added to the event.
### Creating a Global Event
To create an Global Event:
1. [Create a new event](/system-administration/managing-events#creating-a-new-event) as usual
2. [Go on duty](/concepts-and-fundamentals/on-a-computer/working-with-events#setting-your-duties-for-events) and [select the event](/concepts-and-fundamentals/on-a-computer/working-with-events#selecting-a-primary-event)
3. [Edit the event](/system-administration/managing-events#event-settings) to open the event settings
4. In the Advanced section, tick **This is a global event**\

5. Select a [Security Mode](/system-administration/managing-events#security-mode)
6. Save
### Change an Event to or from a Global Event
{% hint style="warning" %}
**Caution:**
Changing the global status of an event can expose, previously restricted, sensitive data.
Always verify the reason for the change and ensure appropriate access controls are in place.
{% endhint %}
To remove a global event or make an event global
1. Find and View the Event
2. [Edit the Event](/system-administration/managing-events#event-settings)
3. In the Advanced section, change the **This is a global event** checkbox
4. Check the **Security Mode** reflects the desired level of access
## Global events, duties and security
Global events behave differently to regular events.
* Users do not go on duty to global events
* Global events are not selectable in the event selector
Rather than being segregated, global event data is displayed all the time, even when users selects and work in any other regular event. They are called global events because their data is available globally irrespective of the event a user is working within.
{% hint style="info" %}
Securing global events relies upon matching its involved positions with a user's positions.
{% endhint %}
The [Security Mode](/system-administration/managing-events#security-mode) has two main options. The key difference is *policy-based* matching means the data is always available, while *duty-based* matching means it is based on a user's duty in another non-global event.
{% hint style="info" %}
The most common use of global events is in creating a place to store and share long-term information — contacts, documentation, geospatial data, etc. These are commonly named "Workspaces".
In most cases, workspaces are best constructed using policy-based security, as it means users will see the data irrespective whether they are working in another event.
{% endhint %}
## Adding Items to a Global Event
Users add items to Global Events using the [Event](/concepts-and-fundamentals/on-a-computer/using-the-datagrid/editing-items#event) setting.
Global Events are found indented under the heading 'Global' if Global Events are present.
The Global section of the Event setting
# Managing Users
This section explains how users, positions and duties are managed by administrators.
## Overview
This page explains how users along with their positions and duties are managed by administrators.
Users are a special type of [Contact](/modules/overview#operations-modules) that can sign in to the system. However a user cannot access anything without [Positions and Duties](/concepts-and-fundamentals/concepts-and-fundamentals#events-users-positions-and-duties).
Only users with at least one Position associated with an event will have access to the event. Other users will not even know the event exists.
Before managing users, it is essential to understand the concepts around how users sign in and access events. See [Your User Account](/concepts-and-fundamentals/on-a-computer/your-user-profile-and-duties) for more on this.
### Benefits
The user management system is designed to be compliant with information security and privacy standards including ISO27001. However this requires an administrator to observe best practices. For more infomation, refer to: [Trust & Security](/security-and-support/security).
In addition, the user management provides supports [automated account deactivation](#managingusers-positions-and-organisations-automatedaccountdeactivation) and role-based access.
This allows your organisation to use the system for many activities ranging from emergency management, event coordination, inspections, risk management, after hours call outs, business continuity, staff expense tracking and timesheets, rostering and much more.
### Features
Administrators have the following user management abilities:
* Easily query and [find existing users](#finding-users)
* View a summary of key user activity
* Access detailed [reporting](#reports)
* Ability to [create new user accounts](#creating-user-accounts) (by adding a contact and granting/[updating an Individual Contact with user privileges](#enable-user-account-for-this-contact)) and also [in bulk](#importing-users)
* Assign [positions](#adding-and-removing-assigned-positions) to grant access to events (see also: [Managing Events](/system-administration/managing-events))
* Put users [on duty](#bulk-on-duty) or [off duty](#bulk-off-duty)
* [Reset a user's access](#send-welcome-email)
* [Reset user's Multi-Factor Authentication (MFA)](/system-administration/user-and-contact-administration/mfa-for-system-administrators)
* Create [assignable users and organisations](/system-administration/user-and-contact-administration/creating-assignable-users-and-organisations)
* Add [Internal Notes](#internal-notes) and flags on specific users
* Set user [sign off details](#signature) for mail merging
* Change user's [opt-in communication settings](#email-subscriptions)
### Positions
The following table outlines [positions](/concepts-and-fundamentals/concepts-and-fundamentals#events-users-positions-and-duty) that can manage users with default security policies:
Position
Description
System Admin - User Management
Users on duty with this position can send manage users
Other positions and positions with custom security policies may have similar security policies.
#### Security Policies
Refer to: [Positions: Security Policies](/system-administration/configuring-the-system/positions#security-policies)
Security Policy explanations
The following security policies apply to Users:
Security Policy
Use
Manage users, organisations and positions
Provides access and management to users and positions.
User Access
Can view the user's list
### Access
To manage users:
1. Sign in with a user management [position](#requests-usingrequests)
2. Navigate to\
Operations → Contacts
## Finding Users
{% content-ref url="/pages/Hqx2rS3kEW8IpmSxPLI7" %}
[Searching and Filtering](/concepts-and-fundamentals/on-a-computer/searching-filtering-and-querying-registers)
{% endcontent-ref %}
A view of Active Users using the Contacts Type filter
Users are found the same way as Contacts.
In addition, there is a *Is User* column in the datagrid that can be used to identify users.
For more information on searching and filtering refer to the [Finding Contacts](broken://pages/LA4Q1JYzBEpq4X9RdhIY#finding).
The following additional search options are available only for users:
#### Filtering
The Contacts register includes the following menus specifically to find users:
* Type: Users
* Users
Filter menu explanations
The following lists some of the filters and how to use them.
For CQL queries and field definitions consult the [CQL Reference](/security-and-support/technical-reference/cql-reference).
Filter Group
Filter/s
CQL
Use
Type
Users
is:active isUser:true
Finds all Contacts with a positive status that are flagged as users
Users
Active Users
is:active isUser:true
Finds all Contacts with a positive status that are flagged as users
On Duty
is:active isUser:true onDuty:yes
Finds all Users that are currently on duty
#### Querying
CQL searches can be performed via either the Filter menu or Search bar.
The following provides some sample searches for users. For a list of available fields, consult the [Contacts Data Dictionary](broken://pages/s4PE4TQZv0L2E6dIxwUK).
Query examples
**For specific users**
Find all users that are on duty
`isUser:true AND onduty:true`
Find user with first name of Rick and last name of O’Shea.
`firstName:Rick lastName:O'Shea AND isUser:true`
Find users with first name of Rick and last name of O’Shea who are on duty.
`firstName:Rick lastName:O'Shea AND isUser:true AND onduty:true`
**Media searches**
Find contacts where an [avatar](#avatar) file has been uploaded
`avatar:any`
Find contacts where the avatar file field is empty
`avatar:none`
Find contacts where a [signature](#signature) file has been uploaded
`signature:any`
Find contacts where the signature file field is empty
`signature:none`
## Viewing Users
To view a user account:
1. Navigate to the **Contacts** register under Operations
2. Filter or search the datagrid. You can do this from the [filters](#information-editinganexistinginformationitem) in the Users section or the Type section (Users)
3. Open the record using the ID, Status or Name
## User Account Settings
#### Internal Notes
This section of an Individual Contact is only available to administrators and can be used to record notes for internal reference only.
### User Account
The User Account settings can be found in the **User Account** section at the top right hand side in view or edit mode.
#### Enable user account for this contact
The **Enable user account for this contact** setting determines whether a user account exists for the contact. If ticked, the contact has a user account and can sign in to the system.
User Account settings (only available to Administrators)
#### Positions
This field is used to manage position(s) that the user can sign in with, along with their organisation if applicable.
Refer to: [Adding and Removing Assigned Positions](#adding-and-removing-assigned-positions)
#### Copy from Email Field
This setting indicates whether the user sign in email is the same as the contact email. They can be two different emails if necessary. It is recommended that they are the same email so that the user doesn't forget their sign in email.
#### Send user a welcome email
This indicates whether the user should have received an email notifying them of their user account and how to update their access credentials. Administrators can use this field to trigger a welcome email to remind the user of their access details.
#### Primary Site
This setting is only viewable to administrators and displays the users Primary site, this will be set the site their original user account was created in.
#### MFA Details
{% hint style="danger" %}
MFA Reset should only be used if the Site Administrator has verified the identity of the requestor.
{% endhint %}
This setting is only viewable to administrators and displays the MFA methods enabled for the user. Site Administrators will also be able to Reset MFA here if a user has lost access to their authentication method.
Refer to: [MFA for System Administrators](/system-administration/user-and-contact-administration/mfa-for-system-administrators)
### Email Subscriptions
Email Subscriptions allow you to opt contacts in or out of communications from Datalink. We send communications on the software updates and news, maintenance updates and system outages. Depending on which of these options is set you may receive more, less frequent or no updates from us.
Email subscriptions can be opted in or out using the checkboxes
### Advanced
This section is typically only available for Users.
#### Avatar
The Avatar field is used to upload a users photo or other image in jpeg format that represents them visually. For more information about uploading files refer to the [File Upload](/concepts-and-fundamentals/on-a-computer/using-the-datagrid/editing-items#adding-files) field type.
#### **Signature**
Signatures are used with templates, such as those for compliance. It supports the upload of an image file format. JPEG is recommended.
A sample signature uploaded into the Signature field
#### **Signature Text**
The Signature Text often accompanies the signature, for example in compliance templates. This is usually the person's official title.
This is a text field and supports limited HTML for formatting the signature text line in the template.
#### **External ID and External Source**
These fields are used to identify the user from an external system. Contact Datalink if you need to do this.
#### Current Duty Status
The current duty status if known for the User.
#### Last On Duty
The date and time when the user was last on duty from the audit log. This field is read only.
#### Last Login At
The date and time when the user was logged in from the audit log. This field is read only.
#### User Created
The date and time when the user record was created from the audit log. This field is read only.
#### User Updated
The date and time when the user record was last updated from the audit log. This field is read only.
#### User ID
The User ID is a unique identifier that is sometimes used in place of the **Sign in Email** field (when the user signs in). It is rare that you will need this setting. Sometimes Datalink may request this for technical reasons.
## Creating User Accounts
{% hint style="info" %}
Every user account must have an email address, and it must be unique. This is used to [log into the system](/concepts-and-fundamentals/on-a-computer/getting-access#signing-in), and is specified in the **Sign in Email** field.
The same email address cannot be shared between user accounts on the same Site.
{% endhint %}
To create a user account:
1. Navigate to Operations module Contacts register
2. Create or edit a Contact using the New Contact button or option from the New Item list
3. In the General section, set the **Contact Type** field to Individual
4. Complete the contact details including Phone and Email. Note that Email is used by default as the user's Sign In Email.
5. In the **User Account** section on the right, tick the box that says **Enable user account for this contact**\
6. In the **Positions** field Add one or more Positions. You can do this by typing the position name into the field and selecting it from the lookup. [See Adding and Removing Assigned Positions](#adding-and-removing-assigned-positions).
7. In the **Sign in Email** field, put the email address you wish the user to use as a sign in. If the user is using the Primary Email, tick the **Copy from Primary Email field**.\
It is best practice to tick the **Send user a welcome email** to notify them of their new user account.
8. Complete the additional sections for:
1. **Workflow** section. When setting up new users the Contact should be Active by default and the Event should default to the event you're currently on duty for.
2. **Communication Preferences** and **Email Subscriptions** sections (refer to [Contacts Settings](broken://pages/rGTm9vyCA4TordShc02E) for more info)
3. **Advanced**, optionally upload an Avatar or photo (refer to [Contacts Settings](broken://pages/rGTm9vyCA4TordShc02E) for more info)
9. Save
**Testing Access**
A good way to test users is to have a test account that you can use in a second web browser. You can change the position in this test account if you want to confirm or test it out. This is a good way to simulate user's access which will be less than yours. If you need to make changes you can switch to the first web browser, make the changes then test in the second web browser.
## Editing User Accounts
Users can be edited from the Contact Register datagrid.
1. Navigate to the Contacts register
2. Locate the User Contact you wish to edit by using the Edit button
3. Make the necessary changes to the [settings](#user-account-settings)
4. Save to save your changes
### Adding and Removing Assigned Positions
Positions are assigned with the **Positions** field under **User Account**. You can do this by typing the position name into the field and selecting it from the lookup. They can be removed with the x.
Positions section in Workflow
{% hint style="info" %}
Do not add Public User position to any staff. This is a special position which has a specific use, no users should ever have this position, it may cause huge problems if you do.
{% endhint %}
### Activating and Deactivating Contacts
To activate or deactivate contacts, use the **Contact Status** field.
Set to Inactive to deactivate (hide) the contact.
Set to Active to reactivate deactivated (hidden) contacts.
#### Automated Account Deactivation
A key security feature, if enabled, is a scheduled daily process that runs that expires (deactivates) inactive accounts that have not been used for more than 24 months. If unsure that this has been enabled for your site please contact Help Desk.
**Warning period**
30 days prior to user deactivation:
* The user is sent a notice by email asking them to log in and update their user profile details
* Users with position *System Admin - User Management* are sent a summary notification
* User is added to the *Users: Approaching Deactivation* filter
7 days prior to the user deactivation:
* Users who still haven't logged in are sent a final reminder that their account will soon be deactivated
**Deactivation**
Any user who still haven't logged in after the warning period:
* The user account is automatically deactivated
* User is added to the *Users: Deactivated* filter
* Users are sent a notice by email advising that they can no longer use their account (they should contact their administrator if they wish to reactivate their account)
### Setting a user's communication preferences and Email subscriptions
Users can set their own notification preferences or user administrators can set them on their behalf.
#### Communication Preferences
A contact user can have multiple phone numbers (**Primary Phone** and **Secondary Phone**) and email addresses (**Primary Email** and **Secondary Email**) and which of these to use when sending communications is set using the fields **SMS Communications** and **Email Communications**.
Whether or not the user receives email and SMS communications is controlled by the options **Receive communications by SMS** and **Receive communications by Email**.
Communications are sent either via a communication message or automated emails to alert users of key events, such as item assignment. A coordinator can bypass these user options when sending urgent communications.
Communications Preferences section
#### Email subscriptions
Datalink sends a low volume set of emails that keep users updated, informed and trained in the product.
Email Subscriptions section
## Bulk Actions
{% content-ref url="/pages/85HyYT6h2YqK6Qk26AXL" %}
[Bulk Actions](/concepts-and-fundamentals/on-a-computer/using-the-datagrid/bulk-actions)
{% endcontent-ref %}
The following additional bulk actions can be performed by administrators in addition to those that can be performed on standard Contacts:
| Action |
| --------------------------------------------------------- |
| [Bulk Edit](#bulk-edit) |
| [Bulk Create Expertise Item](#bulk-create-expertise-item) |
| [Merge](#merge) |
| [Bulk on duty](#bulk-on-duty) |
| [Bulk off duty](#bulk-off-duty) |
| [Send Welcome email ](#send-welcome-email) |
### Bulk Edit
Refer to: [Bulk Edit](/concepts-and-fundamentals/on-a-computer/using-the-datagrid/bulk-actions#bulk-edit)
* Positions
* User Account Status
* On Call Status
### Bulk Create Expertise Item
Refer to: [Expertise](broken://pages/U3jQIUBfnzUpuOpCleAR)
### Merge
Refer to: [Merge](/concepts-and-fundamentals/on-a-computer/using-the-datagrid/bulk-actions#merge)
### Bulk on duty
This action puts selected user on duty to selected positions.
### Bulk off duty
This action puts selected user off duty to selected positions.
### Send Welcome email
This action resends the [Welcome email](#send-user-a-welcome-email) to the user.
## Importing Users
Users can be [imported as contacts](/system-administration/configuring-the-system/imports/register-items/contacts-import) and then converted using the [Bulk Edit](#bulk-actions).
Refer to: [Contacts Import](/system-administration/configuring-the-system/imports/register-items/contacts-import)
## Reports
{% content-ref url="/pages/IwhECOjXodLQkcojUf7P" %}
[Running Reports](/system-administration/reporting/running-reports)
{% endcontent-ref %}
Reports for user management are found under the [User Reports](/modules/reports/user-reports) section of Reports. This includes:
* Users Report
* User Event Participation Report
Other useful reports include:
* [System Administration](/modules/reports/system-administration-reports)
* Security: Users having positions
* Security: User positions based on current duty
* [Operations Reports](broken://pages/rDzS0x7dG5bGlIkFeGEK)
* Expertise Report
* [Rostering Reports](broken://pages/Sg2mDOnkmBWamcjmaqdm)
* Roster Availability
# Creating Assignable Users and Organisations
This page outlines how to create assignable users, such as contractors
## Overview
This page explains how to create assignable users, such as contractors who can log in to view and edit tasks assigned to them, for example via the [mobile app](/security-and-support/faqs/troubleshooting/mobile-app).
This is useful for managing:
* External Agencies to assign [Request Tasks](broken://pages/wLFnJQEV40zX1rcGC6KR)
* Recovery Agencies to assign [Needs & Tasks](broken://pages/cbvxkWADYBnySUMuIgVf)
* Subcontractors for [Fire Prevention Notices](broken://pages/aVcVymyPFayQ3Z01C5aq) who can view [FPN Subcontractor Tasks](broken://pages/PZym7K6PlrQboZV0I0lo)
By restricting their access a sub-register, these users can view tasks assigned to them but not other secure information.
By delegating tasks and giving a level of task autonomy to external users and organisations, processes can be streamlined and made more efficient.
Once properly configured, users or organisations assigned tasks can receive automatic notifications on assignment.
## Creating Assignable Users
To create a user that can be assigned tasks:
1. Create a position (e.g. ABC Contracting) with relevant [security policies](/system-administration/configuring-the-system/positions#security-policies) (the easiest way to do this is to [copy an existing position](/system-administration/configuring-the-system/positions#copying) such as a contractor which has security policies pre-configured).
2. [Create a contact](/system-administration/user-and-contact-administration#creating-user-accounts), tick [user account](/system-administration/user-and-contact-administration#user-account) and [add the position](/system-administration/user-and-contact-administration#adding-and-removing-assigned-positions) (e.g. ABC Contracting) to it.
3. [Enable the position when configuring the Event register](/system-administration/managing-events#positions) (optional) if you want to allow them to access a specific register (such as FPN Subcontractor Tasks).
4. Test [going on duty to the Event](/concepts-and-fundamentals/on-a-computer/working-with-events) to begin working with it. You can temporarily set the user's email to your own to test assignment and notifications. Going on duty will enable assignment of tasks in the relevant Assignment field. You can also put users on duty using the [Bulk on Duty](/system-administration/user-and-contact-administration#bulk-actions) function.
5. Use the Welcome Email to send account details to the new user or organisation.
{% hint style="warning" %}
Important: There needs to be at least one user on duty in the position for it to become assignable. If no users are on duty, you can put them on duty using the [Bulk On Duty](/system-administration/user-and-contact-administration#bulk-actions) function.
{% endhint %}
## Creating Assignable Organisations
You can optionally set up an organisations to assign to an organisation instead of an individual. When doing so, an email account is still required for notifications and sign in. You can use a generic contact with a generic email address for this. You can also use a generic organisation such as 'Contractor'. This is the recommended way.
To create an organisation that can be assigned tasks:
1. Follow the [steps for creating assignable users](#creating-assignable-users)
2. Attach the position to an existing organisation using the [Organisation](/system-administration/configuring-the-system/positions#organisation) setting
{% hint style="info" %}
When a Contact is upgraded to a user it becomes possible to select an Organisation from the list to link the user to. This was a previous way to create assignable users. In the current version it is the Position rather than the Organisation determines assignability. You can still use this now as an optional reference link.
{% endhint %}
## Instructions for Users
Refer users to the Quick Start Guide to get them up and running once you have sent them their link to set a password. Their username will be the same as the email you set them up with.
{% content-ref url="/pages/gTGrSlSMwbJJAwO5KSkV" %}
[Quick Start Guide](/quick-start-guide)
{% endcontent-ref %}
# MFA for System Administrators
Managing multi-factor authentication as a system administrator
## Overview
Multi-factor authentication (MFA) provides an additional layer of security when users sign in. As a system administrator, you can:
* Help new users enrol in MFA
* Reset MFA when a user cannot access their registered method
* Generate a temporary code for users who cannot begin enrolment
* Check and filter users by their MFA status
{% hint style="danger" %}
**Important:** Resetting MFA affects account security. Always verify the user’s identity using your organisation’s approved process before resetting MFA or providing a temporary code.
{% endhint %}
## Positions
The following [positions](https://docs.cw.crisisworks.com/concepts-and-fundamentals/concepts-and-fundamentals#events-users-positions-and-duty) can MFA features with default security policies:
* System Admin - User Management
* System Admin & Data Entry
### How new users set up MFA
When you create a contact and enable a user account, a welcome email is sent to the user.
The user will:
1. Open the link in the welcome email.
2. Create a password.
3. Request and enter the verification code.
4. Sign in with their new password.
5. Follow the prompts to secure their account with MFA.
The user can register:
* An authenticator app
* A mobile number to receive SMS verification codes
We recommend registering both methods where possible. This gives the user a backup if one method becomes unavailable.
A **Skip for now** option may appear during initial sign-in which allows for an initial 24 hour grace period before. The user must enable MFA after this time.
### Reset MFA for a user
System Administrators can **Reset MFA** when a user has lost, replaced or can no longer access the device registered for MFA.
To reset MFA:
1. Verify the user’s identity using your organisation’s approved process.
2. Sign in as a system administrator for the user’s primary site.
3. Open the user’s record.
4. Select **Reset MFA**.
5. Review the warning and confirm the reset only when you are satisfied that the request is genuine.
6. Provide the generated temporary reset code to the verified user.
The temporary code expires after the period displayed on screen. Ask the user to use it within that time.
> **Note:** Resetting MFA does not change the user’s password.
The user must then:
1. Sign in with their existing username and password.
2. Enter the temporary reset code when prompted.
3. Register a new MFA method.
4. Complete the verification steps and save the new method.
### Help a user who has not enrolled in MFA
A user may be unable to sign in if:
* They had not enrolled in MFA before it became mandatory; and
* Their contact record did not contain a mobile number.
The user will be instructed to contact the system administrator at their primary site for a code.
To help the user follow the process to [Reset MFA](#reset-mfa-for-a-user).
### Check a user’s MFA status
You can view MFA information from the Contact datagrid.
1. Open the Contacts register.
2. Open the column selector.
3. Add the **MFA status** and **Primary site** columns.
These columns show whether each user has completed MFA enrolment and identifies the user’s primary site.
These fields are also searchable from the 'Additional filters' selector accessible from the search screen.
### Find users with CQL
You can also use CQL to search for users according to their MFA status.
**Users with MFA enabled (replace 'YourSiteName' with your domain name)**
```
isUser:true is:active authPrimarySite:YourSiteName authMfa:set
```
**Users who have not completed MFA enrolment (replace 'YourSiteName' with your domain name)**
```
isUser:true is:active authPrimarySite:YourSiteName authMfa:unset
```
### Security guidance
When supporting an MFA reset:
* Always verify the user’s identity first.
* Only administrators for the user’s primary site can complete the reset.
* Share temporary codes using an approved secure method.
* Never send a temporary code to an unverified recipient.
* Ask the user to use the code before the displayed expiry time.
* Remind the user that an MFA reset does not change their password.
* Encourage the user to register both SMS and an authenticator app.
# Reporting
This section outlines the Reports module including running reports.
## Overview
The Reporting system provides pre-built reports with filters for exporting data, generally downloadable in comma separated (CSV) format.
They provide a more detailed and flexible alternative to [working with registers and datagrids](/concepts-and-fundamentals/on-a-computer/using-the-datagrid).
There are two ways to generate reports:
* Indirectly via the Export to Report function in the [Bulk Actions menu](/concepts-and-fundamentals/on-a-computer/using-the-datagrid/bulk-actions#export-to-report) in a register (this option may be limited to certain users by permissions) this option provides a pre-filtered pre-selected report
* [Running a Report](/system-administration/reporting/running-reports) from the Reports module directly - this option provides more control over the report selection and output
{% hint style="info" %}
Each built-in report is identifiable by a unique Report ID however this is specific to your organisation's [Site](/concepts-and-fundamentals/concepts-and-fundamentals#sites-and-regions). The same ID may not refer to the same report in another Site.
{% endhint %}
The Reports module uses a snapshot system, enabling users to see previous runs configured with their original filters. Reports are run as a scheduled process so that they don't affect overall performance of the system.
Reports are configured as part of your package and depending on your subscription, Help Desk can assist with the creation of custom reports. Refer to the module guide for relevant reports or full a full list, [Built-in Reports](/system-administration/reporting/built-in-reports).
## Access
Reports is available via the main menu.
The module is typically available only to Coordinator and System Administrator positions. It can be configured for access by other users by a System Administator through a security policy.
If your account doesn't have access to this module and you need to use it, contact your System Administrator.
View of the Reports module
## Finding Reports
Your system will typically have more than 50 built-in reports and may include some configured specifically for your organisation's needs.
Reports are grouped by theme and listed alphabetically by theme.
To find a specific report, you can type a keyword into the '**Search Reports**' field located at the top of the Reports screen. Reports will be automatically filtered by the keyword as you type.
Searching for reports by keyword 'cost'
# Running Reports
This section outlines the process of running reports in the Reports module.
## Overview
Reports can be run, configured and re-run as required.
A list of available reports can be found in [Built-in Reports](/system-administration/reporting/built-in-reports).
Reports are numbered with an RPT- prefix and named to make them easier to identify. However the information you’re looking for may not exactly match the description so it may be necessary to check one or more reports for the available options and parameters before running them.
They are generally downloadable in comma separated (CSV) format.
### Generating a Report
The general process for generating a report is:
1. Navigate to the Reports module using the main menu
2. Find the report you're looking for, you can use the 'Search Reports' field to filter the list
3. Select the report you wish to run and use the 'Run Report' button to open the report
4. Configure optional report [Settings](#settings)
5. Use the 'Run Report' button to run using the selected options or the 'Back' button to select a different report
## Settings
The settings screen is used to configure and customise the report output and uses same process a [editing items](/concepts-and-fundamentals/on-a-computer/using-the-datagrid/editing-items) but instead of being saved, report instances are *Run*.
An example Settings screen
### Search
The Search section is used to filter the data using a **Search Query** which is a powerful way to limit the Register results to specific conditions. The Search Query accepts is constructed using CQL and the search term supports almost all data fields.
For more information on constructing CQL refer the [CQL Reference](/security-and-support/technical-reference/cql-reference).
### Additional Filters
Reports run with default options may produce a large amount of results.
You can customise your report by entering report parameters in the 'Filter' section which can produce a subset of items for the report.
Filters are configured differently for each report and may include options to select Items by by IDs, Workflow (Dates, Status etc) or Text. You may wish to familiarise yourself with the available options when choosing the right report.
Example Run Report screen filter section with options
### Columns
The Columns section defines the columns that appear on the report.
Reports run with a default set of columns. These are defined by the register schema.
You can add or remove columns in the report by expanding this section and ticking or unticking the list of available options.
Example Run Report screen columns section with options
### Formatting Options
Reports are usually exported without grouping or ordering.
Sometimes, however, you may wish to see it grouped and/or ordered prior to exporting. These options differ from report to report.
Example Run Report screen with formatting options
#### Group By
This setting groups the report data by a single key field. The default is *No grouping*.
#### Order By
This setting orders the report data by a single key field. The default is *No ordering*.
### Metadata
You can add information to the report using the Metadata section.
The Reports Metadata section
#### Summary
The Summary helps identify the report.
#### Information Accuracy
This setting indicates the level of accuracy of this report data. For example, if the report is an incomplete or early snapshot of an unfolding event, set the accuracy low.
#### Information Credibility
This setting indicates if information has come from secondary or public sources, set the credibility lower. If it has come from direct inspections by authorised officers, set it higher.
#### Validity
This setting informs the reader as to when this report becomes invalid.
#### Approval for Distribution
This setting indicates whether the data has been authorised for distribution. Only coordinators and administrators should do this.
## Report Results
Reports are queued and may take time to generate. The screen will generally refresh and provide a Completed or Failed result. In either case, you go to the [Recent Runs screen](#viewing-and-running-previously-run-reports) using the 'Back' button.
### Completed Report
A successfully run report will show a Status with a green tick and a Message field saying 'Completed' and by the person's name who ran it. It will also have information on the time and date run, the number of rows produced and how long it took to execute. If a preview is available, some sample records will be displayed in tabular format below.
Example Report output with tabular data
The following buttons in the footer enable follow up actions.
To re-run the report, use the 'Run Again' button.
To download the results, use the 'Download' button. This downloads the default format, CSV.
To download a Microsoft Excel friendly version use the 'To Excel' button.
### Failed Report
A report with a Failed status was not able to be run and there will be no Download button. It may be that the process was not able to complete or that the report did not produce any data. A reason code will be identified in the Result screen Message field and may contain information on the system logs. This message can be quoted for support reasons.
## Viewing and Running Previously Run Reports
To view previously run reports:
1. Navigate to the Reports module using the main menu
2. Select the report you wish to View
3. Use the 'View History' button
4. The Recent Runs section displays recent runs including their Status, Run Date, User (you or someone else) and the number of Rows produced in the results.
1. Use the ID or Status to show the Report Result screen for a specific run (and optionally run again) OR
2. Run the Report using the 'Run Report' button or return to the Reports menu by using the 'Back' button
An example 'Recent Runs' screen showing previous runs by status, date, user and rows
# Built-in Reports
This page explains the reports that are built-in to your system.
## Built-in Reports
Use the pages below to find the built-in reports available in your system.
For how to run a report, see [Running Reports](/system-administration/reporting/running-reports).
{% hint style="info" %}
Each built-in report is identified by a **Report ID**.
Report IDs are **site-specific**. The same ID can refer to a different report in another site.
{% endhint %}
# Practice notes
# Technical Reference
This section is the source of truth for technical information on data schemas, CQL, API and merge template code.
# CQL Reference
This section gives an overview of CQL including syntax from basic single field queries to advanced multi-field and multi-register queries.
CQL (Crisisworks Query Language) provides a way to build structured queries including multi-field and multi-register queries which can also be used in many ways including to export data and prepare reports.
The are two main ways to perform a CQL query are:
1. Using the search box within [Register Filters](/concepts-and-fundamentals/on-a-computer/searching-filtering-and-querying-registers#register-filters) (for field based filtering)
2. From the [Search bar](/concepts-and-fundamentals/on-a-computer/searching-filtering-and-querying-registers#search-bar) (for more advanced queries across one or more registers)
Both methods must be performed within a specific register.
For more general information on these methods refer to [Searching & Filtering](/concepts-and-fundamentals/on-a-computer/searching-filtering-and-querying-registers).
Queries are built by performing operations on fields. A full list of available fields can be found in the [Data Dictionary](broken://pages/kOWwnlRokYfxBf1Za2os).
---
[Next Page](/llms-full.txt/1)
 #### Recovering your password
If you are a new user or have lost or forgotten your password, follow these steps to reset:
1. Use the **Reset Password** link underneath the **Sign In** heading.\

2. Enter your **email address** and use the **Send Code** button.
3. Without closing your browser, check your email for a reset code.
4. Set a new password (you'll need to enter it again to confirm).
Passwords must include:
* At least 8 characters
* Upper and lower case letters
* At least one special character (@\*!\&#$%^<>.\_-\[]{}()=\~+?,;:"'/|)
* At least one number
5. Enter your **Reset Code** and use **Submit**
6. Once your password has been updated successfully you will see a confirmation message. Use the **Back to Sign In** link and login with your email and new password.
#### Important notes
* The email sent by the system contains a reset code, not a password.
* If you don't receive an email, you may not have an account on the system that uses that email address.
#### Signing In with Multi Factor Authentication
Multi-factor authentication (MFA) helps secure your account to prevent it being compromised or hacked. MFA adds an extra, highly secure, step to logging in addition to the username and password.
{% hint style="warning" %}
MFA is now mandatory for all those users not using SSO.
{% endhint %}
If you have enabled Multi Factor Authentication (MFA) (recommended) additional authentication steps are required before signing in.
There are currently two main options for MFA:
1. Authentication App that supports one-time password (OTP) codes (recommended), and;
2. SMS based authentication
#### Authentication Code (via Authenticator App)
If your MFA method is Authentication Code, you'll see a prompt to enter a one-time authentication code. This will depend on the Authentication method you're using, for example Google Authenticator.
1. Using your Authenticator app, find the code
2. Enter or paste the code into the field on screen
3. Use the **Confirm** button
#### SMS Authentication
If your MFA method is SMS you'll get a screen notifying you that a code has been sent to your phone and get a prompt to enter a one-time code.
1. Check your phone for an SMS
2. Enter or paste the code from the SMS into the field on this screen
3. Use the **Confirm** button
#### Signing In with Single sign-on (SSO)
If Single sign-on (SSO) is configured for your site, this will be the default login option (otherwise users will sign in using their email address and password).
After using the **Sign In** button, a second page will appear prompting you to sign in with your corporate ID.
Follow your organisations authentication process to complete the login.
{% hint style="info" %}
Please refer to the Single Sign On instructions from your organisation for account onboarding.
{% endhint %}
#### Recovering your password
If you are a new user or have lost or forgotten your password, follow these steps to reset:
1. Use the **Reset Password** link underneath the **Sign In** heading.\

2. Enter your **email address** and use the **Send Code** button.
3. Without closing your browser, check your email for a reset code.
4. Set a new password (you'll need to enter it again to confirm).
Passwords must include:
* At least 8 characters
* Upper and lower case letters
* At least one special character (@\*!\&#$%^<>.\_-\[]{}()=\~+?,;:"'/|)
* At least one number
5. Enter your **Reset Code** and use **Submit**
6. Once your password has been updated successfully you will see a confirmation message. Use the **Back to Sign In** link and login with your email and new password.
#### Important notes
* The email sent by the system contains a reset code, not a password.
* If you don't receive an email, you may not have an account on the system that uses that email address.
#### Signing In with Multi Factor Authentication
Multi-factor authentication (MFA) helps secure your account to prevent it being compromised or hacked. MFA adds an extra, highly secure, step to logging in addition to the username and password.
{% hint style="warning" %}
MFA is now mandatory for all those users not using SSO.
{% endhint %}
If you have enabled Multi Factor Authentication (MFA) (recommended) additional authentication steps are required before signing in.
There are currently two main options for MFA:
1. Authentication App that supports one-time password (OTP) codes (recommended), and;
2. SMS based authentication
#### Authentication Code (via Authenticator App)
If your MFA method is Authentication Code, you'll see a prompt to enter a one-time authentication code. This will depend on the Authentication method you're using, for example Google Authenticator.
1. Using your Authenticator app, find the code
2. Enter or paste the code into the field on screen
3. Use the **Confirm** button
#### SMS Authentication
If your MFA method is SMS you'll get a screen notifying you that a code has been sent to your phone and get a prompt to enter a one-time code.
1. Check your phone for an SMS
2. Enter or paste the code from the SMS into the field on this screen
3. Use the **Confirm** button
#### Signing In with Single sign-on (SSO)
If Single sign-on (SSO) is configured for your site, this will be the default login option (otherwise users will sign in using their email address and password).
After using the **Sign In** button, a second page will appear prompting you to sign in with your corporate ID.
Follow your organisations authentication process to complete the login.
{% hint style="info" %}
Please refer to the Single Sign On instructions from your organisation for account onboarding.
{% endhint %}
 on the My User Account page.
The status of your MFA setup for the two modes are shown to the right of the screen.
on the My User Account page.
The status of your MFA setup for the two modes are shown to the right of the screen.