Managing Events
This section covers managing events including creating new events.
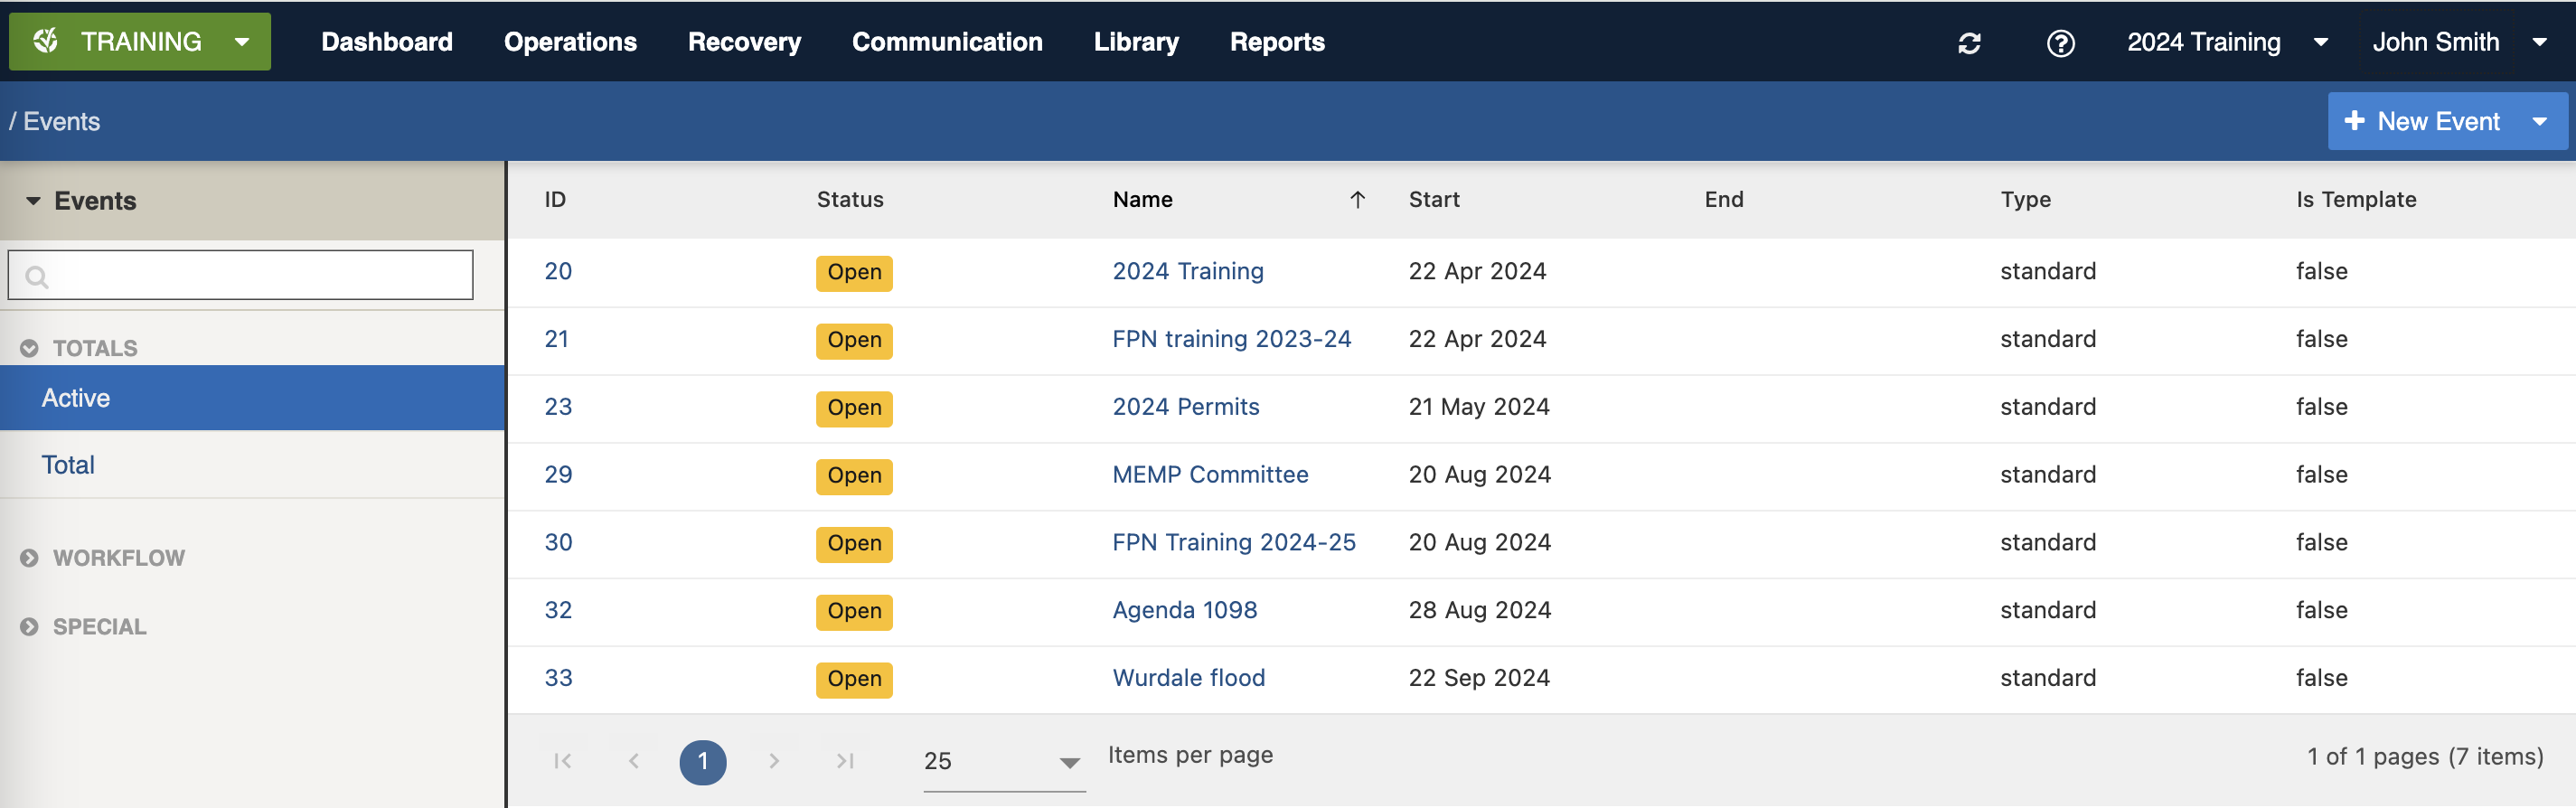
With the Events register (only available to administrators) you can view, update, create new Events (and special types of events such as event templates, global events or test only events) and close Events when they are over or no longer needed. You can also use it to enable positions, registers and for certain registers, public forms.
For more information on how Events are used, refer to Working within Events.
Access
To access the Events register:
Go on duty with an appropriate role such as a System Administrator (See System Administration Positions) or have a relevant Coordinator position with Event permissions.
Open the Events menu, administrators can access additional options:
If you can't access these and you need to, ask your administrator to check your permissions.
Setup and Configuration
Administrators can configure Events access using a combination of Positions and Security Policies.
Security Policies
Refer to: Positions: Security Policies
Security Policy explanations
The following security policies apply to Events:
Event Coordination Limited
Full management and coordination of existing events. Cannot create new events
Events Coordination
Full management and coordination to all events, with the power to create new events.
Events Create & Manage
Can create and edit events from templates you have access to
View Event
Can View an Events’s overview details such as positions & people on duty
Special Event Types
Administrators can also configure:
Event Templates using the Template setting under Advanced
Global Events using the This is a global event setting under Advanced
Public Forms using the Public Forms section
Finding Events
The register includes a number of features to assist in finding Events:
Datagrid view
Map view
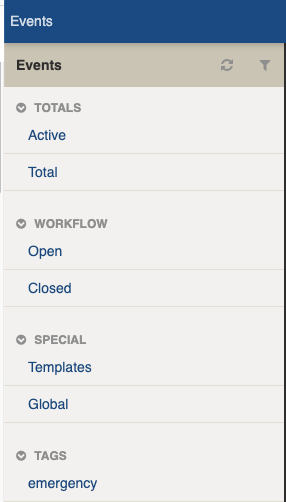
Filters including Totals, Workflow, Special (templates, global) and tags
Search (on Event name only - CQL is not currently enabled for Events)
Filters
Filters help make management easier by focusing on specific groups of items on the datagrid.

Filter menu explanations
The following lists some of the filters and how to use them:
Totals
Active
Finds all Events with a Status of Open
Total
Finds all Events (either a Status of Open or Closed)
Workflow
Open
Finds all Events with a Status of Open
Closed
Finds all Events with a Status of Closed
Special
Templates
Finds all items with This is a template ticked
Global
Finds all items with This is a global event ticked
* May vary based on your system configuration
Viewing a single Event
Refer to: Viewing Event Details
View All Events
The Events register holds a listing of Events, including both open and closed.
To view the Event List:
Open the Events menu
Under 'Manage Events', select View All Events
The Events register will list all the events and let you view the details for any Events listed. See Registers and Datagrid for how to navigate this register.

Event Settings
Required fields are indicated with an asterisk.
General
This section contains fundamental details for the event.
Title
This field should contain a short descriptive name for the event.
Start Date/Time
This field automatically sets to the time you opened the form, but you can back-date or forward date an event.
Refer to: Setting Dates
End Date/Time
The date is typically left blank for emergency events and incidents. For events that represent fixed shifts, this allows the event to automatically have its status set to Closed at the end date/time.
Refer to: Setting Dates
Template*
You're required to select a template that best suits your event. This is done from a list of configured in Event Templates. Templates pre-select the positions, registers and resources, and pre-create key requests, information and other data to kick-start events. Administrators can create templates.
Refer to: Event Templates
Category*
You're required to select a category to describe the type or severity of the event.
By default the category list contains an event risk level, but this can be customised per site so your site may have different categories.
Test Only is a special category designed primarily for tests and drills. When this category is used, all communications from the system are labelled clearly with ** TEST ** so that users know that it is not a real event.
Code
A short code, if required, is used to facilitate data sharing between sites and systems. Leave blank if unused by your organisation.
Description
This field contains a short description of the event. This is not meant to be a detailed description, which is better left to an Information record within the event, but is used when reviewing events in aggregate at a later time.
Regions
Regions are configured specifically for your system and the list is customised based on your local area.
Region
You're required to set at least one Region for each event.
This field contains a list of available geographical regions, and those that are associated with the event.
If your system has only one region configured, make sure that is selected.
Registers
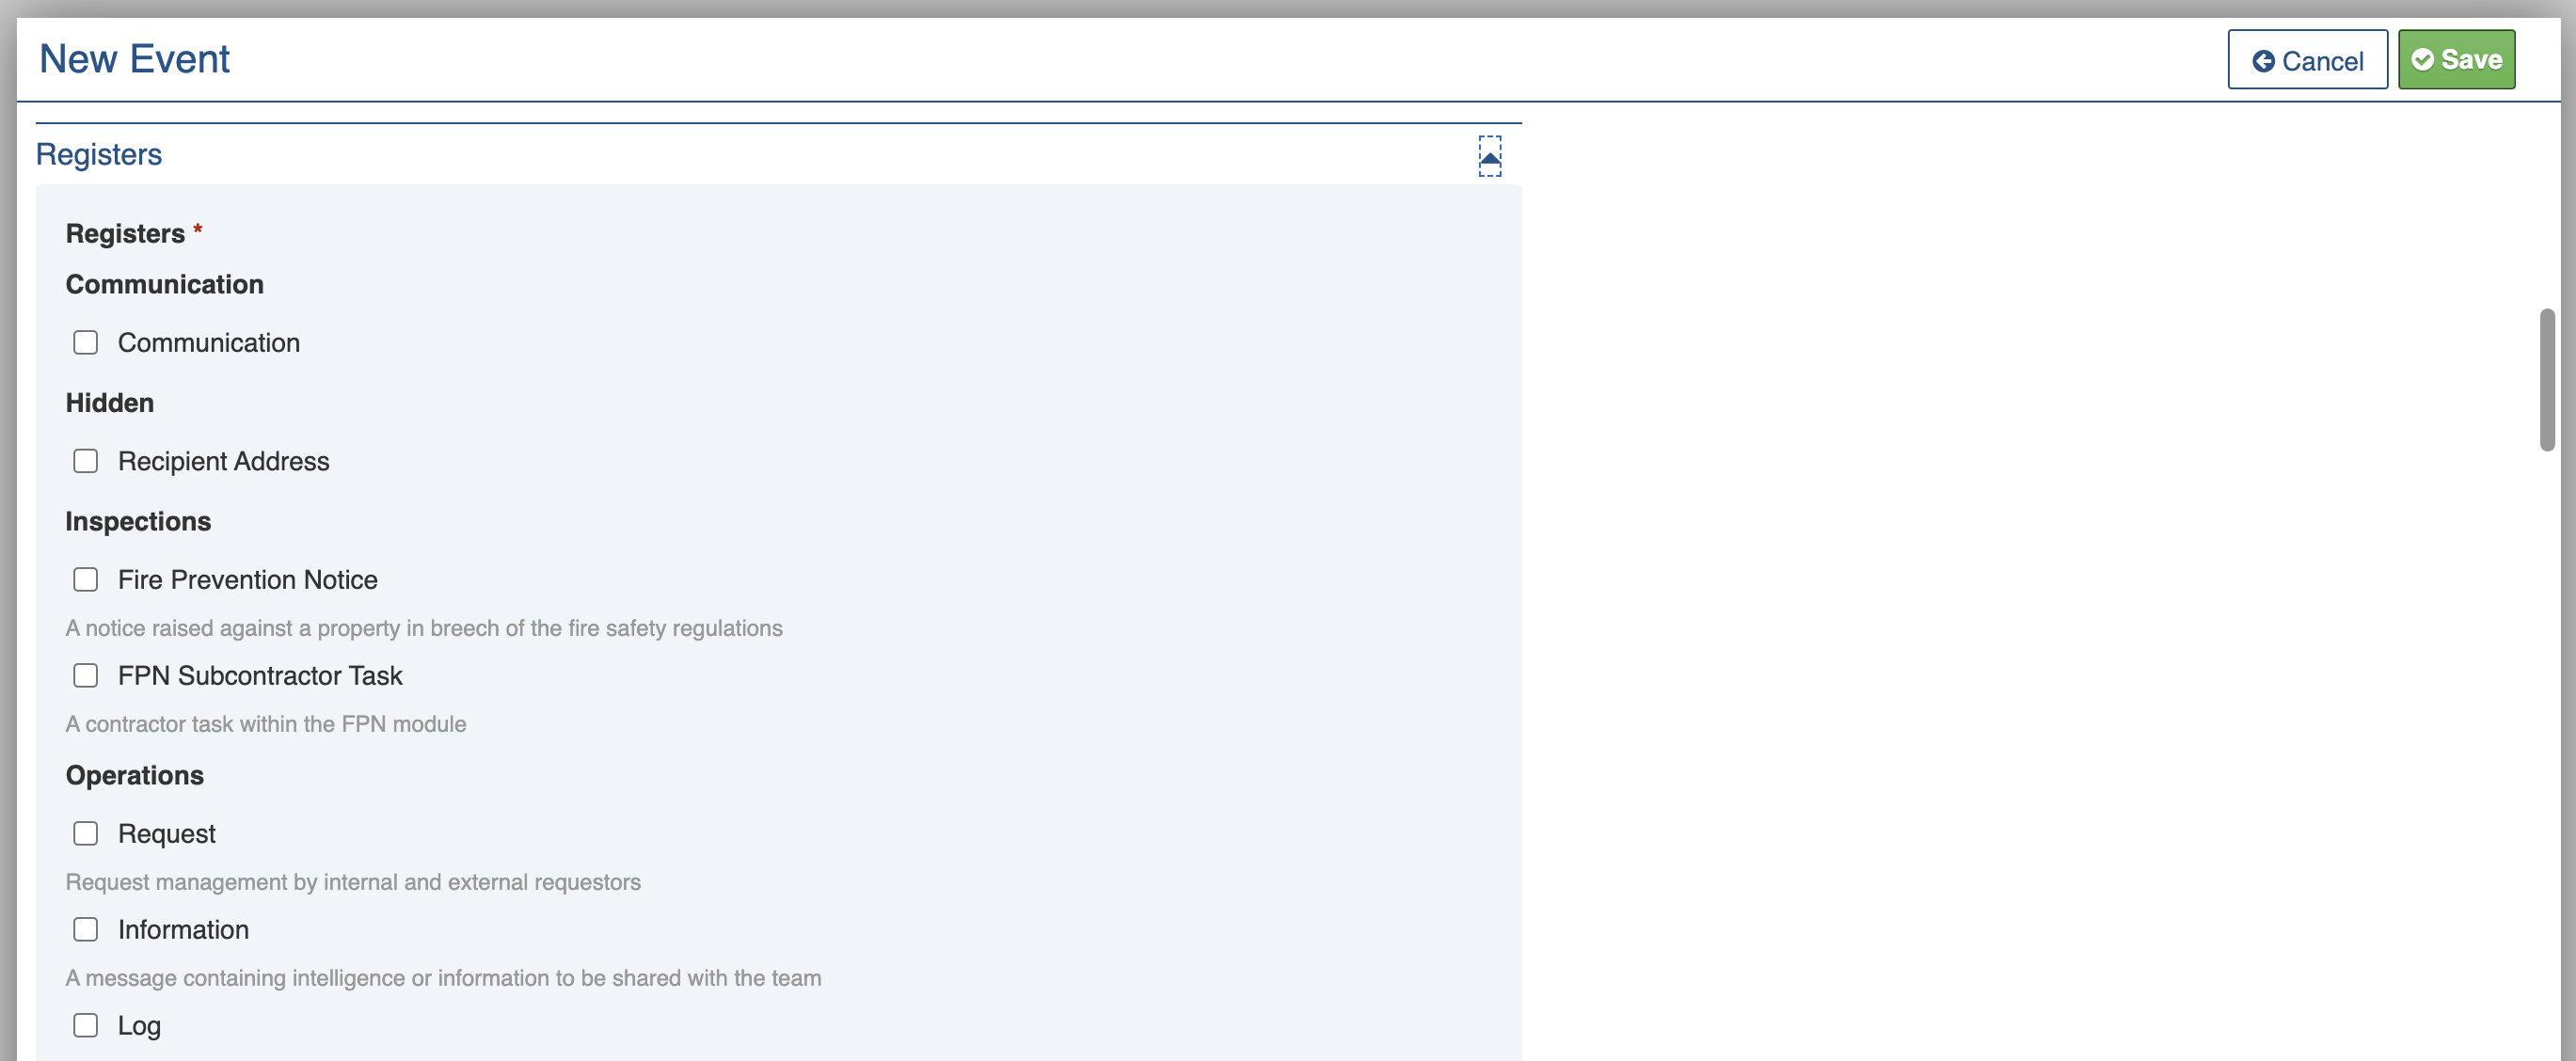
This section section contains a list of Registers enabled for the event.
The selected Template determines which Registers are enabled in this section.
Tick the Registers relevant to your event. You can modify this list later if needed.
It is recommended that you include the basic registers in Operations, including Information and Contact.

Positions
This section contains a list of Positions that can sign into the event.
Based on the Template selected, some positions are pre-selected.
Tick the positions required for your event. You can modify this list later if needed.
At the bottom of this section, select a Coordinator position - this role has overall responsibility for the event.

Public Forms
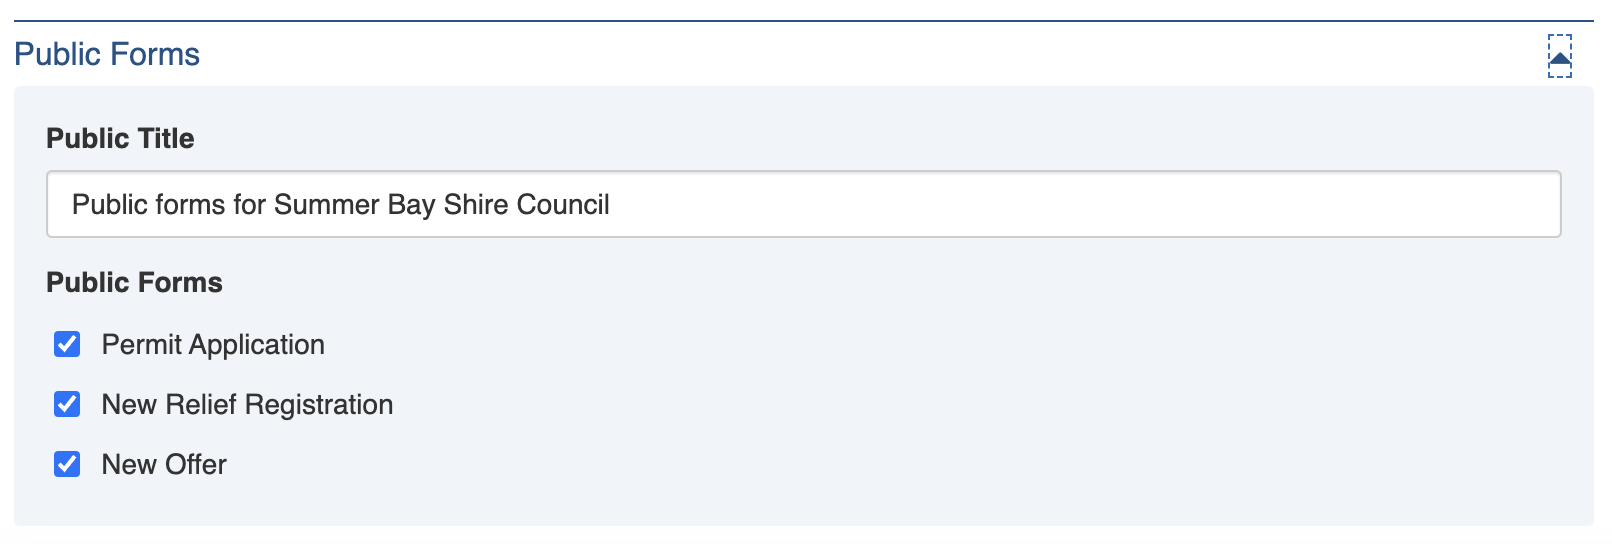
Public forms can be enabled to allow members of the public to enter information directly into your system. For example Permits, Relief Registrations and Offers.
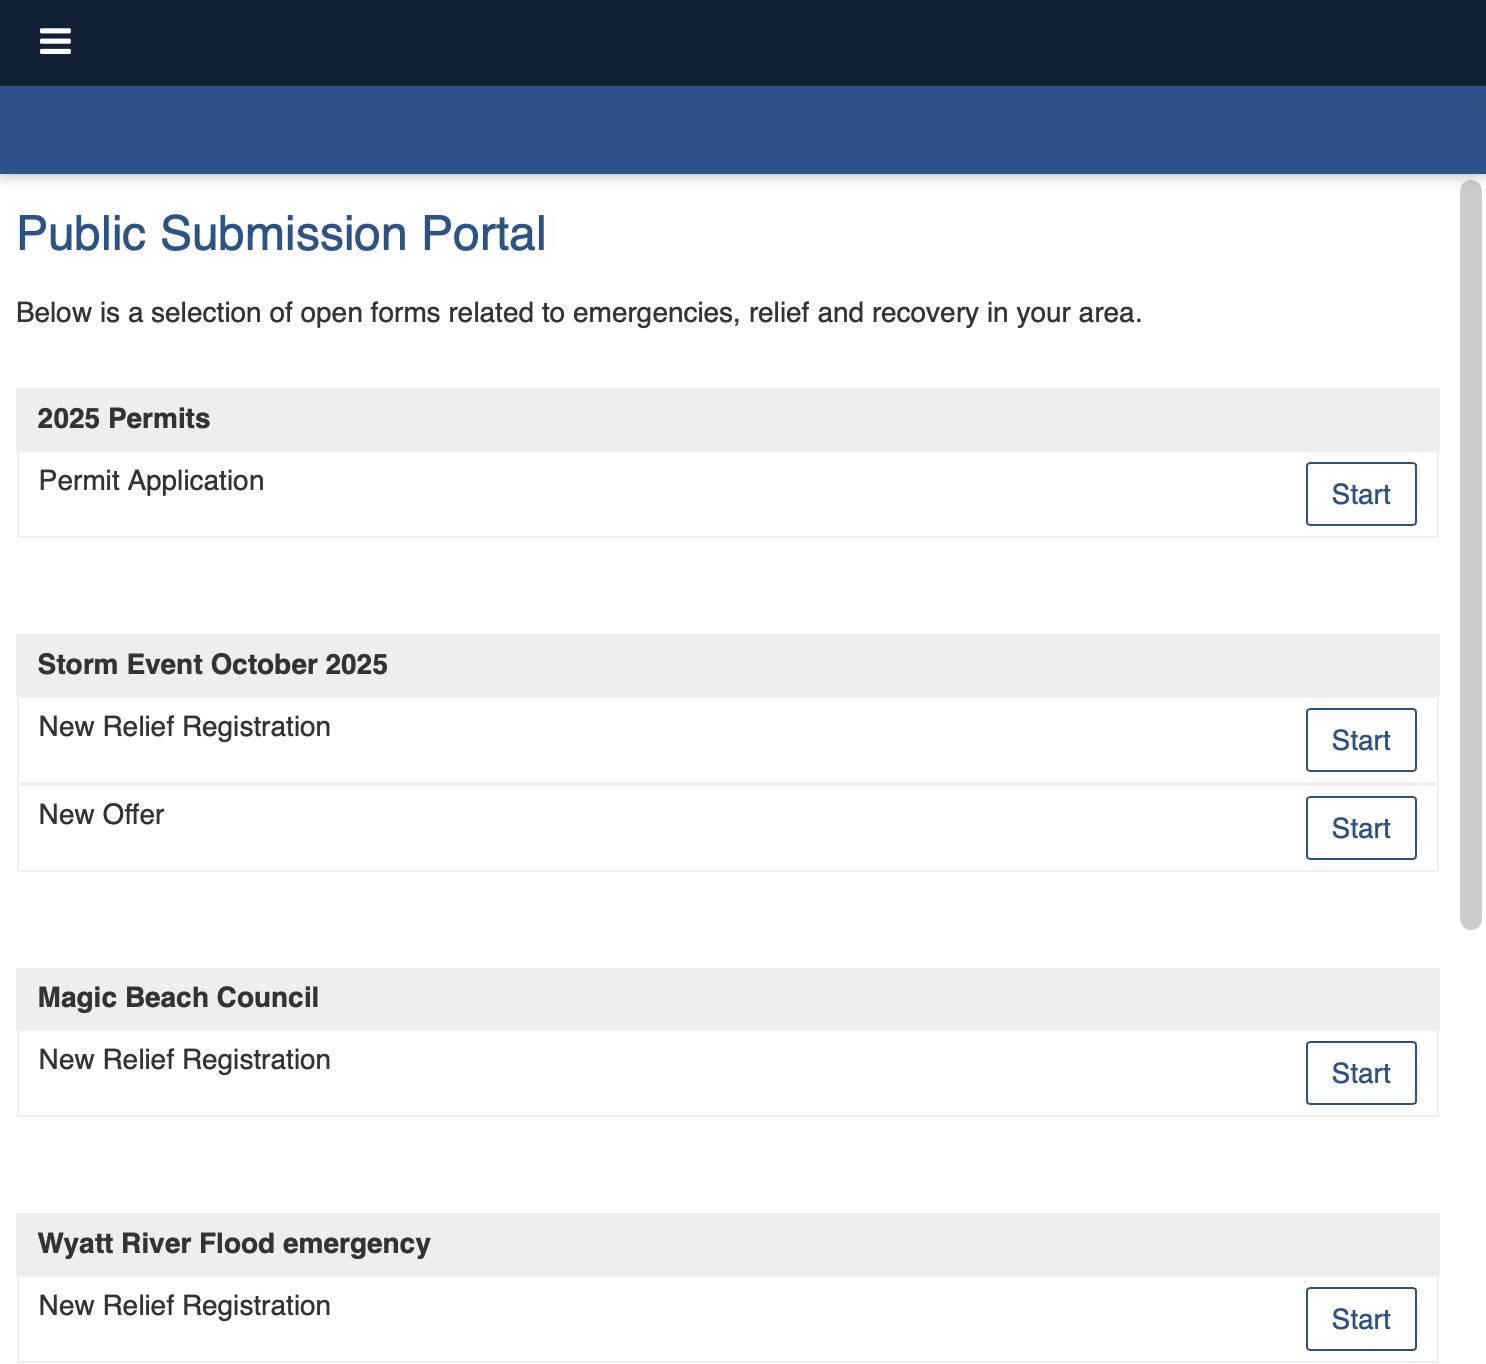
The Public Submissions Portal groups forms by Event.
Multiple events can have active public forms simultaneously.

When activated, public forms appear on a landing page known as the Public Submission Portal at:
Where:
Site URL is the URL used for access (for example: app.cw.crisisworks.com)
Site Name is the name of your Site (all lowercase without spaces)
for example: app.cw.crisisworks.com/yourcouncilname/public
The Public Submissions Portal groups forms by Event. Users press the Start button to submit a form.

The title for each section defaults to the Event name, however you can override this using the Public Title field on the Event page.
To enable a Public Form type, tick the relevant checkbox.

Configure help text for Public forms
Help text for the public forms is defined in System Text Library items pre-configured in your system's Global Workspace. This will set the help text for all forms of that type.
You can change the content of the help text by finding the relevant Library item and editing it.
Workflow
The Workflow section contains the following fields:
Status
Events have only two statuses, they are set either to Open or Closed. New events are set to 'Open' by default. Closed events are archived and no longer able to be worked with unless reopened.
Automatically put you on duty
This setting puts you on duty for the new event as soon as the Event is created (recommended as it saves time, otherwise you will need to go on duty).
Automatically put on-call users on duty
This setting places users on duty to the Event with all matching positions if the user is "On Call" (recommended as it saves time, otherwise individual users will need to go on duty or you will need to find these users and set their duties in bulk).
Tags
Refer to: Tagging Items.
Tags can be useful to organise Events when existing fields don’t capture what you need.
Advanced
This is a template
This setting create a template that future Events can be created from. When creating a New Event, the title of the template will appear in the Template selection.
This option is only available when Updating Events.
Event TemplatesThis is a global event
Global events are active irrespective of which event is selected. Note that they may not show up in the Event menu.
Use this to manage Events that all users can access, that may contain shared items. Examples include the Contacts Directory, Library Workspaces, Global Resources and Roster Availability.
This option is only available when Updating Events.
Global EventsSecurity mode
This setting is used specifically for global events and determines how users can access the Event's data.
There are two available modes:
Duty-based
Users must go on duty with a participating position(s) to access this Event's data
Policy-based
Any user with access to an included register can access this Event's data
Creating a New Event
To create the new event:
In the Events menu use the
Create Event option
Save

Take care to add the right Registers, Positions and Regions. Without them users will not be able to find or access your new Event. If you have only one Region, this will be ticked by default.
After event has been created
After an event has been created, you would typically:
Go on duty for the event, if you didn't do so during the event creation process (the Automatically put you on duty setting does this for you)
Optionally: Add an Information record with details of the event, and use a Communication to let others know. Note that users who are opted in to communications may already receive automated notifications.
Updating Events
For security reasons, updating Events is done differently to editing items from other registers.
To Edit an Event:
If you have access, use the Edit Event
button (at the bottom of the General Information section)
When updating Events:
Complete each section of the Settings as required. Note that some options may open up new sections to complete.

Closing Events
Events should be closed when they are no longer needed.
To close an event:
Set the optional End Date/Time (see Selecting Dates). If not set, the End/Date time will default to the time you close and save the event.
Change the Status to Closed
Save.
Last updated
Was this helpful?