
Location of the Requests register in the Operations module
Location of the Requests register in the Operations module
| Security Policy | Use |
|---|---|
Operations Resource Assignment | Can assign resources within the request form |

Requests filter menu
| Filter Group | Filter/s | Use |
|---|---|---|
| Main | Active | |
| Recently Updated | ||
| Overdue | ||
| All | ||
| Special | High Priority | Finds all items with Priority of High |
| Urgent | Finds all items with Priority of Urgent | |
| Payment Not Authorised | Finds all items without The requestor is authorised and has agreed to pay any costs ticked | |
| Templates | Finds all items with Save as Template ticked | |
| Cost Recovery Method | [List is based on your system configuration]* | Finds all items with the matching Cost Recovery method |
| Region | [List is based on your system configuration]* | Finds all items for the selected Region |
| Workflow | Assigned | Finds all items with Status of Assigned |
| Closed | Finds all items with Status of Closed | |
| In Progress | Finds all items with Status of In Progress | |
| On Hold | Finds all items with Status of On Hold | |
| Reopen | Finds all items with Status of Reopen | |
| Requested | Finds all items with Status of Requested | |
| Resolved | Finds all items with Status of Resolved | |
| Active tags | [List is based on your system configuration]* | Any tags in use. Refer to: tags |
| Assignments | [List is based on your system configuration]* | Finds all items assigned to the position listed |
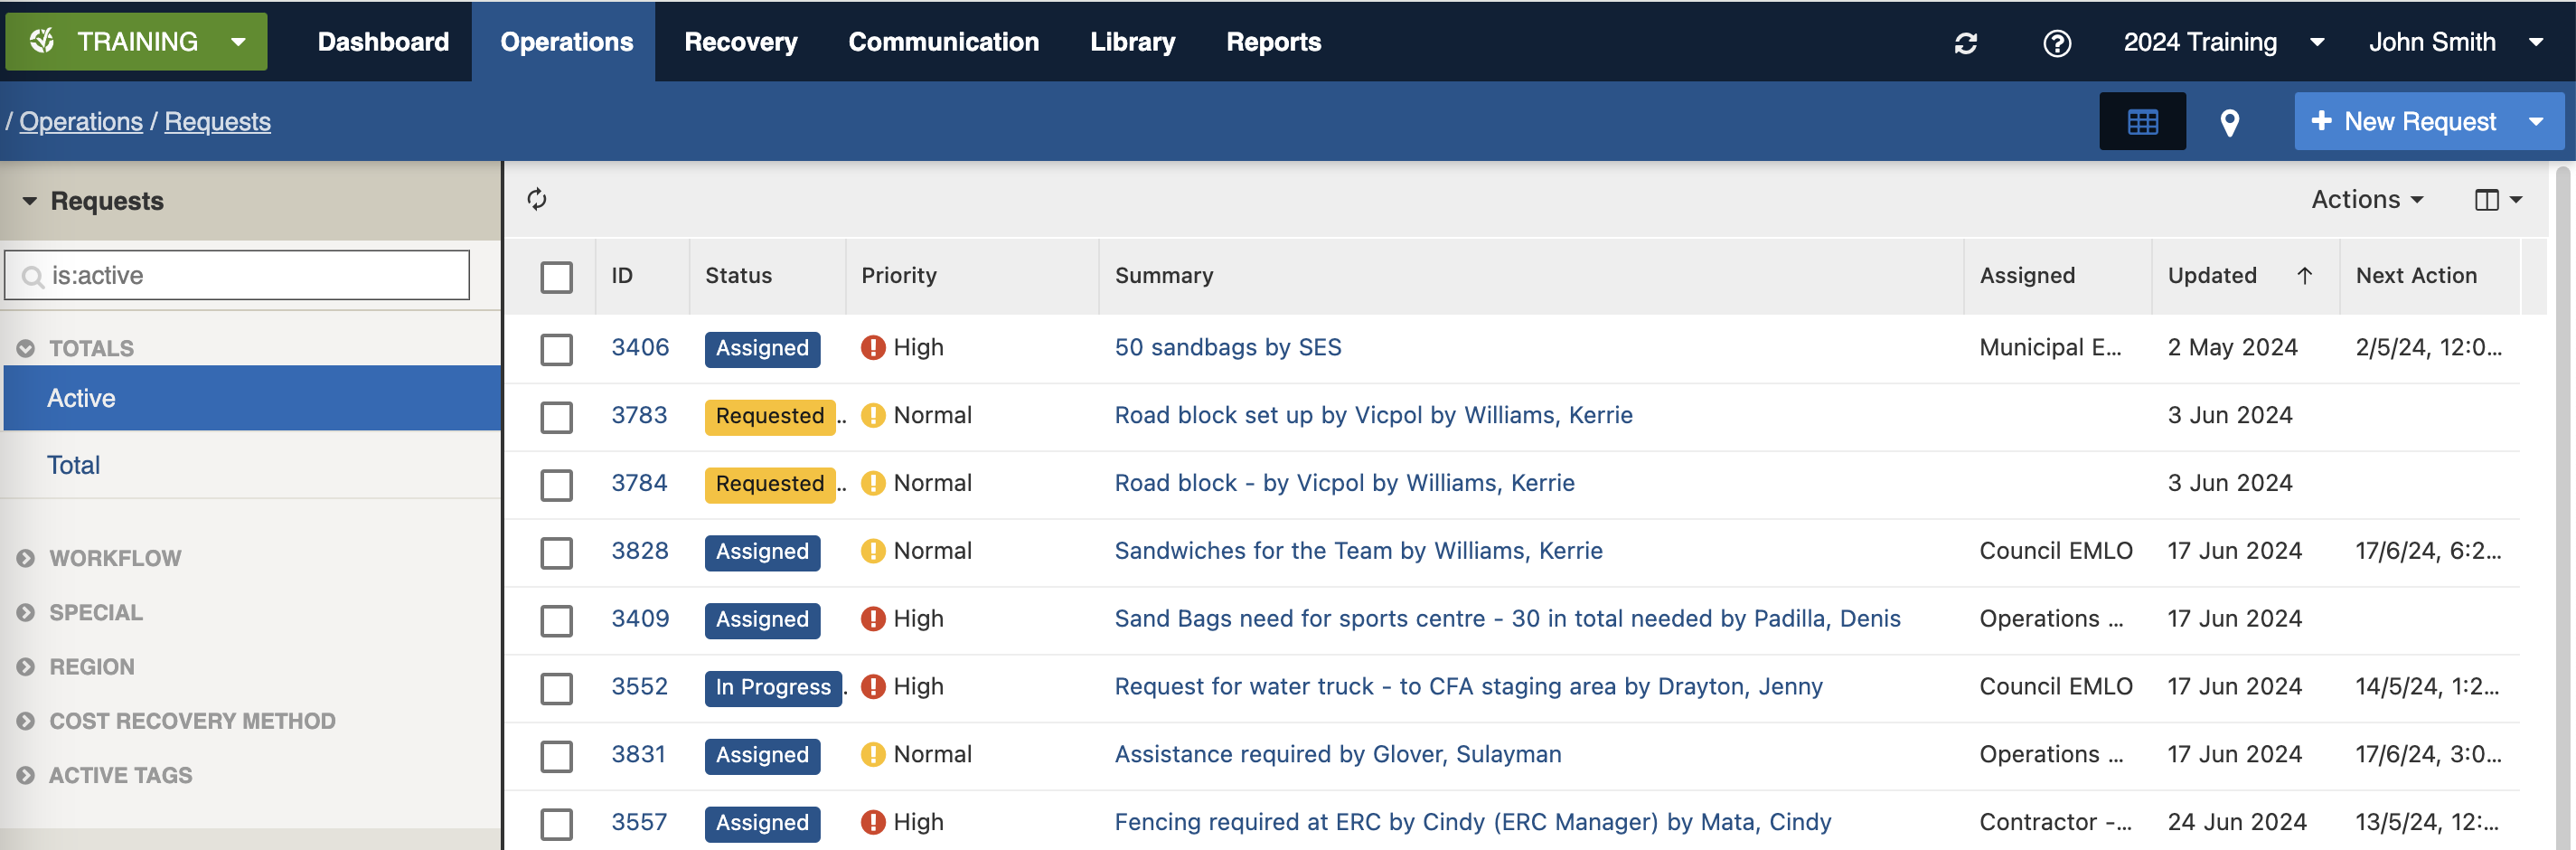
Requests register datagrid (sample view)

Requestor section

Tasks, Resources & Costs section
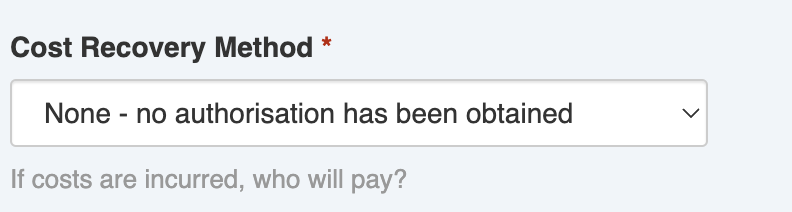
Cost Recovery Method
 to attach a Task record
4. In the Tasks, Resources & Costs form, set the **Task Status** (all new tasks begin as 'Requested'), **Priority**, **Task Due Date** and **Cost Estimate**\
to attach a Task record
4. In the Tasks, Resources & Costs form, set the **Task Status** (all new tasks begin as 'Requested'), **Priority**, **Task Due Date** and **Cost Estimate**\ 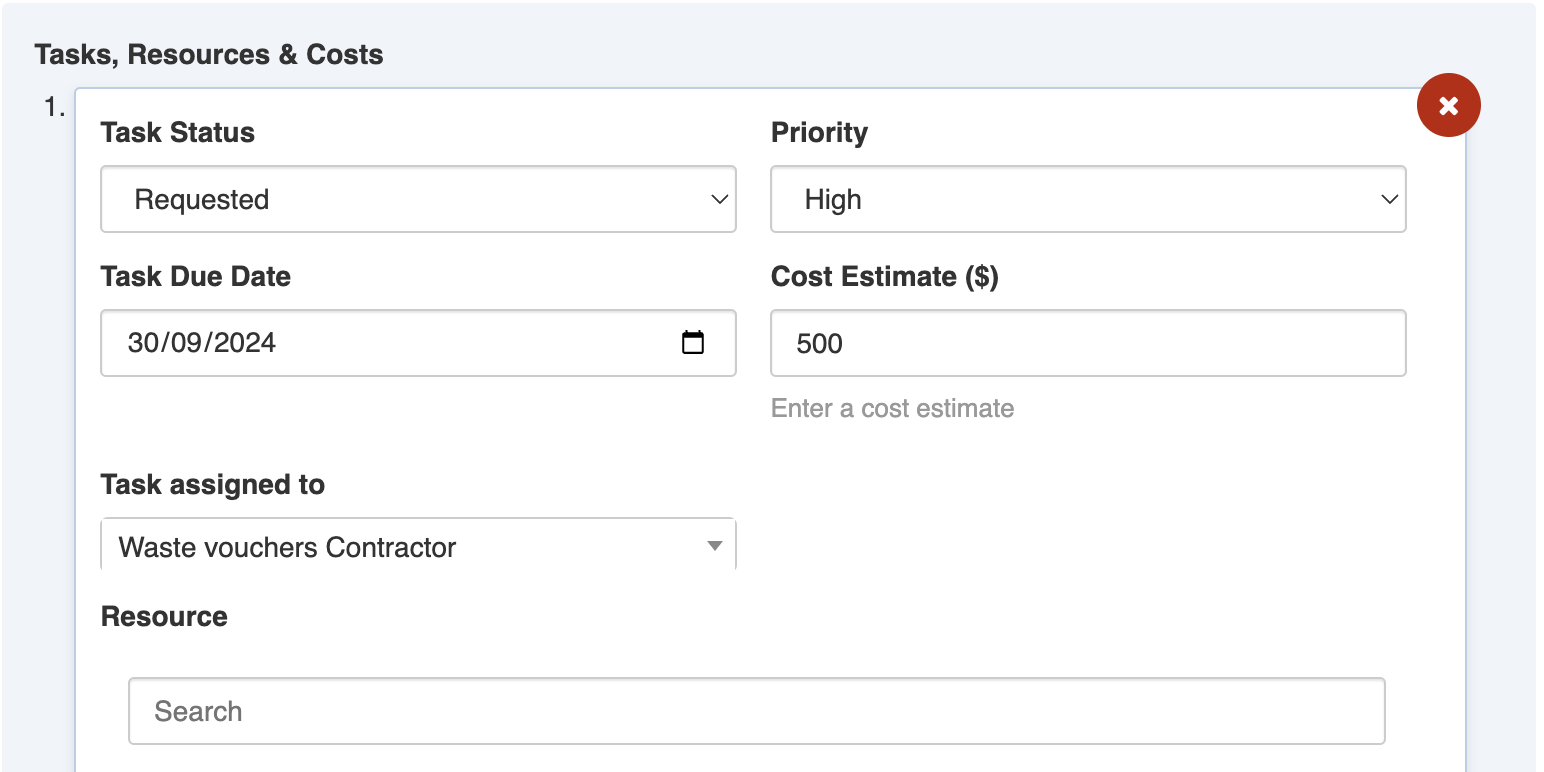 5. Assign to a position using the **'Task assigned to'** lookup
6. Name the **Resource** (search for an existing resource) and add **Details**
7. Optionally, add any documents and images using the '**Add File**' button (refer to: [File Uploading](https://docs.cw.crisisworks.com/concepts-and-fundamentals/on-a-computer/using-the-datagrid/editing-items#attaching-files))
8. Save
To add more than one, use the
5. Assign to a position using the **'Task assigned to'** lookup
6. Name the **Resource** (search for an existing resource) and add **Details**
7. Optionally, add any documents and images using the '**Add File**' button (refer to: [File Uploading](https://docs.cw.crisisworks.com/concepts-and-fundamentals/on-a-computer/using-the-datagrid/editing-items#attaching-files))
8. Save
To add more than one, use the  button.
### Location
**Location** shows the coordinates for the request on a **Map**. This could be represented by a series of points, or an area (polygon).
### Workflow
Request workflow consists of:
* Status (also used for assignment)
* Priority
* Due Date
Each of these workflows can trigger notifications to ensure that coordinators and users can keep on top of tasks.
#### Status
Users set the status of the request by editing the request and changing the value in the **Status** field.
Statuses are indicated visually and colour coded on the datagrid which allows them to be filtered.\
Requests have the following Statuses, in order of which they can be set:
button.
### Location
**Location** shows the coordinates for the request on a **Map**. This could be represented by a series of points, or an area (polygon).
### Workflow
Request workflow consists of:
* Status (also used for assignment)
* Priority
* Due Date
Each of these workflows can trigger notifications to ensure that coordinators and users can keep on top of tasks.
#### Status
Users set the status of the request by editing the request and changing the value in the **Status** field.
Statuses are indicated visually and colour coded on the datagrid which allows them to be filtered.\
Requests have the following Statuses, in order of which they can be set:
| Status | Datagrid Icon | Next available steps | Notes |
|---|---|---|---|
| Requested |  | Assigned | All new requests begin with this status |
| Assigned |  | Requested, In Progress, Resolved | Requests with this status can be assigned to a position |
| In Progress |  | Requested, On Hold, Resolved | Updates on progress can be provided in this status |
| On Hold |  | Requested, In Progress, Resolved | Progress has been paused |
| Resolved |  | Closed (only for coordinators) | Assignee has fulfilled the request |
| Closed |  | Reopen (only for coordinators) | Coordinator has reviewed and finalised the request |
| Reopen | Resolved (only for coordinators) | Used only to reset to Resolved. |
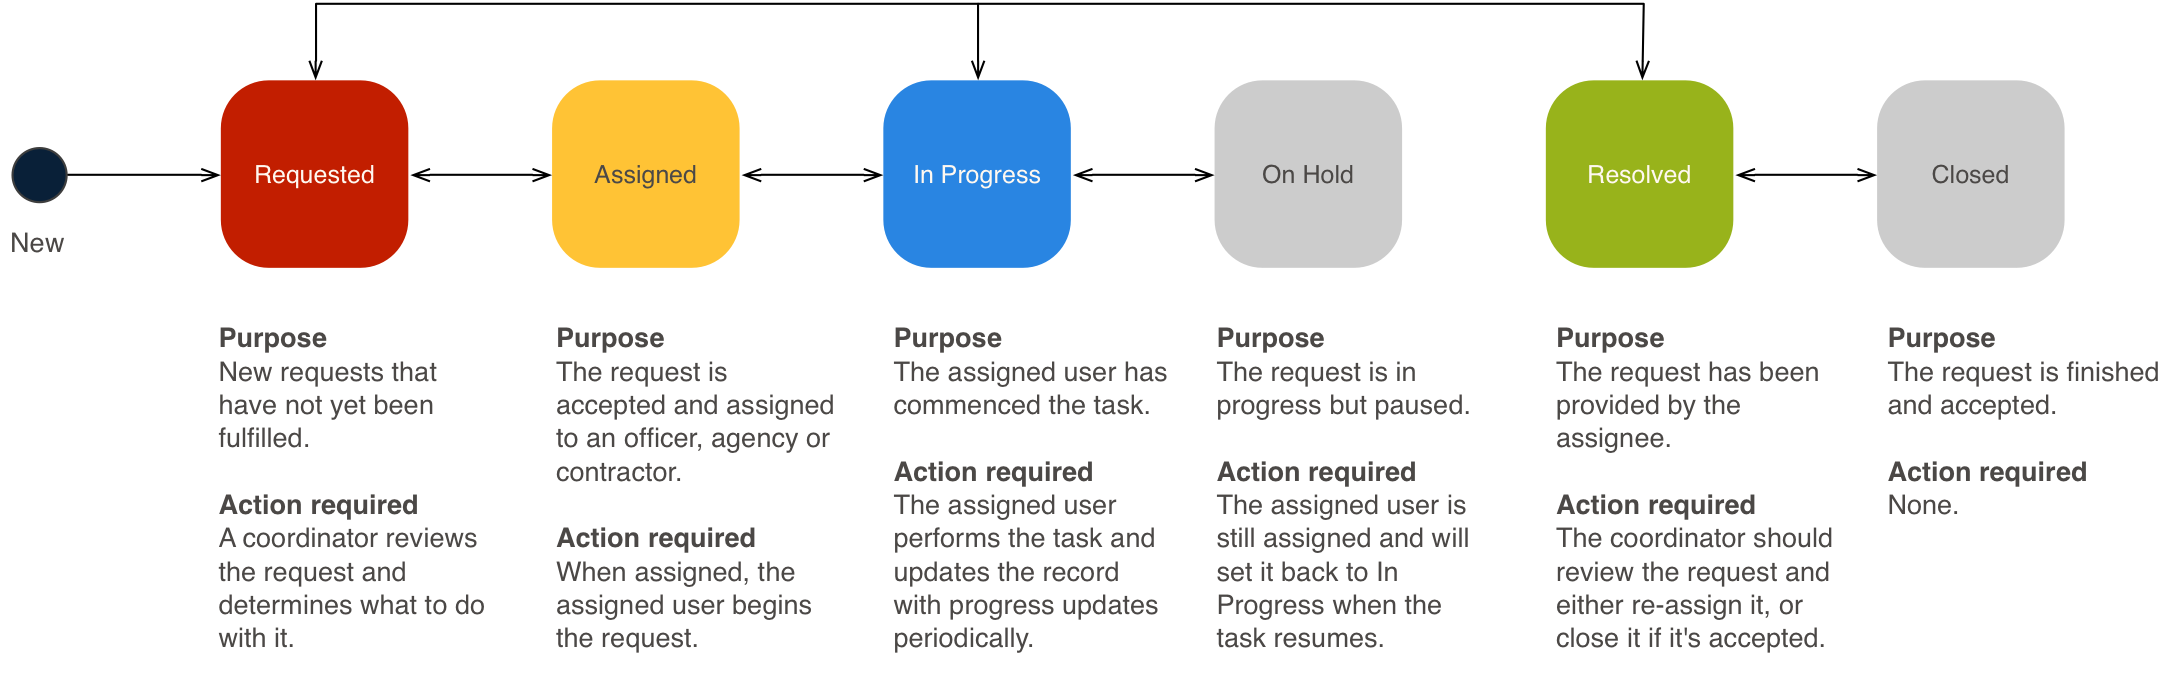
Workflow stages of requests
 Users on duty for the assigned position will be notified of the assignment.
{% hint style="info" %}
Requests can only be assigned to positions that are involved in the event. This prevents problems with lost or missing requests during shift changeovers.
{% endhint %}
#### Priority
Through the Priority field you can set a priority.
Priorities are indicated visually and colour coded on the datagrid which allows them to be filtered.\
Requests have the following priorities:
Users on duty for the assigned position will be notified of the assignment.
{% hint style="info" %}
Requests can only be assigned to positions that are involved in the event. This prevents problems with lost or missing requests during shift changeovers.
{% endhint %}
#### Priority
Through the Priority field you can set a priority.
Priorities are indicated visually and colour coded on the datagrid which allows them to be filtered.\
Requests have the following priorities:
| Priority | Colour code | Datagrid Icon |
|---|---|---|
| High | Red |  |
| Low | Green |  |
| Normal | Yellow |  |
| Urgent | Red |  |

A request in progress
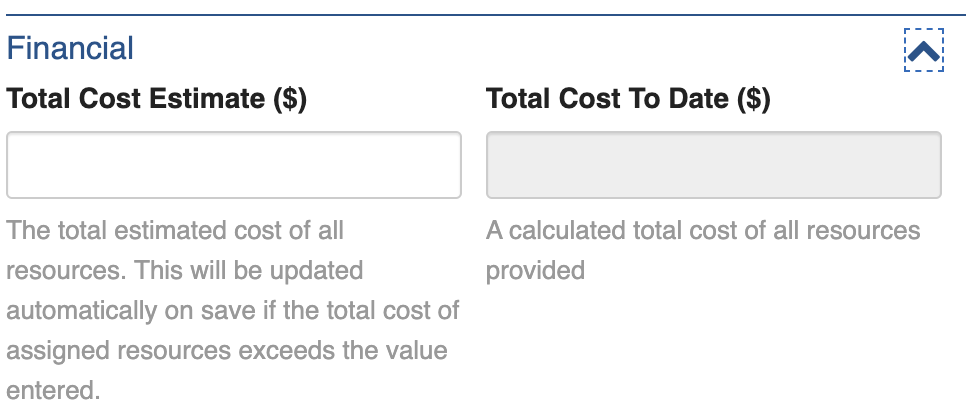
Financial section
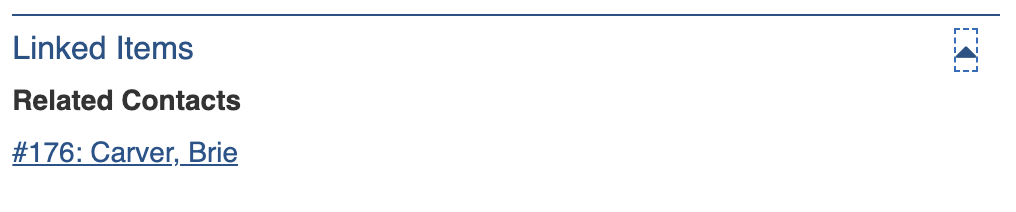
Linked Items section
 button (or drop down the list from any other register and select it)
The New Request form
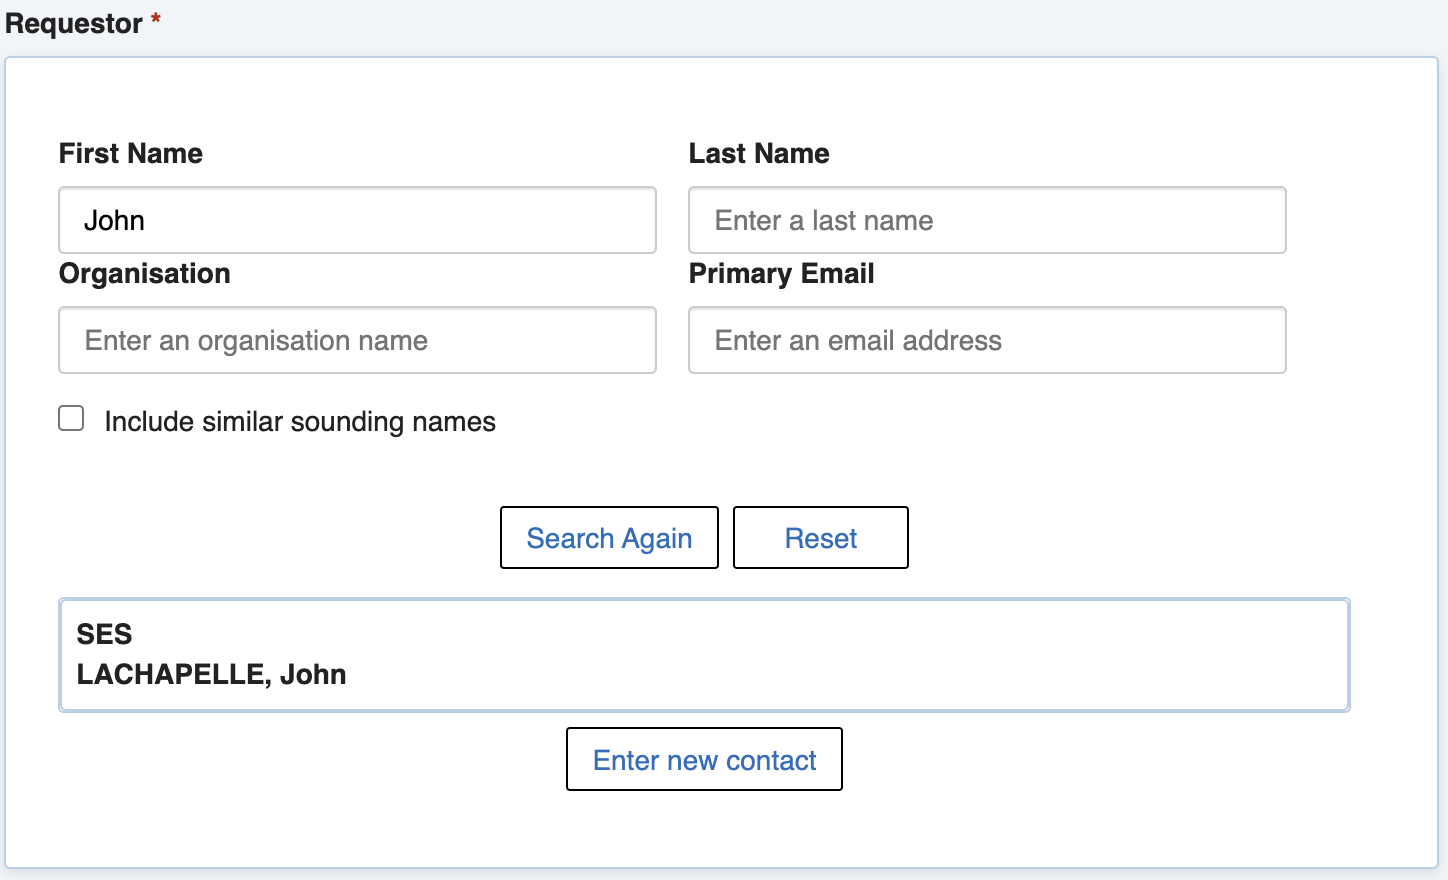
Requestor Search form example
 4. Or you can add a new contact using the 'Enter new contact' button
  which appears at the bottom of the list after you search (a blank search will suffice)
5. If there are likely costs involved and the requestor has agreed to pay costs, select the appropriate option. This will help in emergency cost recovery.\

3. Specify the **request particulars** by entering a **Subject**, **Details** and **Attachments** just like you may write an email. To add Attachments, us the 'Add File' button
which appears at the bottom of the list after you search (a blank search will suffice)
5. If there are likely costs involved and the requestor has agreed to pay costs, select the appropriate option. This will help in emergency cost recovery.\

3. Specify the **request particulars** by entering a **Subject**, **Details** and **Attachments** just like you may write an email. To add Attachments, us the 'Add File' button  4. Select a location to deliver or perform the request.
5. Update Workflow, Classification and Financial as required
6. Save the request
The request will then appear in the datagrid as **unassigned,** meaning a coordinator will need to assess the request and assign it to a position for action. The unassigned counter can be thought of as an inbox for new requests.
## Bulk Actions
{% content-ref url="../../concepts-and-fundamentals/on-a-computer/using-the-datagrid/bulk-actions" %}
[bulk-actions](https://docs.cw.crisisworks.com/concepts-and-fundamentals/on-a-computer/using-the-datagrid/bulk-actions)
{% endcontent-ref %}
The following additional bulk actions can be performed on Requests via the Actions menu:
| Action | Description |
| ---------------- | -------------------------------------------------------------------------------------------------------------------------------------------------------------------------------------------------------------------------------- |
| Copy IDs | See [Copy IDs](https://docs.cw.crisisworks.com/concepts-and-fundamentals/on-a-computer/using-the-datagrid/bulk-actions#copy-ids) |
| Bulk Edit |
4. Select a location to deliver or perform the request.
5. Update Workflow, Classification and Financial as required
6. Save the request
The request will then appear in the datagrid as **unassigned,** meaning a coordinator will need to assess the request and assign it to a position for action. The unassigned counter can be thought of as an inbox for new requests.
## Bulk Actions
{% content-ref url="../../concepts-and-fundamentals/on-a-computer/using-the-datagrid/bulk-actions" %}
[bulk-actions](https://docs.cw.crisisworks.com/concepts-and-fundamentals/on-a-computer/using-the-datagrid/bulk-actions)
{% endcontent-ref %}
The following additional bulk actions can be performed on Requests via the Actions menu:
| Action | Description |
| ---------------- | -------------------------------------------------------------------------------------------------------------------------------------------------------------------------------------------------------------------------------- |
| Copy IDs | See [Copy IDs](https://docs.cw.crisisworks.com/concepts-and-fundamentals/on-a-computer/using-the-datagrid/bulk-actions#copy-ids) |
| Bulk Edit | See Bulk Edit
Update for multiple Requests: Status, Progress, Priority, Position Assigned, Due by and tags
| | Create a Copy | See [Create a Copy](https://docs.cw.crisisworks.com/concepts-and-fundamentals/on-a-computer/using-the-datagrid/bulk-actions#create-a-copy) | | Export to Report |See Export to Report
Exports to Requests Items Report
| ## Reports {% content-ref url="../../system-administration/reporting/running-reports" %} [running-reports](https://docs.cw.crisisworks.com/system-administration/reporting/running-reports) {% endcontent-ref %} [Operations Reports](https://docs.cw.crisisworks.com/modules/reports/operations-reports) contains several reports based on Request data, including: * Request Items (also available from the [Actions menu](#bulk-actions)) * Request Resource Assignments * Request Needs & Tasks