
Location of the Permits register in the Operations module
| Name | Summary of use |
|---|---|
| Permit to Burn | Used by local councils to notify council of a planned burn-off on private property |
| Permit to Travel | Used during the COVID-19 Pandemic to authorise travel |
| Position | Description | Example users | |
|---|---|---|---|
| Permits Coordinator | Can manage all aspects of Permits | MFPO etc | |
| CFA Brigade Officer | Can only access items created by and assigned to them | ||
| System Admin & Data Entry | Required to create and configure events and configure subcontractors | ||
| System Administrator - User | Required to set up accounts for users |
Location of the Permits register in the Operations module
| Security Policy | Use |
|---|---|
| Access to Asset Contacts | Provides access to view Asset contacts within the module. |
| Access to Permit Analytics | Provides access to Permit reports. |
| Permit CFA Brigade Officer Access | Provides access to the own and assigned items in the register to the CFA Brigade Officer position. |
| Permit Coordination (MFPO) | Provides full access to the module. |

A sample Permits register and datagrid
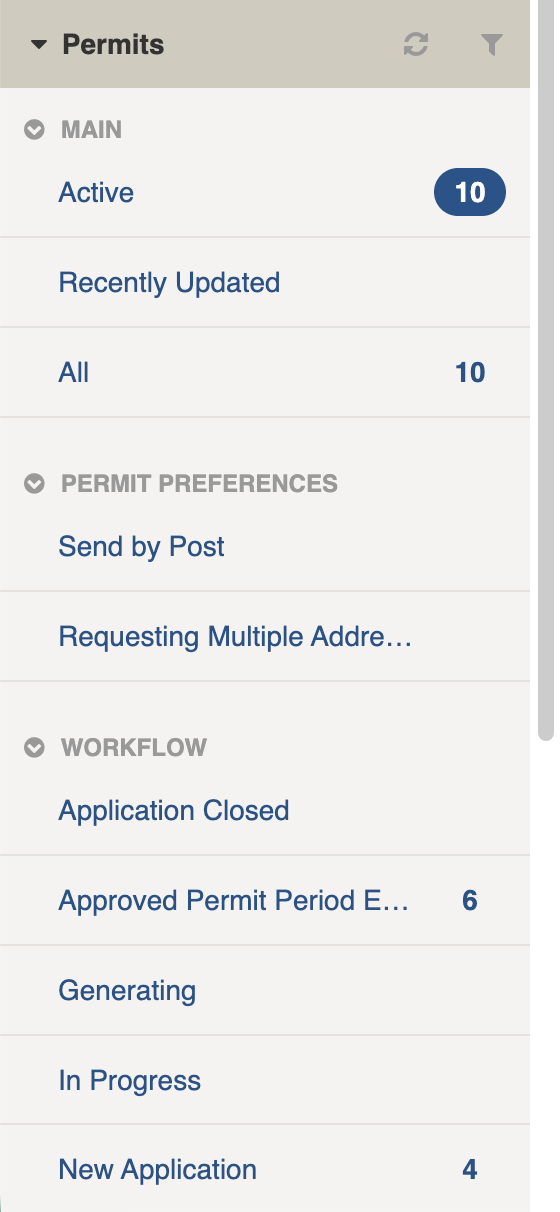
Permits filter menu
| Filter Group | Filter/s | CQL | Use |
|---|---|---|---|
| Main | |||
| Active | is:active | Finds all Active Permits (with a positive Status) | |
| Recently Updated | is:active dateUpdated:>today-5d | Finds all Active Permits updated in the last 5 days | |
| All | Finds all Permits | ||
| Permit Preferences | |||
| Send by Post | is:active AND commsMethod:post | Finds all Permits flagged with Communication Preference set to Send by Post | |
| Requesting Multiple Addresses | is:active AND multipleProperties:true | Finds all Permits flagged with Communication Preference set to Send to Multiple Addresses | |
| Workflow | |||
| Application Closed | status:closed | Finds all Permits with a Status of Closed | |
| Approved Permit Period Ended | status:completed | Finds all Permits with a Status of Completed | |
| Generating | status:generating | Finds all Permits with a Status of Generating | |
| In Progress | status:inprogress | Finds all Permits with a Status of In Progress | |
| New Application | status:new | Finds all Permits with a Status of New | |
| Permit Cancelled | status:cancelled | Finds all Permits with a Status of Cancelled | |
| Permit Declined | status:declined | Finds all Permits with a Status of Declined | |
| Permit Issued | status:issued | Finds all Permits with a Status of Issued | |
| Assignments | Unassigned | is:active assigned:none | Finds all Permits with an Assignee field that is not set |
| [List is based on your system configuration]* | is:active assigned: | Finds all Permits with the Assignee field set to the matching user |

A sample Permits register and datagrid
 ## Permits Settings
Settings may vary depending on the type of Permit.
Permits are divided into the following sections (sections may or may not appear depending on the Type of Resource selected so do this first, as well as your permissions level, and what mode you're viewing).
Some sections are completed and submitted by members of the public via the public form.
An authorised officer can also edit public submissions in Edit mode.
| Left Column | Right Column |
| ----------------------------------------------------------- | --------------------- |
| [Record Notes](#record-notes) | [Workflow](#workflow) |
| [Permit Type](#permit-type) | [Advanced](#advanced) |
| [Owner/Applicant Details](#owner-applicant-details) | [Activity](#activity) |
| [Application Property Details](#applicant-property-details) | |
| [Application Details](#application-details) | |
| [Acknowledgement](#acknowledgement) | |
| [Communication](#communication) | |
### Record Notes
When editing, record notes in the [rich text field](https://docs.cw.crisisworks.com/concepts-and-fundamentals/on-a-computer/using-the-datagrid/editing-items#rich-text-fields) as you make changes which will appear in the Activity log.
Refer to: [Recording Notes](https://docs.cw.crisisworks.com/concepts-and-fundamentals/on-a-computer/using-the-datagrid/editing-items#recording-notes)
### Permit Type
This field sets the type of permit you wish to use and will depend on what [types of permits](#requests-usingrequests-1) that are enabled in your system. A System Administrator configures this selection list using the Permit Type [Lookup](https://docs.cw.crisisworks.com/system-administration/configuring-the-system/lookups).
### Owner/Applicant Details
This section stores details of the person requesting the permit. **Firstname** and **Last Name**, **Mobile phone** and **Email** are required.
#### Preferred method to send application
This setting records the applicants preferred method for sending corresponednce (by Email or by Post). These correspond with filters to make them easily find later.
## Permits Settings
Settings may vary depending on the type of Permit.
Permits are divided into the following sections (sections may or may not appear depending on the Type of Resource selected so do this first, as well as your permissions level, and what mode you're viewing).
Some sections are completed and submitted by members of the public via the public form.
An authorised officer can also edit public submissions in Edit mode.
| Left Column | Right Column |
| ----------------------------------------------------------- | --------------------- |
| [Record Notes](#record-notes) | [Workflow](#workflow) |
| [Permit Type](#permit-type) | [Advanced](#advanced) |
| [Owner/Applicant Details](#owner-applicant-details) | [Activity](#activity) |
| [Application Property Details](#applicant-property-details) | |
| [Application Details](#application-details) | |
| [Acknowledgement](#acknowledgement) | |
| [Communication](#communication) | |
### Record Notes
When editing, record notes in the [rich text field](https://docs.cw.crisisworks.com/concepts-and-fundamentals/on-a-computer/using-the-datagrid/editing-items#rich-text-fields) as you make changes which will appear in the Activity log.
Refer to: [Recording Notes](https://docs.cw.crisisworks.com/concepts-and-fundamentals/on-a-computer/using-the-datagrid/editing-items#recording-notes)
### Permit Type
This field sets the type of permit you wish to use and will depend on what [types of permits](#requests-usingrequests-1) that are enabled in your system. A System Administrator configures this selection list using the Permit Type [Lookup](https://docs.cw.crisisworks.com/system-administration/configuring-the-system/lookups).
### Owner/Applicant Details
This section stores details of the person requesting the permit. **Firstname** and **Last Name**, **Mobile phone** and **Email** are required.
#### Preferred method to send application
This setting records the applicants preferred method for sending corresponednce (by Email or by Post). These correspond with filters to make them easily find later.

Owner/Applicant Details section
 button.
{% hint style="info" %}
You can only access to this option if your position has the *Access to Asset Contacts* [security policy](#security-policies). Contact your administrator if you don't have this permission.
{% endhint %}
This section also records whether the **residential address is different** and whether **more than one address** is part of the application. These settings correspond with [filters](#filters) that help you find Permits flagged for each of these.
button.
{% hint style="info" %}
You can only access to this option if your position has the *Access to Asset Contacts* [security policy](#security-policies). Contact your administrator if you don't have this permission.
{% endhint %}
This section also records whether the **residential address is different** and whether **more than one address** is part of the application. These settings correspond with [filters](#filters) that help you find Permits flagged for each of these.
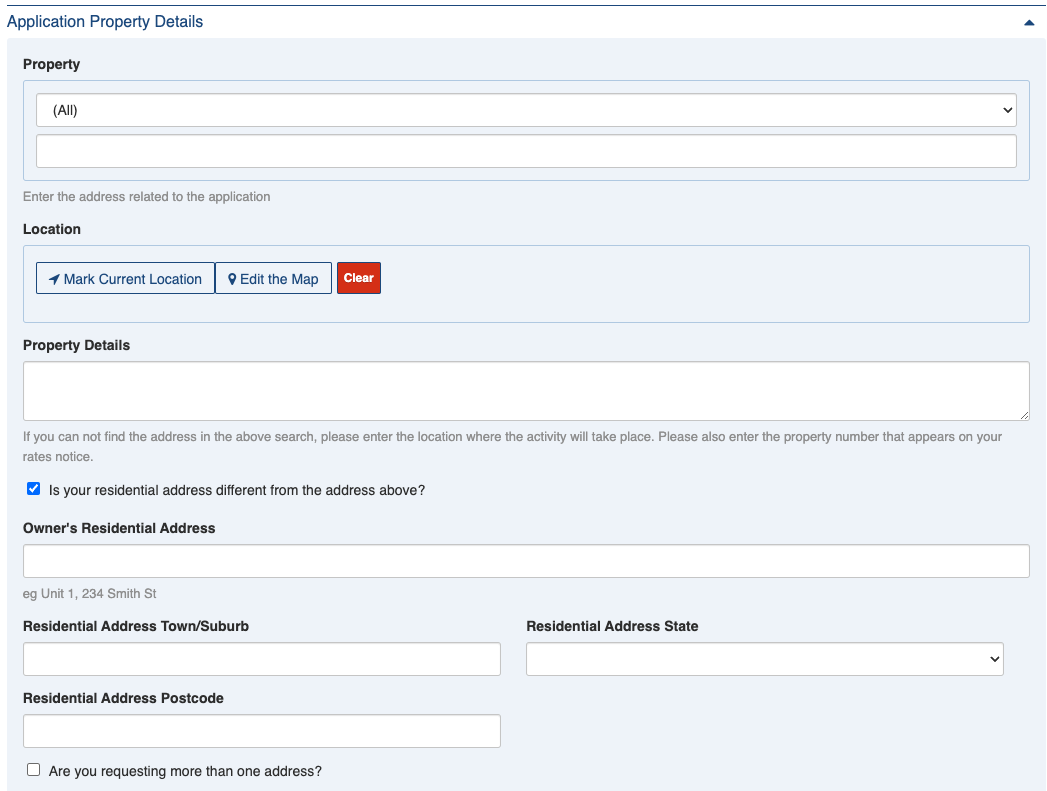
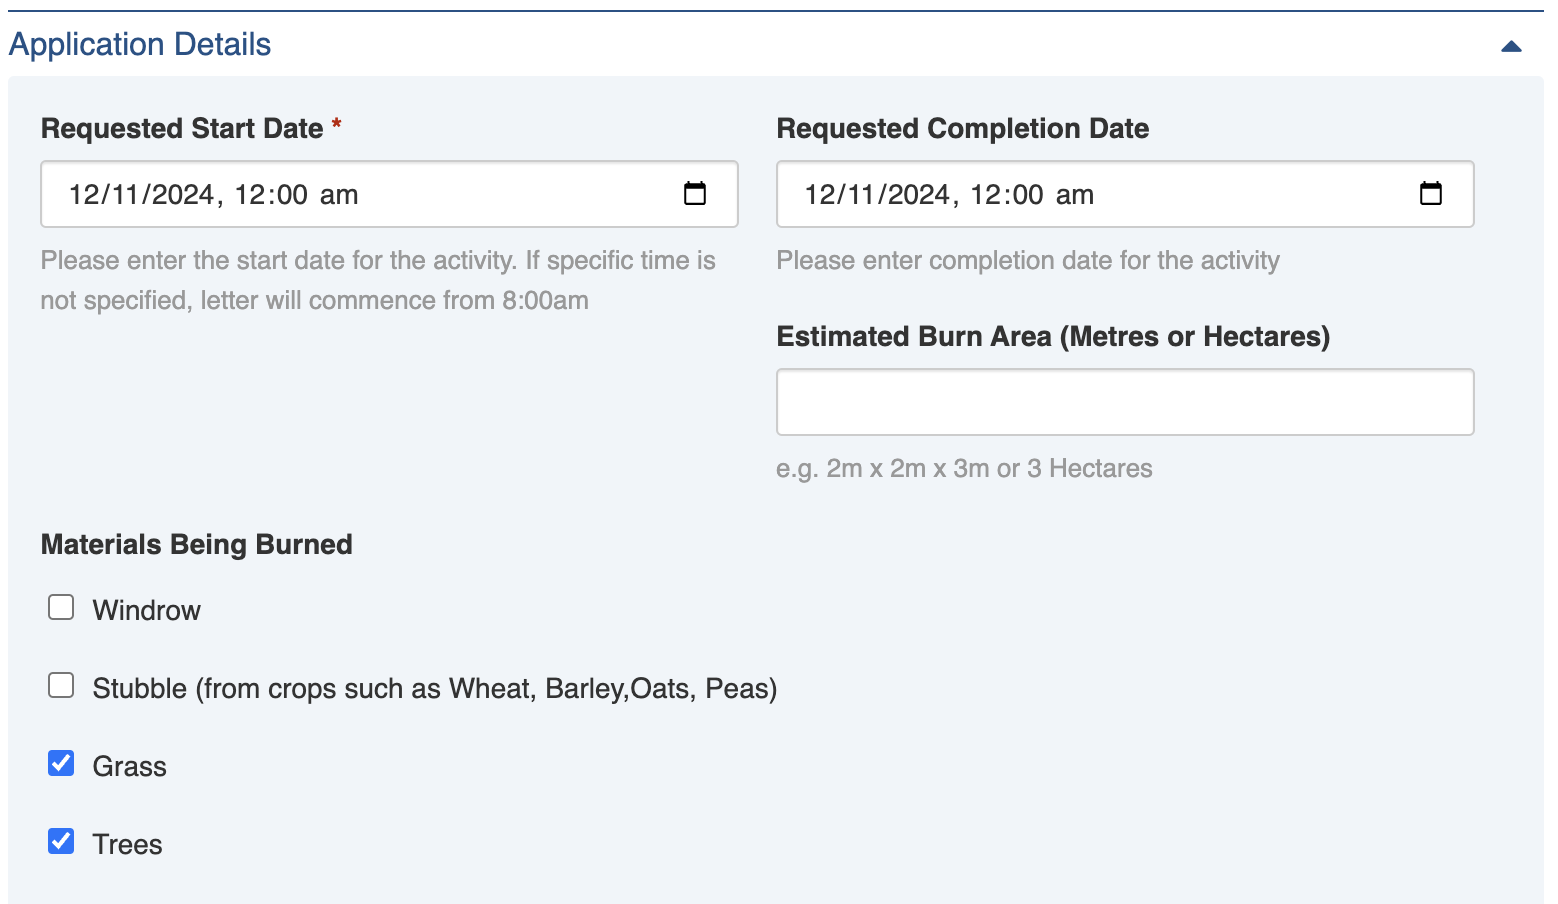
Part of the Application Details for a Permit to Burn
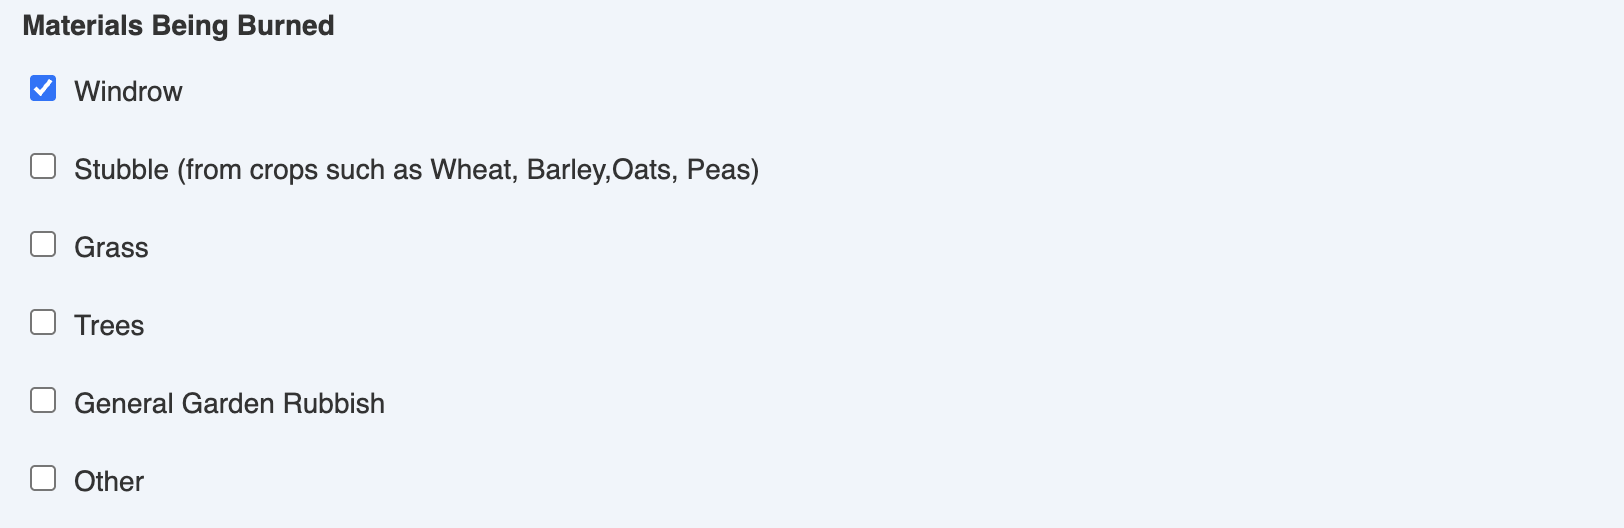
Materials being burned setting

Example Acknowledgement for Permit to Burn applications
 3. Make the necessary changes to the settings
4. Save
3. Make the necessary changes to the settings
4. Save  ## Adding Permits
To general process to add a Permit is:
1. Click the [**New Permit** button](https://docs.cw.crisisworks.com/concepts-and-fundamentals/on-a-computer/using-the-datagrid/adding-items) from any screen.
2. Select the **Permit Type**
3. Enter the Owner/Applicant Details including **First Name**, **Last Name**, **Mobile Phone Number**, **Email** and **Preferred method to send application** (Email or Post)
4. Include any optional information such as Location/address in the Applicant Property Details
5. Complete the Application Details including the **Requested Start Date**
6. Save
## Adding Permits
To general process to add a Permit is:
1. Click the [**New Permit** button](https://docs.cw.crisisworks.com/concepts-and-fundamentals/on-a-computer/using-the-datagrid/adding-items) from any screen.
2. Select the **Permit Type**
3. Enter the Owner/Applicant Details including **First Name**, **Last Name**, **Mobile Phone Number**, **Email** and **Preferred method to send application** (Email or Post)
4. Include any optional information such as Location/address in the Applicant Property Details
5. Complete the Application Details including the **Requested Start Date**
6. Save  ## Issuing a Permit
To issue a permit:
1. Set the Status to 'Permit Issued'
2. Set the 'Approved Start Date' and 'Approved Completion date'
3. Save
## Issuing a Permit
To issue a permit:
1. Set the Status to 'Permit Issued'
2. Set the 'Approved Start Date' and 'Approved Completion date'
3. Save

Issuing a permit

Generating a Permit as a PDF

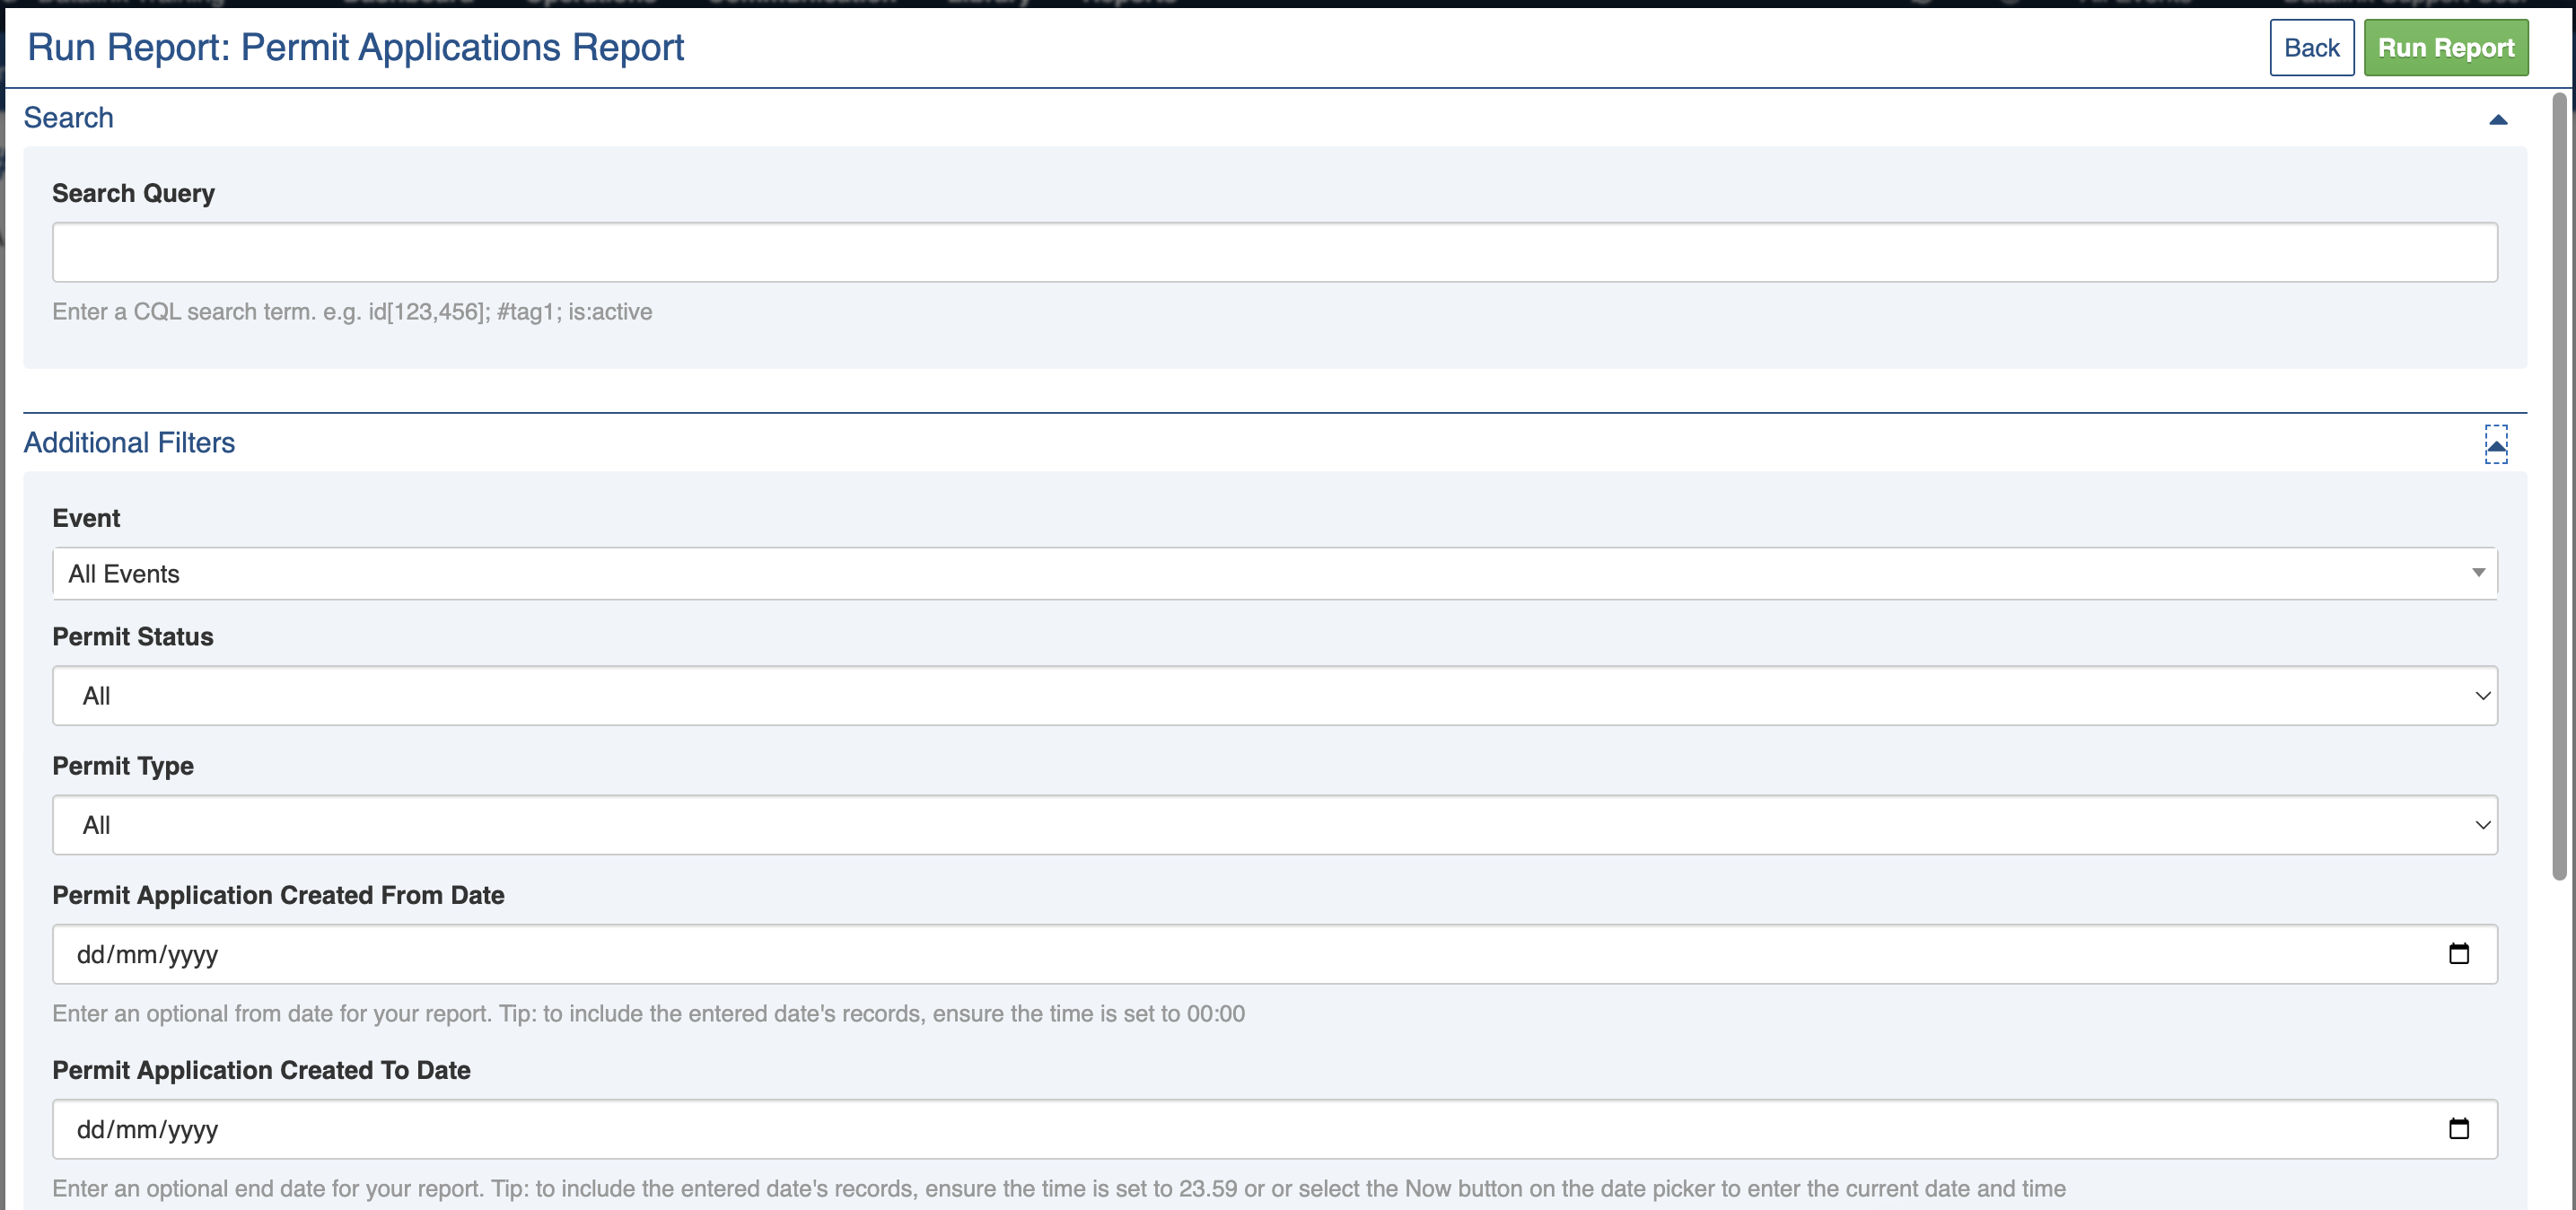
Permits Report parameters