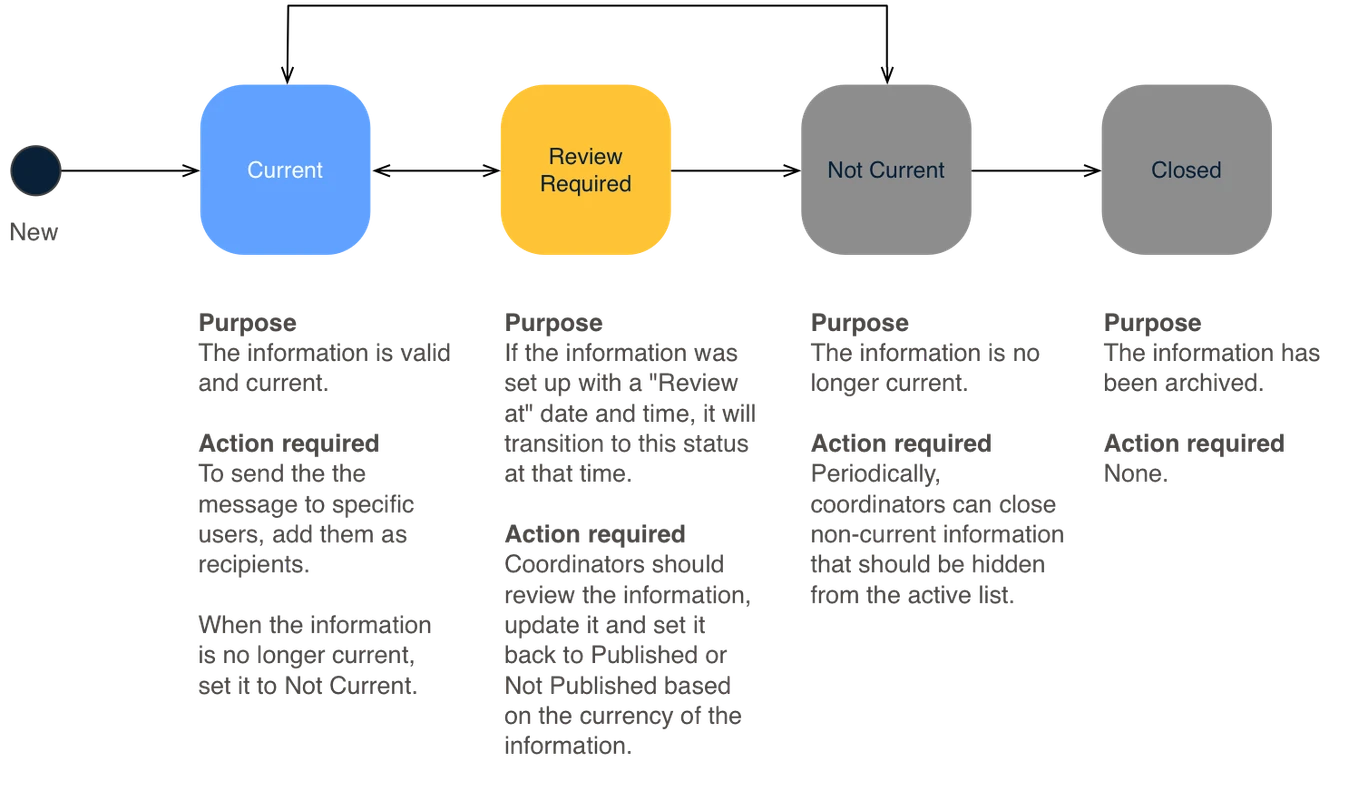
General workflow of Information items
| Name | Summary of use |
|---|---|
| Information | The default option, the most general and flexible to use, and most commonly used for general messages and information sharing. |
| Briefing or Handover | For recording notes of critical information conveyed to personnel in SMEACSQ format |
| Feature of interest | Used to share important locations. This focusses on the map field, and allows a feature to be identified on the map and named. A map layer for features of interest can be enabled on any map, plus a counter allows for listing all features of interest. |
| Situation Report | An operational update from a business unit. Used to disseminate regular operations updates. Can be accompanied by a custom template for organisation branding. |
| Incident Action Plan | The Incident Action Plan uses the SMEACS format to summarise the plan for operations. |
| Route | For record routes. Field users can track where they've been using GPS while working with the mobile app and synchronise it as a route to the web. |
General workflow of Information items

Location of the Information register in the Operations module
| Security Policy | Use |
|---|---|
Information Basic | Read access to information items within involved events only where the data is assigned to user. |
Information Coordination | Can view and edit all information items. |
| Information Officer | Can view all information items and update own. |
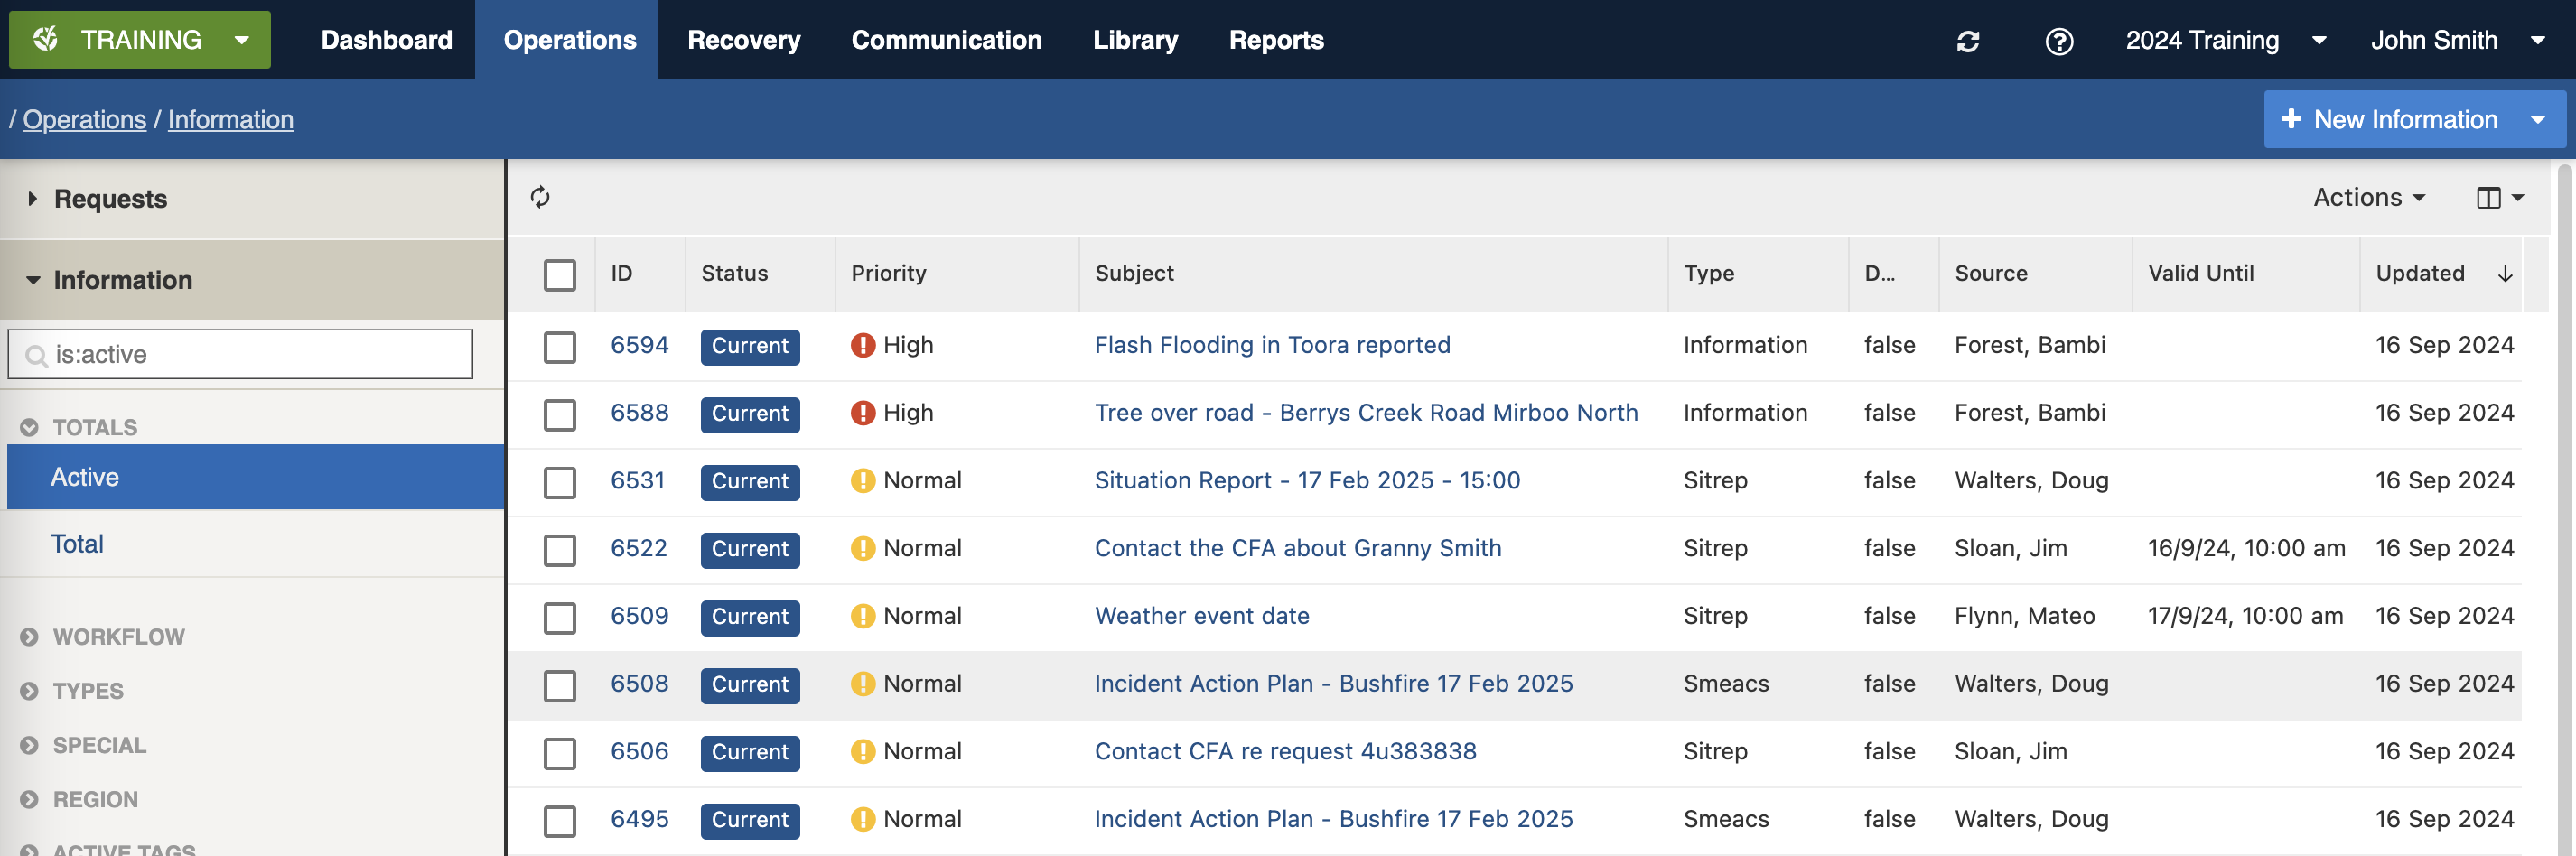
A sample Information register Datagrid
| Filter Group | Filter/s | Use |
|---|---|---|
| Main | Active | Finds all items except those with a Status of Not Current |
| Recently Updated | Finds all items updated in the last 5 days (except those with a Status of Not Current) | |
| Assigned to Me | Finds all items assigned to your user | |
| Overdue | Finds all items with an Expires at date that has passed | |
| All | Finds all items | |
| Special | Important Information | Finds all items marked with a Priority of High |
| Promoted on Dashboard | Finds all items with Promote on Dashboard ticked | |
| Templates | Finds all items with Save this item as a template ticked | |
| Workflow | Current | Finds all items with a Status of Current |
| Review Required | Finds all items with a Status of Review Required | |
| Not Current | Finds all items with a Status of Not Current | |
| Closed | Finds all items with a Status of Closed | |
| Types | Feature of Interest | Finds all items with a Type of Feature of Interest |
| Information | Finds all items with a Type of Information | |
| Situation Report | Finds all items with a Type of Situation Report | |
| Incident Action Plan | Finds all items with a Type of Incident Action Plan | |
| Route | Finds all items with a Type of Route | |
| Briefing or Handover | Finds all items with a Type of Briefing or Handover | |
| Region | [List is based on your system configuration]* | Finds all items for the Region based on the an item's Classification section |
| Active tags | [List is based on your system configuration]* | Any tags in use. Refer to: tags |
| My Assignments | Unassigned | Finds all items that don't have an Assignee set |
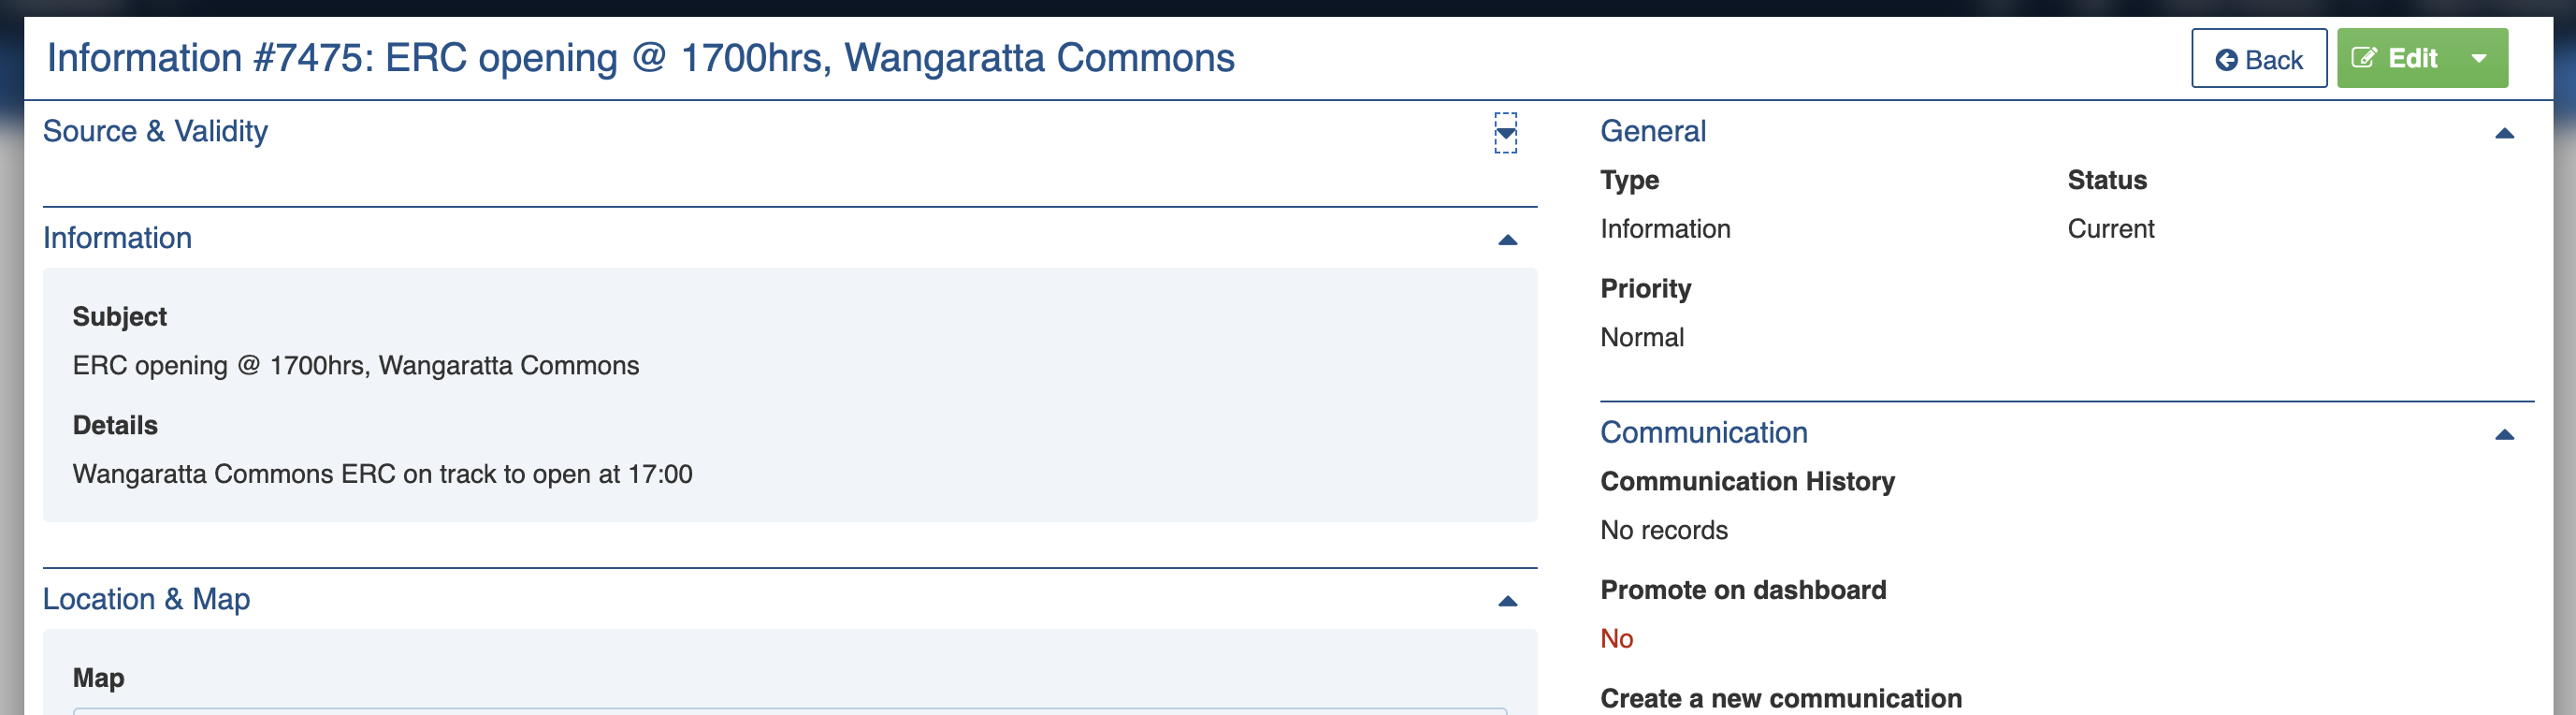
Information item for opening of relief centre


| Status | Datagrid Icon | Next available steps | Notes |
|---|---|---|---|
| Current |  | Review Required, Not Current | All new Information begins with this status |
| Review Required |  | Current, Not Current | The item needs a review |
| Not Current |  | Closed, Current | This information is no longer current |
| Closed |  | Reopen | The information is no longer needed |
 button (or drop down the list from any other register and select it)
2. Complete each section of the [Settings](#register-item-settings) as required.
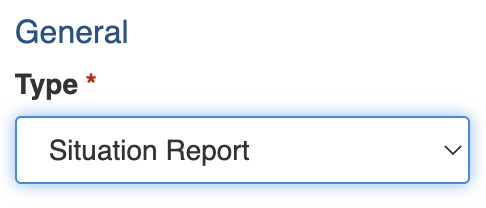
1. Carefully select the [Type](#type) first this will open the relevant [Type Settings](#type-settings) form. Do not attempt to change this after adding data.
2. Add a **Subject**
3. Complete additional settings as required
3. Save
button (or drop down the list from any other register and select it)
2. Complete each section of the [Settings](#register-item-settings) as required.
1. Carefully select the [Type](#type) first this will open the relevant [Type Settings](#type-settings) form. Do not attempt to change this after adding data.
2. Add a **Subject**
3. Complete additional settings as required
3. Save  ## Bulk Actions
{% content-ref url="../../concepts-and-fundamentals/on-a-computer/using-the-datagrid/bulk-actions" %}
[bulk-actions](https://docs.cw.crisisworks.com/concepts-and-fundamentals/on-a-computer/using-the-datagrid/bulk-actions)
{% endcontent-ref %}
The following additional bulk actions can be performed via the Actions menu:
| Action | Description |
| ---------------- | -------------------------------------------------------------------------------------------------------------------------------------------------------------------------------------------------------------------------------------------------------------------------------------------------------------------------------------------- |
| Copy IDs | Refer to: [Copy IDs](https://docs.cw.crisisworks.com/concepts-and-fundamentals/on-a-computer/using-the-datagrid/bulk-actions#copy-ids) |
| Bulk Edit |
## Bulk Actions
{% content-ref url="../../concepts-and-fundamentals/on-a-computer/using-the-datagrid/bulk-actions" %}
[bulk-actions](https://docs.cw.crisisworks.com/concepts-and-fundamentals/on-a-computer/using-the-datagrid/bulk-actions)
{% endcontent-ref %}
The following additional bulk actions can be performed via the Actions menu:
| Action | Description |
| ---------------- | -------------------------------------------------------------------------------------------------------------------------------------------------------------------------------------------------------------------------------------------------------------------------------------------------------------------------------------------- |
| Copy IDs | Refer to: [Copy IDs](https://docs.cw.crisisworks.com/concepts-and-fundamentals/on-a-computer/using-the-datagrid/bulk-actions#copy-ids) |
| Bulk Edit | Refer to: Bulk Edit
Set the Status, Priority, Assignee, Promote on dashboard and tags
Refer to: Export to Report
Exports to the Information Report