# Relief Registration
## Overview
The Relief Registration register is used to capture information from people visiting relief or evacuation centres.
There are two ways attendance can be recorded:
* Public Submission registrations - affected persons [register their attendance via an online form](#requests-usingrequests-1) (which can be linked to via a QR code on relief centre posters). This can even be done remotely (for example during a pandemic) through a virtual relief centre.
* Office only registrations - your staff can record registrations for affected persons on their behalf in the system, for example on a laptop, tablet or mobile device either from the relief centre or the office.
Two types of registrations can be recorded: **Attending Relief Centre** registering their stay at the centre, and **Leaving Early** registering their departure for another destination.
In both types, public or staff can register contacts and related contacts as they enter or leave a relief centre. This includes sections for contacts and related contact information, home and destination address, initial needs assessments and additional assessments as required.
Where long term recovery needs are identified following a Relief Registration, you can [transition them](#bulk-actions) to Recovery [Cases](https://docs.cw.crisisworks.com/modules/recovery/cases) for case management.
Your administrator can perform the [initial setup and configuration](#initial-setup-and-configuration) including the public submissions form, registration types accepted and your list of Relief Centres.
### Access
To access the register:
1. [Go on duty](https://docs.cw.crisisworks.com/concepts-and-fundamentals/on-a-computer/working-with-events#setting-your-duties-for-events) with an appropriate Relief [position](#positions). If you can't access it, ask your administrator to check your permissions.
2. Locate the *Persons* register under **Recovery** > **Relief Registration** in the menu.
Location of the Relief Registration register in the Recovery module
{% hint style="info" %}
Note that Relief Registrations must be [enabled for the event](#initial-setup-and-configuration) by your System Administrator.
{% endhint %}
### Positions
The following table outlines Relief [positions](https://docs.cw.crisisworks.com/concepts-and-fundamentals/concepts-and-fundamentals#events-users-positions-and-duty) and what users with them can do according to their default security policies:
### Initial Setup & Configuration
Refer to: [Administration](https://docs.cw.crisisworks.com/system-administration/configuring-the-system)
Your System Administrator must first:
* [Enabled Relief Registrations for the event](https://docs.cw.crisisworks.com/system-administration/managing-events)
* Allocate [positions](#positions) to users who need to access the Relief Registrations register
They also may need to:
* Configure the [public submissions form](#requests-usingrequests-1)
* [Add Relief Centres](#emergency-relief-centre) using the [Recovery: Relief Centres](https://docs.cw.crisisworks.com/system-administration/configuring-the-system/lookups) lookup
* Manage [Registration Types](#registration-type) using the [Recovery: Relief Registration Type](https://docs.cw.crisisworks.com/system-administration/configuring-the-system/lookups) lookup
* [Import registrations](https://docs.cw.crisisworks.com/system-administration/configuring-the-system/imports) in bulk
### Public Submissions
The public submission form allows anonymous users to register that they are leaving early or entering a relief centre. When active, the public submission URL will be:
`https://app.cw.crisisworks.com/yoursite/public`
Replace `yoursite` in the URL above with your site name which appears in your Crisisworks URL when you're accessing the site. If you get a "Public registrations are closed" message then it is not active. Only your System Administrator should set up and activate the public form. This is done by [enabling the public form in the Event.](https://docs.cw.crisisworks.com/system-administration/managing-events#public-forms)
If your public form is active you can link to this from your website or generate a QR code for the link and put it on posters at the centre for people to scan and fill in the form.
The key elements of the form are shown in the screenshot below:
Public Submission form for Relief Registrations
## Finding Relief Registrations
{% content-ref url="../../concepts-and-fundamentals/on-a-computer/searching-filtering-and-querying-registers" %}
[searching-filtering-and-querying-registers](https://docs.cw.crisisworks.com/concepts-and-fundamentals/on-a-computer/searching-filtering-and-querying-registers)
{% endcontent-ref %}
The register includes a number of features to assist in finding *Relief Registrations*:
* [Datagrid](https://docs.cw.crisisworks.com/concepts-and-fundamentals/on-a-computer/using-the-datagrid#data-grid-view) view
* Filters including workflow, registration type, assessments likely required, follow ups required, emergency relief centre location and tags
* Combination filters and search by most fields
### Filters
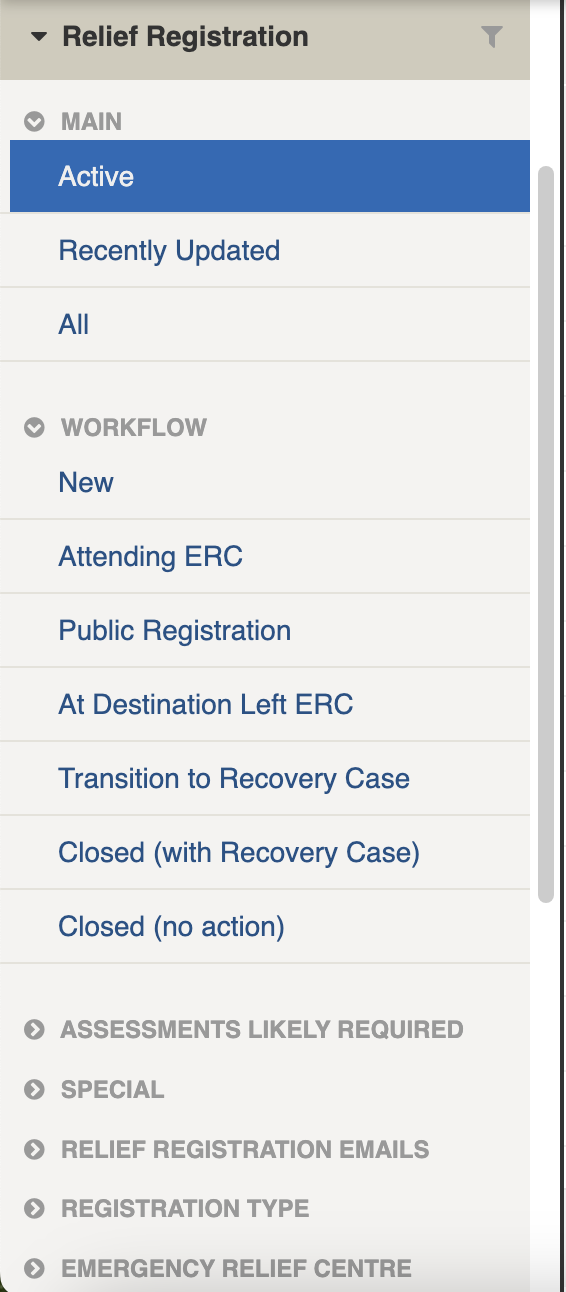
Filters help make management of relief registrations easier by focusing on those registrations on the datagrid.
Relief Registration filters menu
Filter menu explanations
The following lists some of the filters and how to use them:
| Filter Group | Filter/s | Use |
| -------------------------------- | ----------------------------------- | ----------------------------------------------------------------------------------------------------------------------------------- |
| Main | Shows Active, Recently updated, All | |
| Workflow | Public Registration | These are new public registrations that need to be processed. |
| | At Destination Left ERC | These are registrations for people who have left the ERC. The leave early registrations will automatically be saved to this status. |
| | Transition to Recovery Case | These require follow up and need to be transitioned to a Recovery Case |
| | Closed (with Recovery Case) | Registrations that have been [transitioned to a recovery case](#workflow). |
| | Closed (no action) | [Closed registrations](#workflow) that require no follow up. |
| Assessments Likely Required | | Registrations [classified for assessment](#workflow) (in one of the 5 Pillars of Recovery) |
| Special | Follow Up Required | Any registrations [flagged for follow up](#workflow). |
| Relief Registration Email | | Any draft or unsent [Communications](#communication) sent. |
| Registration Type | | Show by [Registration type ](#registration-type)(all Attending or Leaving Early) |
| Emergency Relief Centre Location | | Show by [Relief Centre Location](#emergency-relief-centre) |
| Active tags | |
Any tags in use.
Refer to: tags
|
## Viewing Relief Registrations
{% content-ref url="../../concepts-and-fundamentals/on-a-computer/using-the-datagrid/viewing-items" %}
[viewing-items](https://docs.cw.crisisworks.com/concepts-and-fundamentals/on-a-computer/using-the-datagrid/viewing-items)
{% endcontent-ref %}
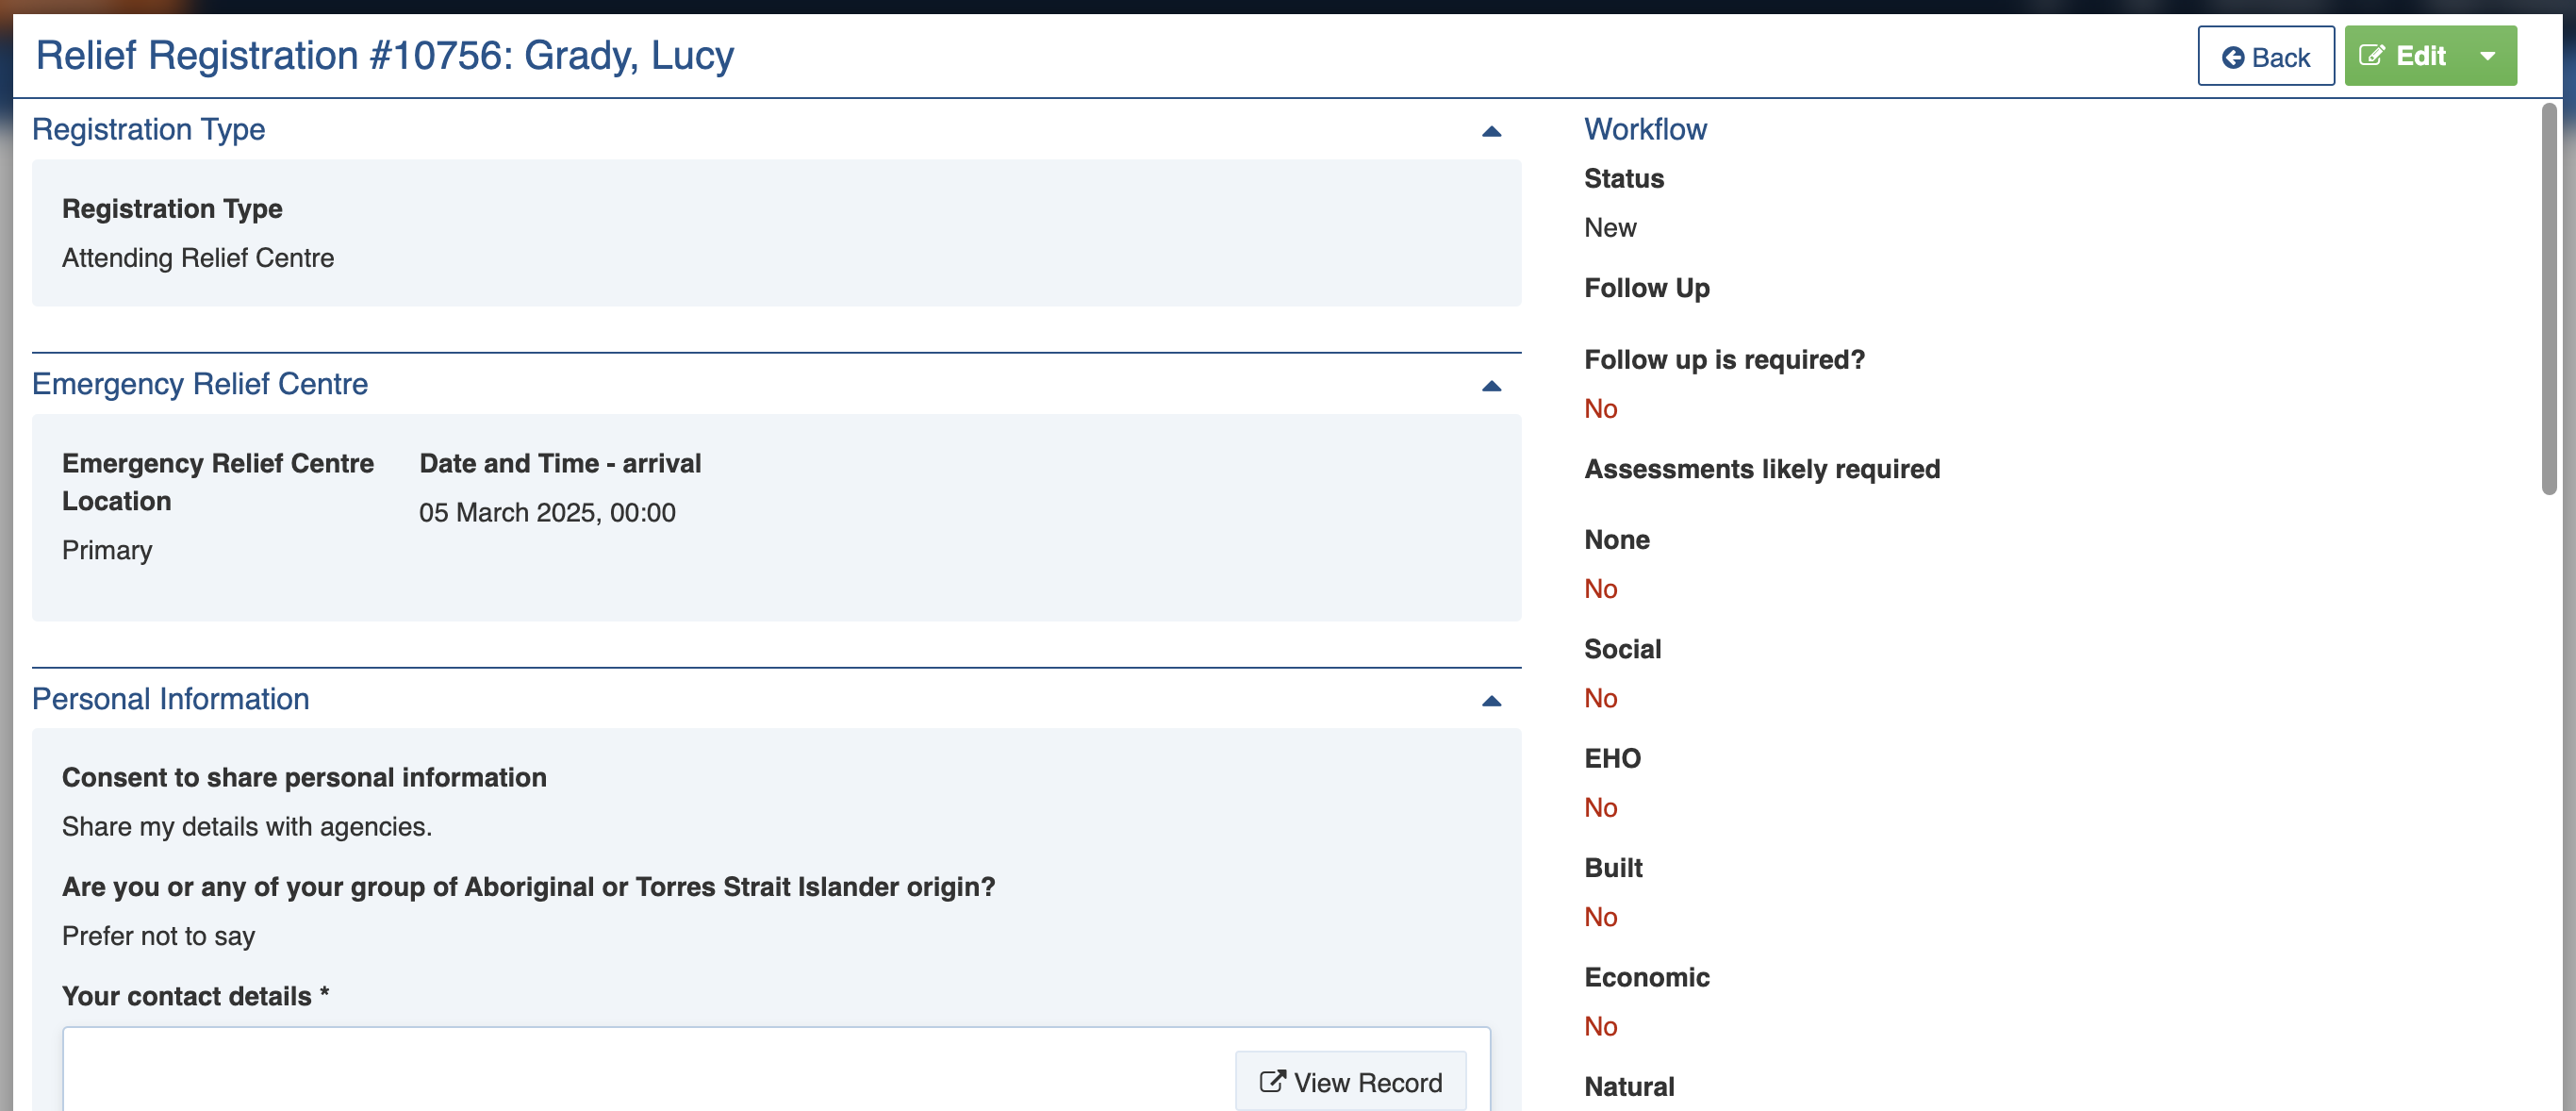
When viewing *Relief Registrations*, sections can be expanded to show information.
As each section is completed, new sections may show additional information.
As the form fields are the same as the public form, many of the fields are worded from the perspective of an affected person.
Sample Relief Registration
## Relief Registration Settings
| Left Column | Right Column |
| --------------------------------------------------- | --------------------------------- |
| [Registration Type](#registration-typ) | [Workflow](#workflow) |
| [Emergency Relief Centre](#emergency-relief-centre) | [Classification](#classification) |
| [Personal Information](#personal-informatio) | [Activity](#activity) |
| [Address Information](#addres-information) | |
| [Needs Assessment](#needs-assessment) | |
| [Additional Information](#additional-information) | |
| [Needs and Tasks](#needs-and-tasks) | |
| [Communication](#communication) | |
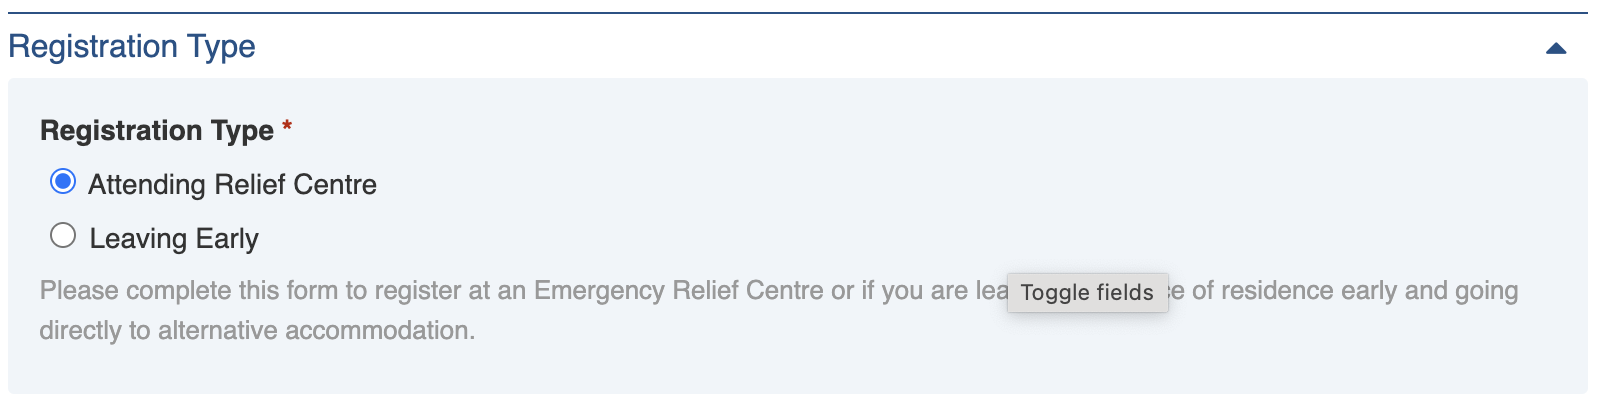
### Registration Type
Registration Type records the types of registrations as either **Attending Relief Centre** and **Leaving Early**. Your Administrator configures the list of Classification for your site using the [Recovery: Relief Registration Type](https://docs.cw.crisisworks.com/system-administration/configuring-the-system/lookups) lookup.
Registration Type section
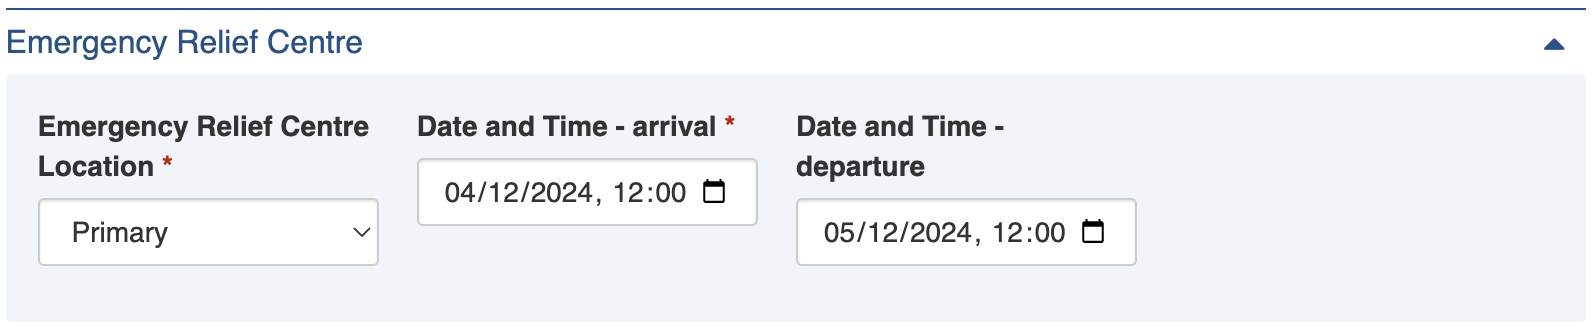
### Emergency Relief Centre
This section is only activated when **Attending Relief Centre** is selected. It records the **Emergency Relief Centre Location**. Your Administrator configures the list of Classification for your site using the [Recovery: Relief Centres](https://docs.cw.crisisworks.com/system-administration/configuring-the-system/lookups) lookup. **Date and Time - arrival** and **Date and Time departure** show when the person arrived and left the centre.
Emergency Relief Centre section
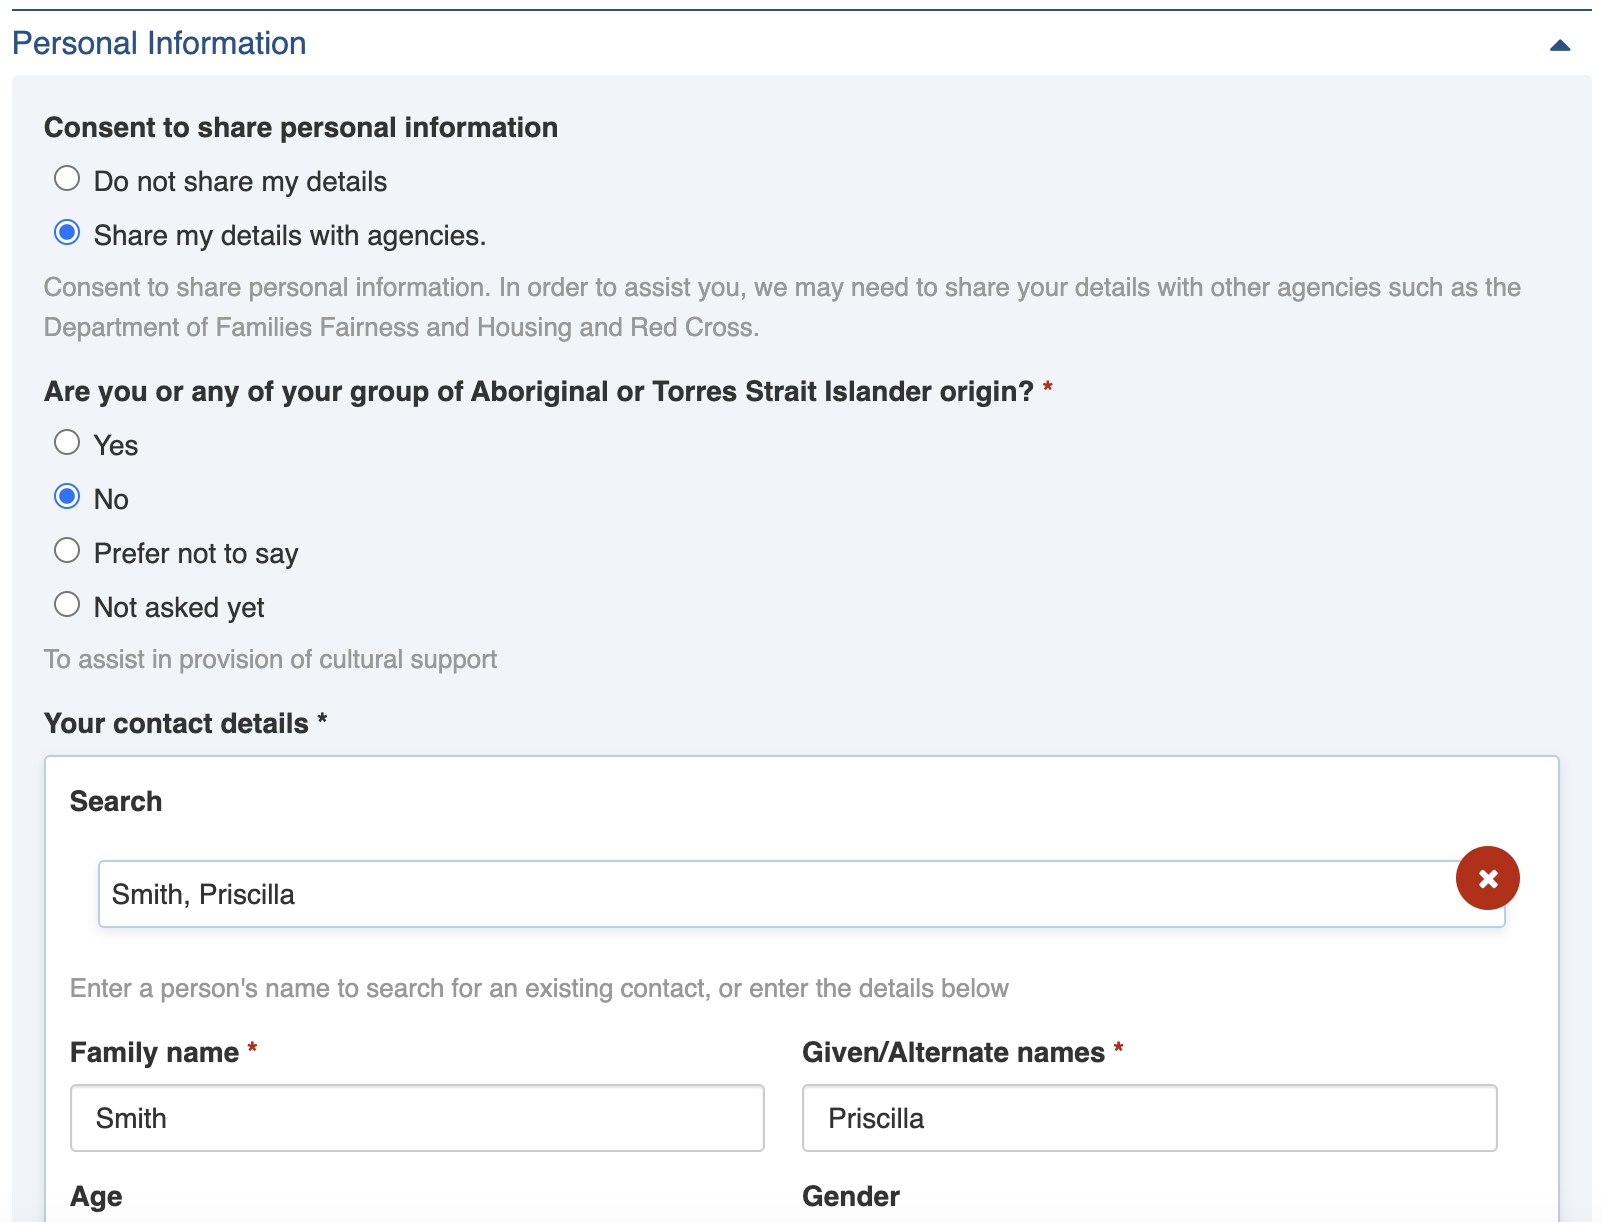
### Personal Information
The Personal Information section records consent, cultural needs and contact details.
The **Your contact details** field contains information from attached [Persons](https://docs.cw.crisisworks.com/modules/recovery/persons) records. You can use the View Record or View Person buttons to access the full details from the Persons register.
Personal information section
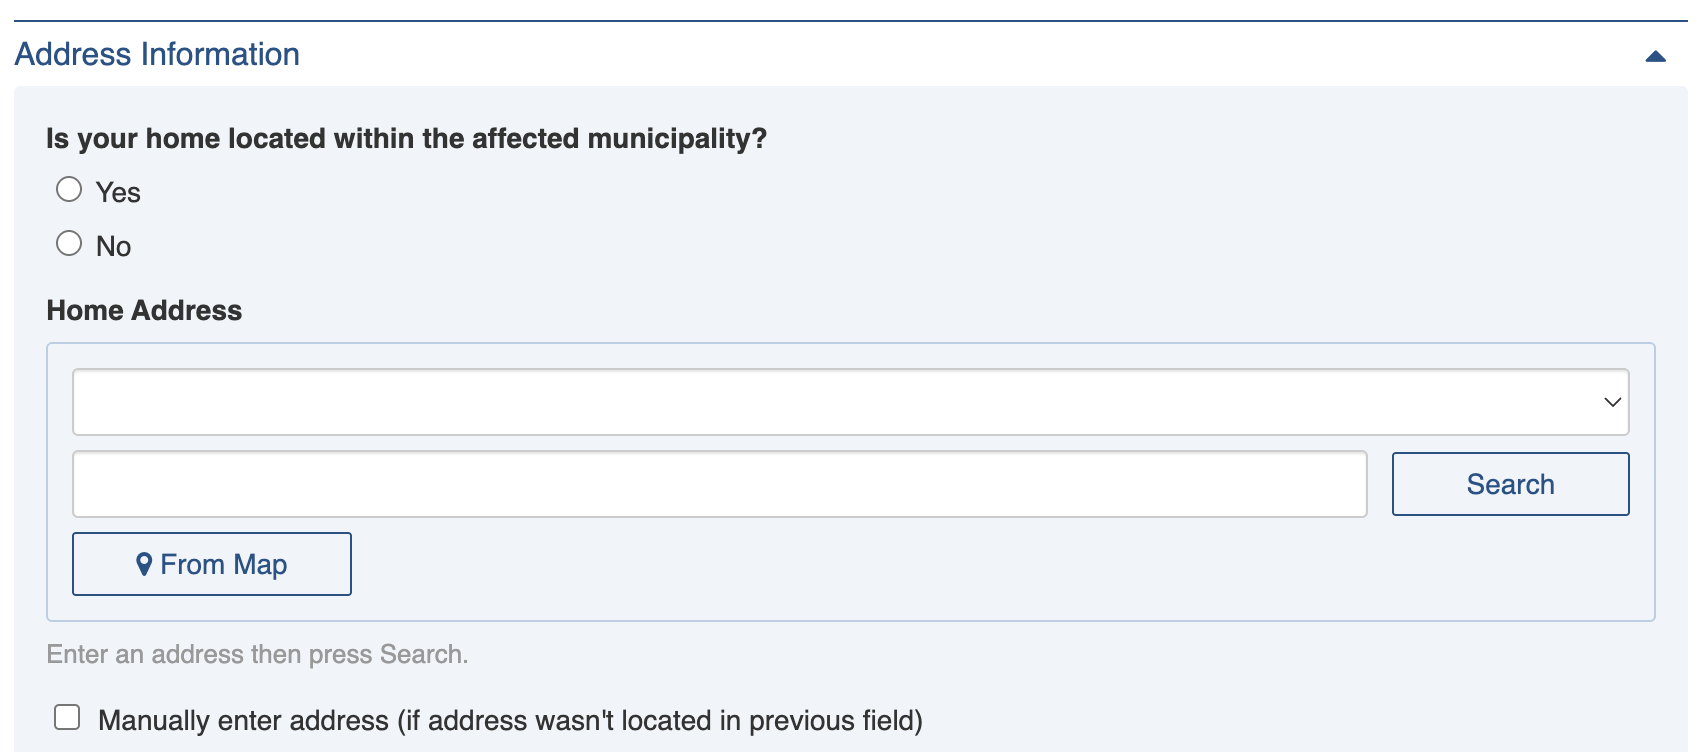
### Address Information
The Address information records the **Home Address** or **Destination Details** of the Person if it is in the affected municipality and their destination (whether they staying during the emergency). The address can be manually entered either by an officer or via the public form.
Address Information section
#### Is your home located within the affected municipality
This setting indicates whether or not the person's home is located within the affected municipality (i.e. the council managing the registration).
#### Home Address
Users can set the address using the [location selector](https://docs.cw.crisisworks.com/concepts-and-fundamentals/on-a-computer/using-the-datagrid/editing-items#location).
Manual entry of addresses is supported by ticking the *Manually enter address* option.
Manual Home Address entry
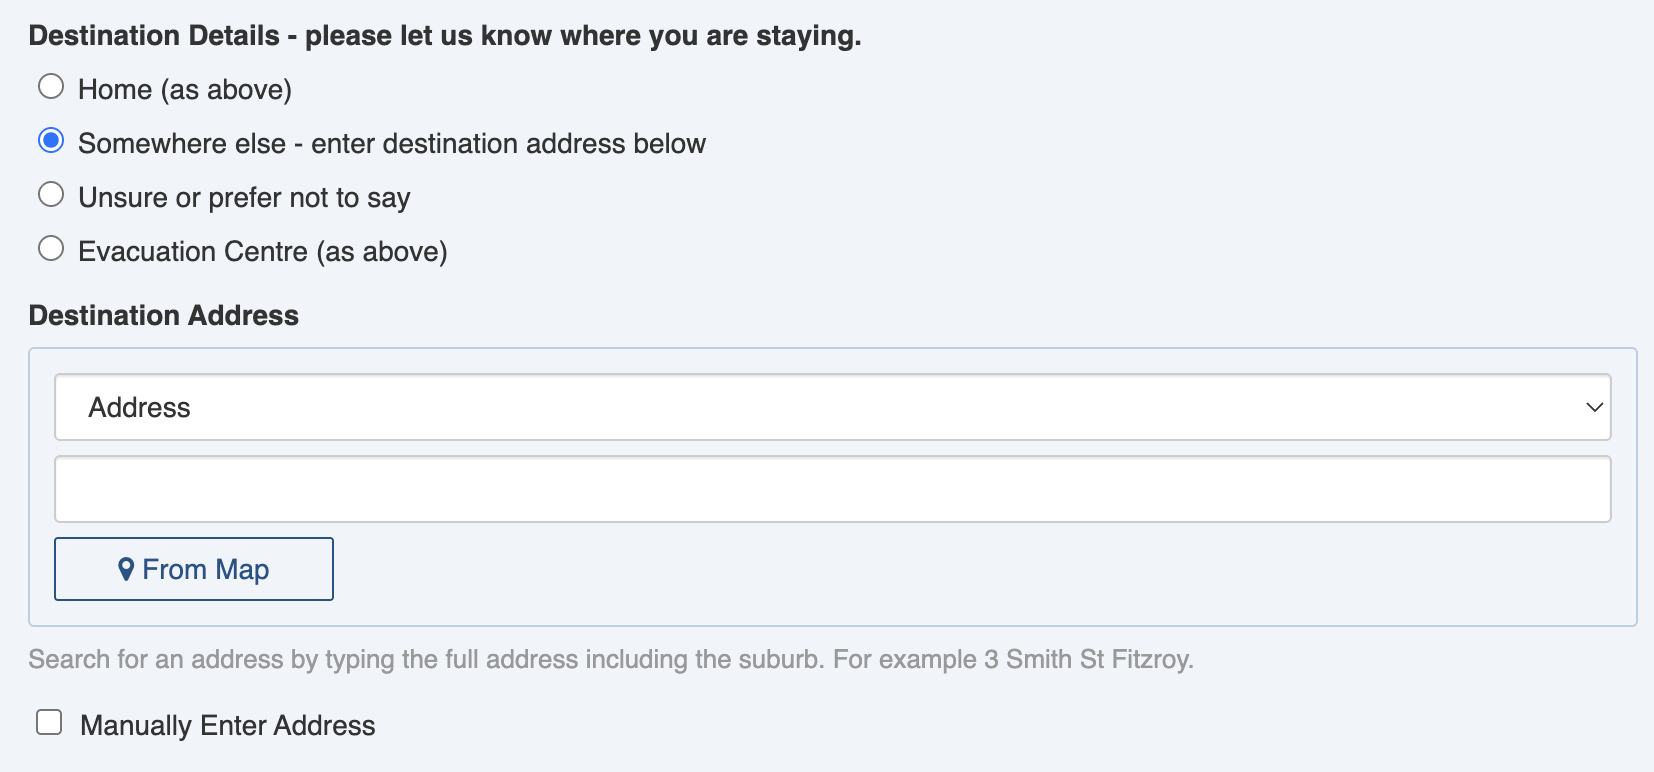
#### Destination Details
This setting indicates where the person is staying (for example, if they have temporary accomodation at a Relief Centre.
#### Destination Address
This setting records an address for the destination. By selecting *Home* or *Relief Centre*, the system will use the [Home Address](#home-address) as the address. By selecting *Somewhere else* you can record a different Destination Address from the Home Address.
Destination Details section
As in the Home Address, manual entry of Destination Address is supported by ticking the *Manually enter address* option.
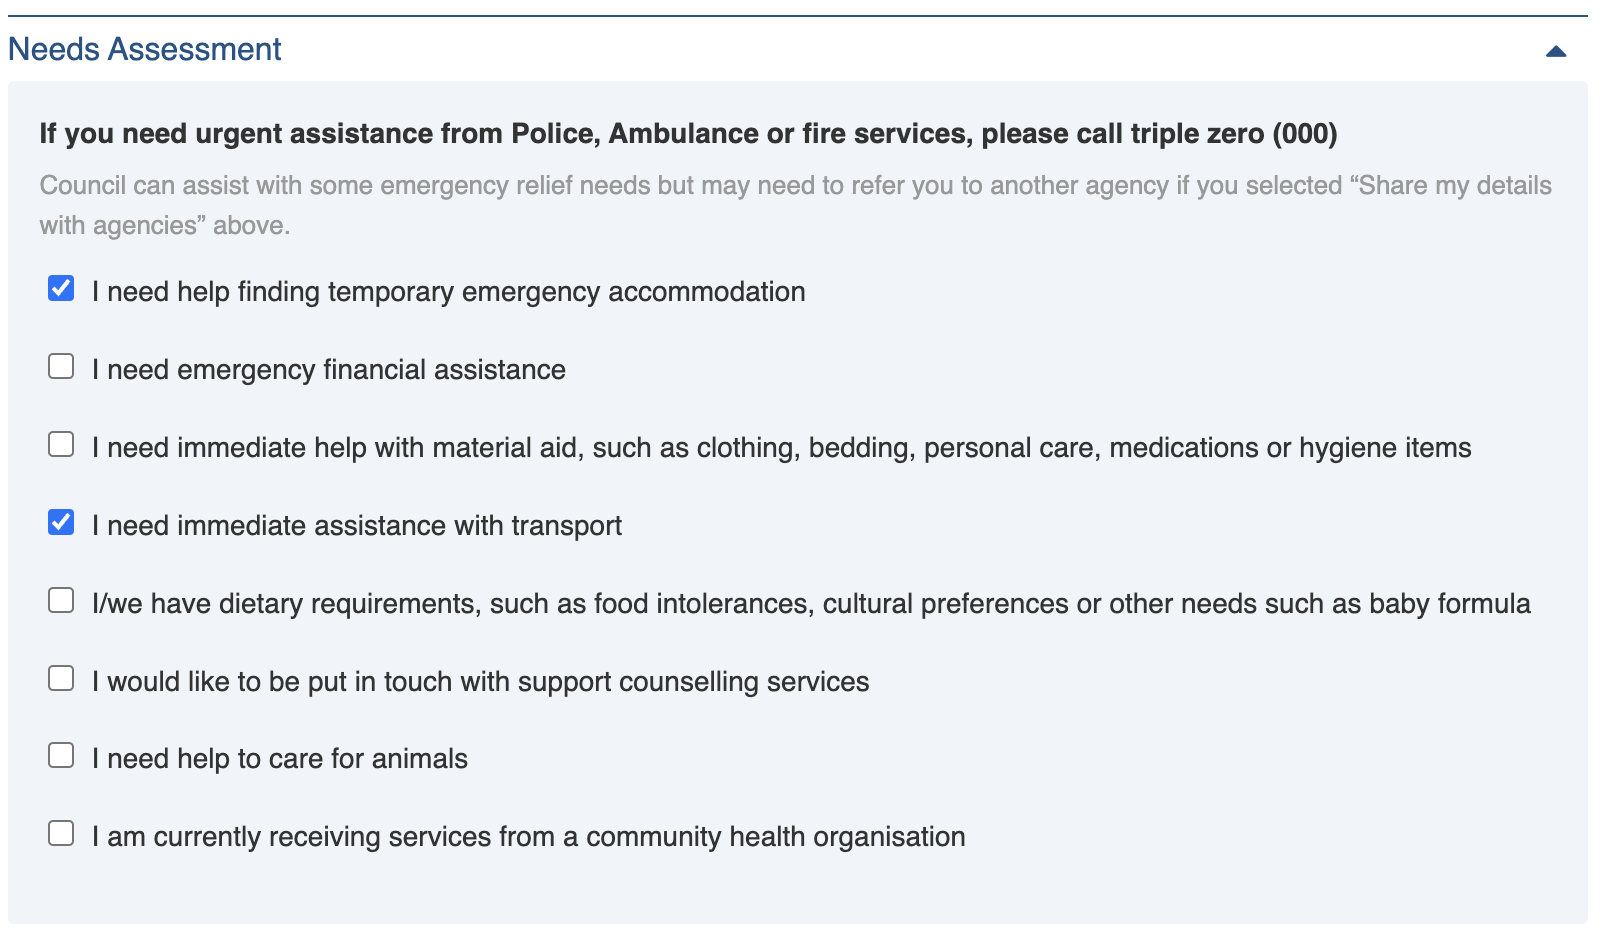
### Needs Assessment
The Needs Assessment section can be filled out by a person registering for relief and only requires ticking the relevant boxes. It helps to identify urgent referrals for assistance from Police, Ambulance or fire services.
You can also use the information here to inform the creation of [Needs and Tasks](#needs-and-tasks).
Needs Assessment section
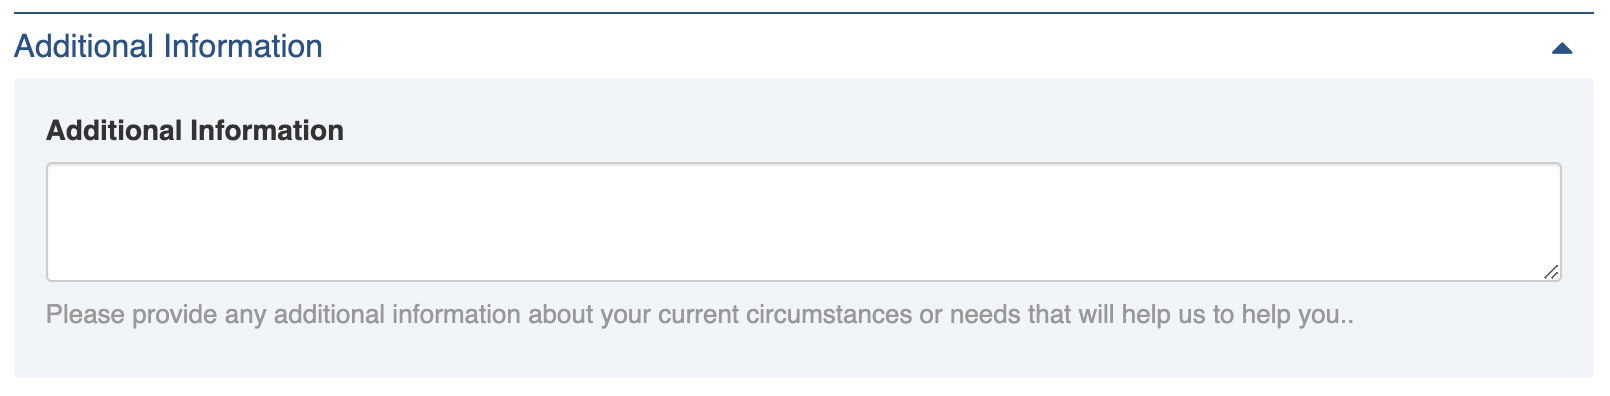
### Additional Information
Additional information comes from the public form and allows registrants to include anything about their current circumstances or needs that can help assist them.
Additional Information section
### Needs and Tasks
{% content-ref url="needs-and-tasks" %}
[needs-and-tasks](https://docs.cw.crisisworks.com/modules/recovery/needs-and-tasks)
{% endcontent-ref %}
Needs and Tasks records any services, tasks and immediate needs and supports allocation of resources. Multiple Needs and Tasks can be added in this section.
Use the View Record or View Resource buttons to view full details.
Needs and Tasks section
Needs and Tasks are Sub-items. You can [add](https://docs.cw.crisisworks.com/modules/needs-and-tasks#adding-needs-and-tasks) as many as needed. These will be created in the [Needs & Tasks](https://docs.cw.crisisworks.com/modules/recovery/needs-and-tasks) register where you can view the full details. Note that you can't create them there however.
When an external agency is assigned a task and has the required consent, they can manage it through Needs and Tasks.
### Communication
{% content-ref url="../communication" %}
[communication](https://docs.cw.crisisworks.com/modules/communication)
{% endcontent-ref %}
The Communication section may contain a **Message History** in the form of a delivery report of any messages sent to the primary contact via details from their Person record.
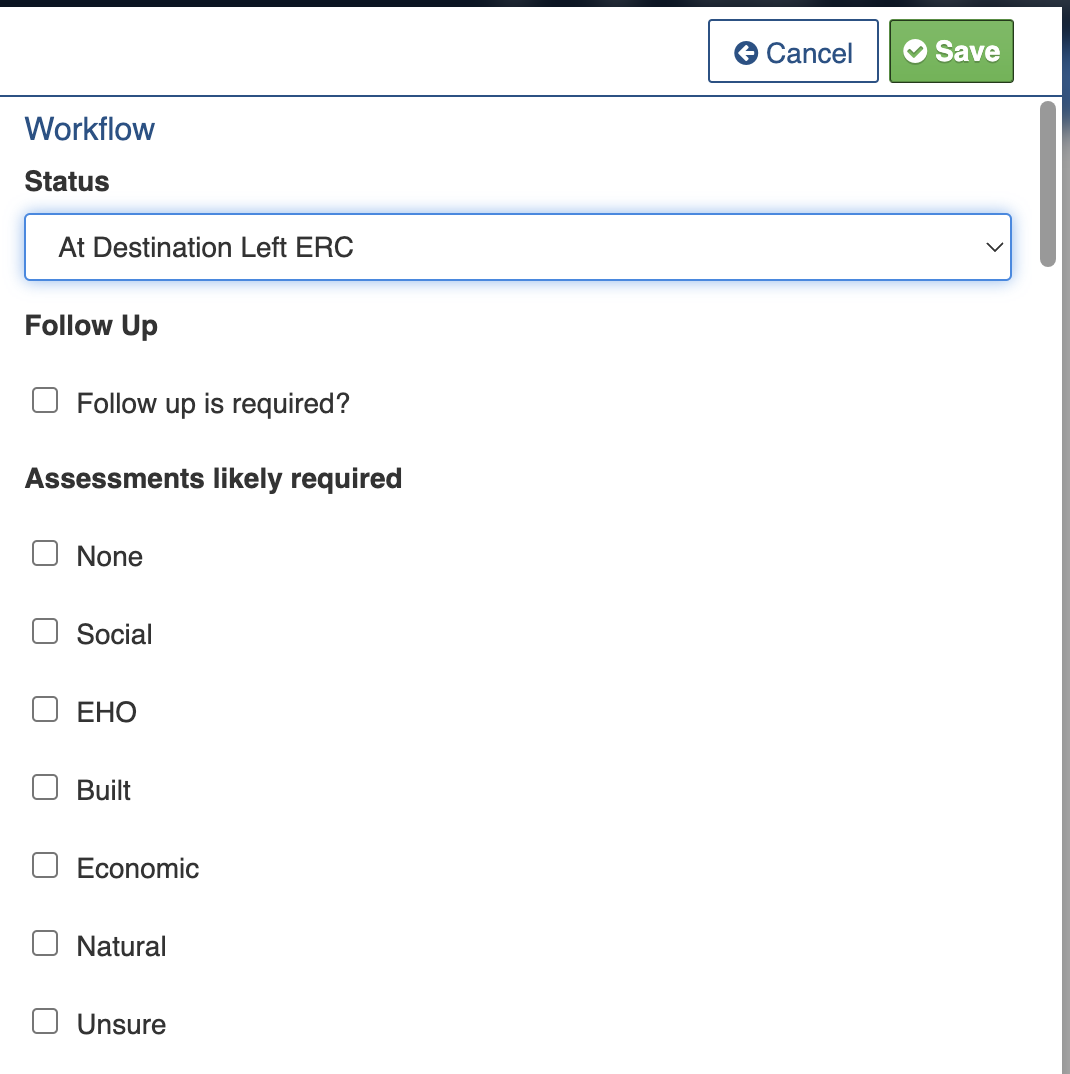
### Workflow
The Workflow section of the Relief Registration records the Status, any Follow Up actions and assessments.
Workflow section
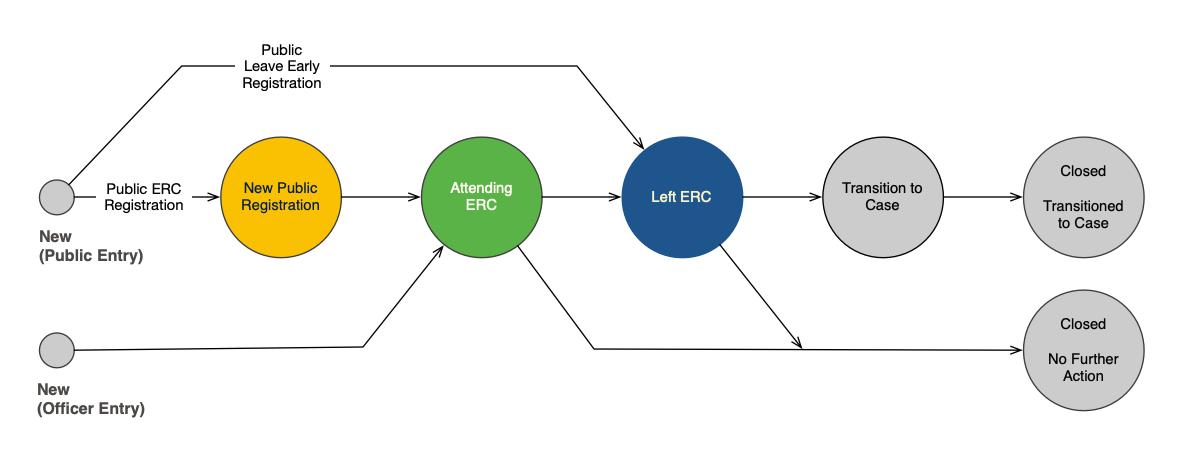
The following diagram illustrates the workflow for the two modes of entry - public (online form) and officer entry.
Workflow of Relief Registrations
Persons have the following Statuses, in order of which they can be set:
Status
Datagrid Icon
Notes
New
New officer entries appear with this status.
Attending ERC
These people are currently still at the ERC.
Public Registration
These have come through the public form.
At Destination Left ERC
These people have left the ERC and are now at another destination.
Transition to Recovery Case
These registrations have been flagged as long term recovery. Important: Setting this Status will not automatically convert them, you will still need to run the Bulk Action Transition to Cases on these.
Closed (with Recovery Case)
**Follow up** is used to flag whether the Person should be contacted after their relief centre visit, for example to check if there are any longer term recovery needs.
{% hint style="info" %}
You cannot close a registration that has this box ticked.
{% endhint %}
**Assessments likely required** flags registrations for follow up assessments against the 5 Pillars of Recovery - Social, Environmental, Built, Economic and Natural.
### Classification
Refer to: [Editing Items: Classification](https://docs.cw.crisisworks.com/concepts-and-fundamentals/on-a-computer/using-the-datagrid/editing-items#classification)
### Activity
Refer to: [Viewing and Opening Register Items: Activity](https://docs.cw.crisisworks.com/concepts-and-fundamentals/on-a-computer/using-the-datagrid/viewing-items#activity)
## Updating Relief Registrations
{% content-ref url="../../concepts-and-fundamentals/on-a-computer/using-the-datagrid/editing-items" %}
[editing-items](https://docs.cw.crisisworks.com/concepts-and-fundamentals/on-a-computer/using-the-datagrid/editing-items)
{% endcontent-ref %}
When updating Relief Registrations:
* Update the **Status** to reflect the current stage
* Keep contact information up to date for the primary contact and any additional people attached to the registration
* Record notes in the **Record Notes** field
* Make sure that **Needs and Tasks** and any follow up actions match with the Needs Assessment
## Adding Relief Registrations
{% content-ref url="../../concepts-and-fundamentals/on-a-computer/using-the-datagrid/adding-items" %}
[adding-items](https://docs.cw.crisisworks.com/concepts-and-fundamentals/on-a-computer/using-the-datagrid/adding-items)
{% endcontent-ref %}
{% hint style="info" %}
If you have public forms set up, then new registrations may also be created through public registration.
{% endhint %}
To add a new Relief Registration as an officer:
1. Select the **New Relief Registration** button from the New item menu.
2. Complete each section of the [Relief Registration Settings ](#relief-registration-settings)as required. Note that some options may open up new sections to complete.
1. In the Registration Type section, set the **Registrations Type**. If this is Attending Relief Centre then you must also set the **Emergency Relief Centre Location** and **Date and Time - arrival**
2. In the Personal Information section, answer on behalf of the registrants **Are you or any of your group of Aboriginal or Torres Strait Islander origin?** (them not you) and enter **Your contact details** (this is theirs not yours) including at minimum a **Family Name**, **Given/Alternative names** and **Mobile Phone** (this is used to send communications).
3. **Save**
The new Relief Registration begins as **New**.
## Bulk Actions
{% content-ref url="../../concepts-and-fundamentals/on-a-computer/using-the-datagrid/bulk-actions" %}
[bulk-actions](https://docs.cw.crisisworks.com/concepts-and-fundamentals/on-a-computer/using-the-datagrid/bulk-actions)
{% endcontent-ref %}
The following additional bulk actions can be performed on Persons via the Actions menu:
| Action | Description |
| ------------------------------ | ---------------------------------------------------------------------------------------------------------------------------------------------------------------------------------------------------------------------- |
| Copy IDs | Refer to: [Copy IDs](https://docs.cw.crisisworks.com/concepts-and-fundamentals/on-a-computer/using-the-datagrid/bulk-actions#copy-ids) |
| Export Selected to Report | Refer to: [Export to Report](https://docs.cw.crisisworks.com/concepts-and-fundamentals/on-a-computer/using-the-datagrid/bulk-actions#export-to-report) |
| | Exports to the [Relief Registrations Report](https://docs.cw.crisisworks.com/modules/recovery/broken-reference) |
| Bulk Edit Relief Registrations |
Refer to: Bulk Edit Change the Status or Record notes for multiple Persons
|
| Transition to Recovery | Creates a [Recovery Cases](https://docs.cw.crisisworks.com/modules/recovery/cases) from the Relief Registration including any Needs and Tasks added. Also changes the Status in bulk to *Closed (with Recovery Case)*. |
| Send Communication |
Adds the Contacts as Recipients to a Communication
|
## Importing Relief Registrations
{% content-ref url="../../system-administration/configuring-the-system/imports" %}
[imports](https://docs.cw.crisisworks.com/system-administration/configuring-the-system/imports)
{% endcontent-ref %}
A System Administrator can add and/or update Relief Registrations in bulk via the Import system using the [Relief Registration Import](https://docs.cw.crisisworks.com/system-administration/configuring-the-system/imports/register-items/relief-registration-import) option.
## Reports
{% content-ref url="../../system-administration/reporting/running-reports" %}
[running-reports](https://docs.cw.crisisworks.com/system-administration/reporting/running-reports)
{% endcontent-ref %}
The main Report for Relief Registrations is the [Relief Registrations Report](https://docs.cw.crisisworks.com/modules/recovery/broken-reference) his is also as a bulk option from the [Actions menu](#bulk-actions).


 button from the New item menu.
2. Complete each section of the [Relief Registration Settings ](#relief-registration-settings)as required. Note that some options may open up new sections to complete.
1. In the Registration Type section, set the **Registrations Type**. If this is Attending Relief Centre then you must also set the **Emergency Relief Centre Location** and **Date and Time - arrival**
2. In the Personal Information section, answer on behalf of the registrants **Are you or any of your group of Aboriginal or Torres Strait Islander origin?** (them not you) and enter **Your contact details** (this is theirs not yours) including at minimum a **Family Name**, **Given/Alternative names** and **Mobile Phone** (this is used to send communications).
3. **Save**
button from the New item menu.
2. Complete each section of the [Relief Registration Settings ](#relief-registration-settings)as required. Note that some options may open up new sections to complete.
1. In the Registration Type section, set the **Registrations Type**. If this is Attending Relief Centre then you must also set the **Emergency Relief Centre Location** and **Date and Time - arrival**
2. In the Personal Information section, answer on behalf of the registrants **Are you or any of your group of Aboriginal or Torres Strait Islander origin?** (them not you) and enter **Your contact details** (this is theirs not yours) including at minimum a **Family Name**, **Given/Alternative names** and **Mobile Phone** (this is used to send communications).
3. **Save**  The new Relief Registration begins as **New**.
## Bulk Actions
{% content-ref url="../../concepts-and-fundamentals/on-a-computer/using-the-datagrid/bulk-actions" %}
[bulk-actions](https://docs.cw.crisisworks.com/concepts-and-fundamentals/on-a-computer/using-the-datagrid/bulk-actions)
{% endcontent-ref %}
The following additional bulk actions can be performed on Persons via the Actions menu:
| Action | Description |
| ------------------------------ | ---------------------------------------------------------------------------------------------------------------------------------------------------------------------------------------------------------------------- |
| Copy IDs | Refer to: [Copy IDs](https://docs.cw.crisisworks.com/concepts-and-fundamentals/on-a-computer/using-the-datagrid/bulk-actions#copy-ids) |
| Export Selected to Report | Refer to: [Export to Report](https://docs.cw.crisisworks.com/concepts-and-fundamentals/on-a-computer/using-the-datagrid/bulk-actions#export-to-report) |
| | Exports to the [Relief Registrations Report](https://docs.cw.crisisworks.com/modules/recovery/broken-reference) |
| Bulk Edit Relief Registrations |
The new Relief Registration begins as **New**.
## Bulk Actions
{% content-ref url="../../concepts-and-fundamentals/on-a-computer/using-the-datagrid/bulk-actions" %}
[bulk-actions](https://docs.cw.crisisworks.com/concepts-and-fundamentals/on-a-computer/using-the-datagrid/bulk-actions)
{% endcontent-ref %}
The following additional bulk actions can be performed on Persons via the Actions menu:
| Action | Description |
| ------------------------------ | ---------------------------------------------------------------------------------------------------------------------------------------------------------------------------------------------------------------------- |
| Copy IDs | Refer to: [Copy IDs](https://docs.cw.crisisworks.com/concepts-and-fundamentals/on-a-computer/using-the-datagrid/bulk-actions#copy-ids) |
| Export Selected to Report | Refer to: [Export to Report](https://docs.cw.crisisworks.com/concepts-and-fundamentals/on-a-computer/using-the-datagrid/bulk-actions#export-to-report) |
| | Exports to the [Relief Registrations Report](https://docs.cw.crisisworks.com/modules/recovery/broken-reference) |
| Bulk Edit Relief Registrations |